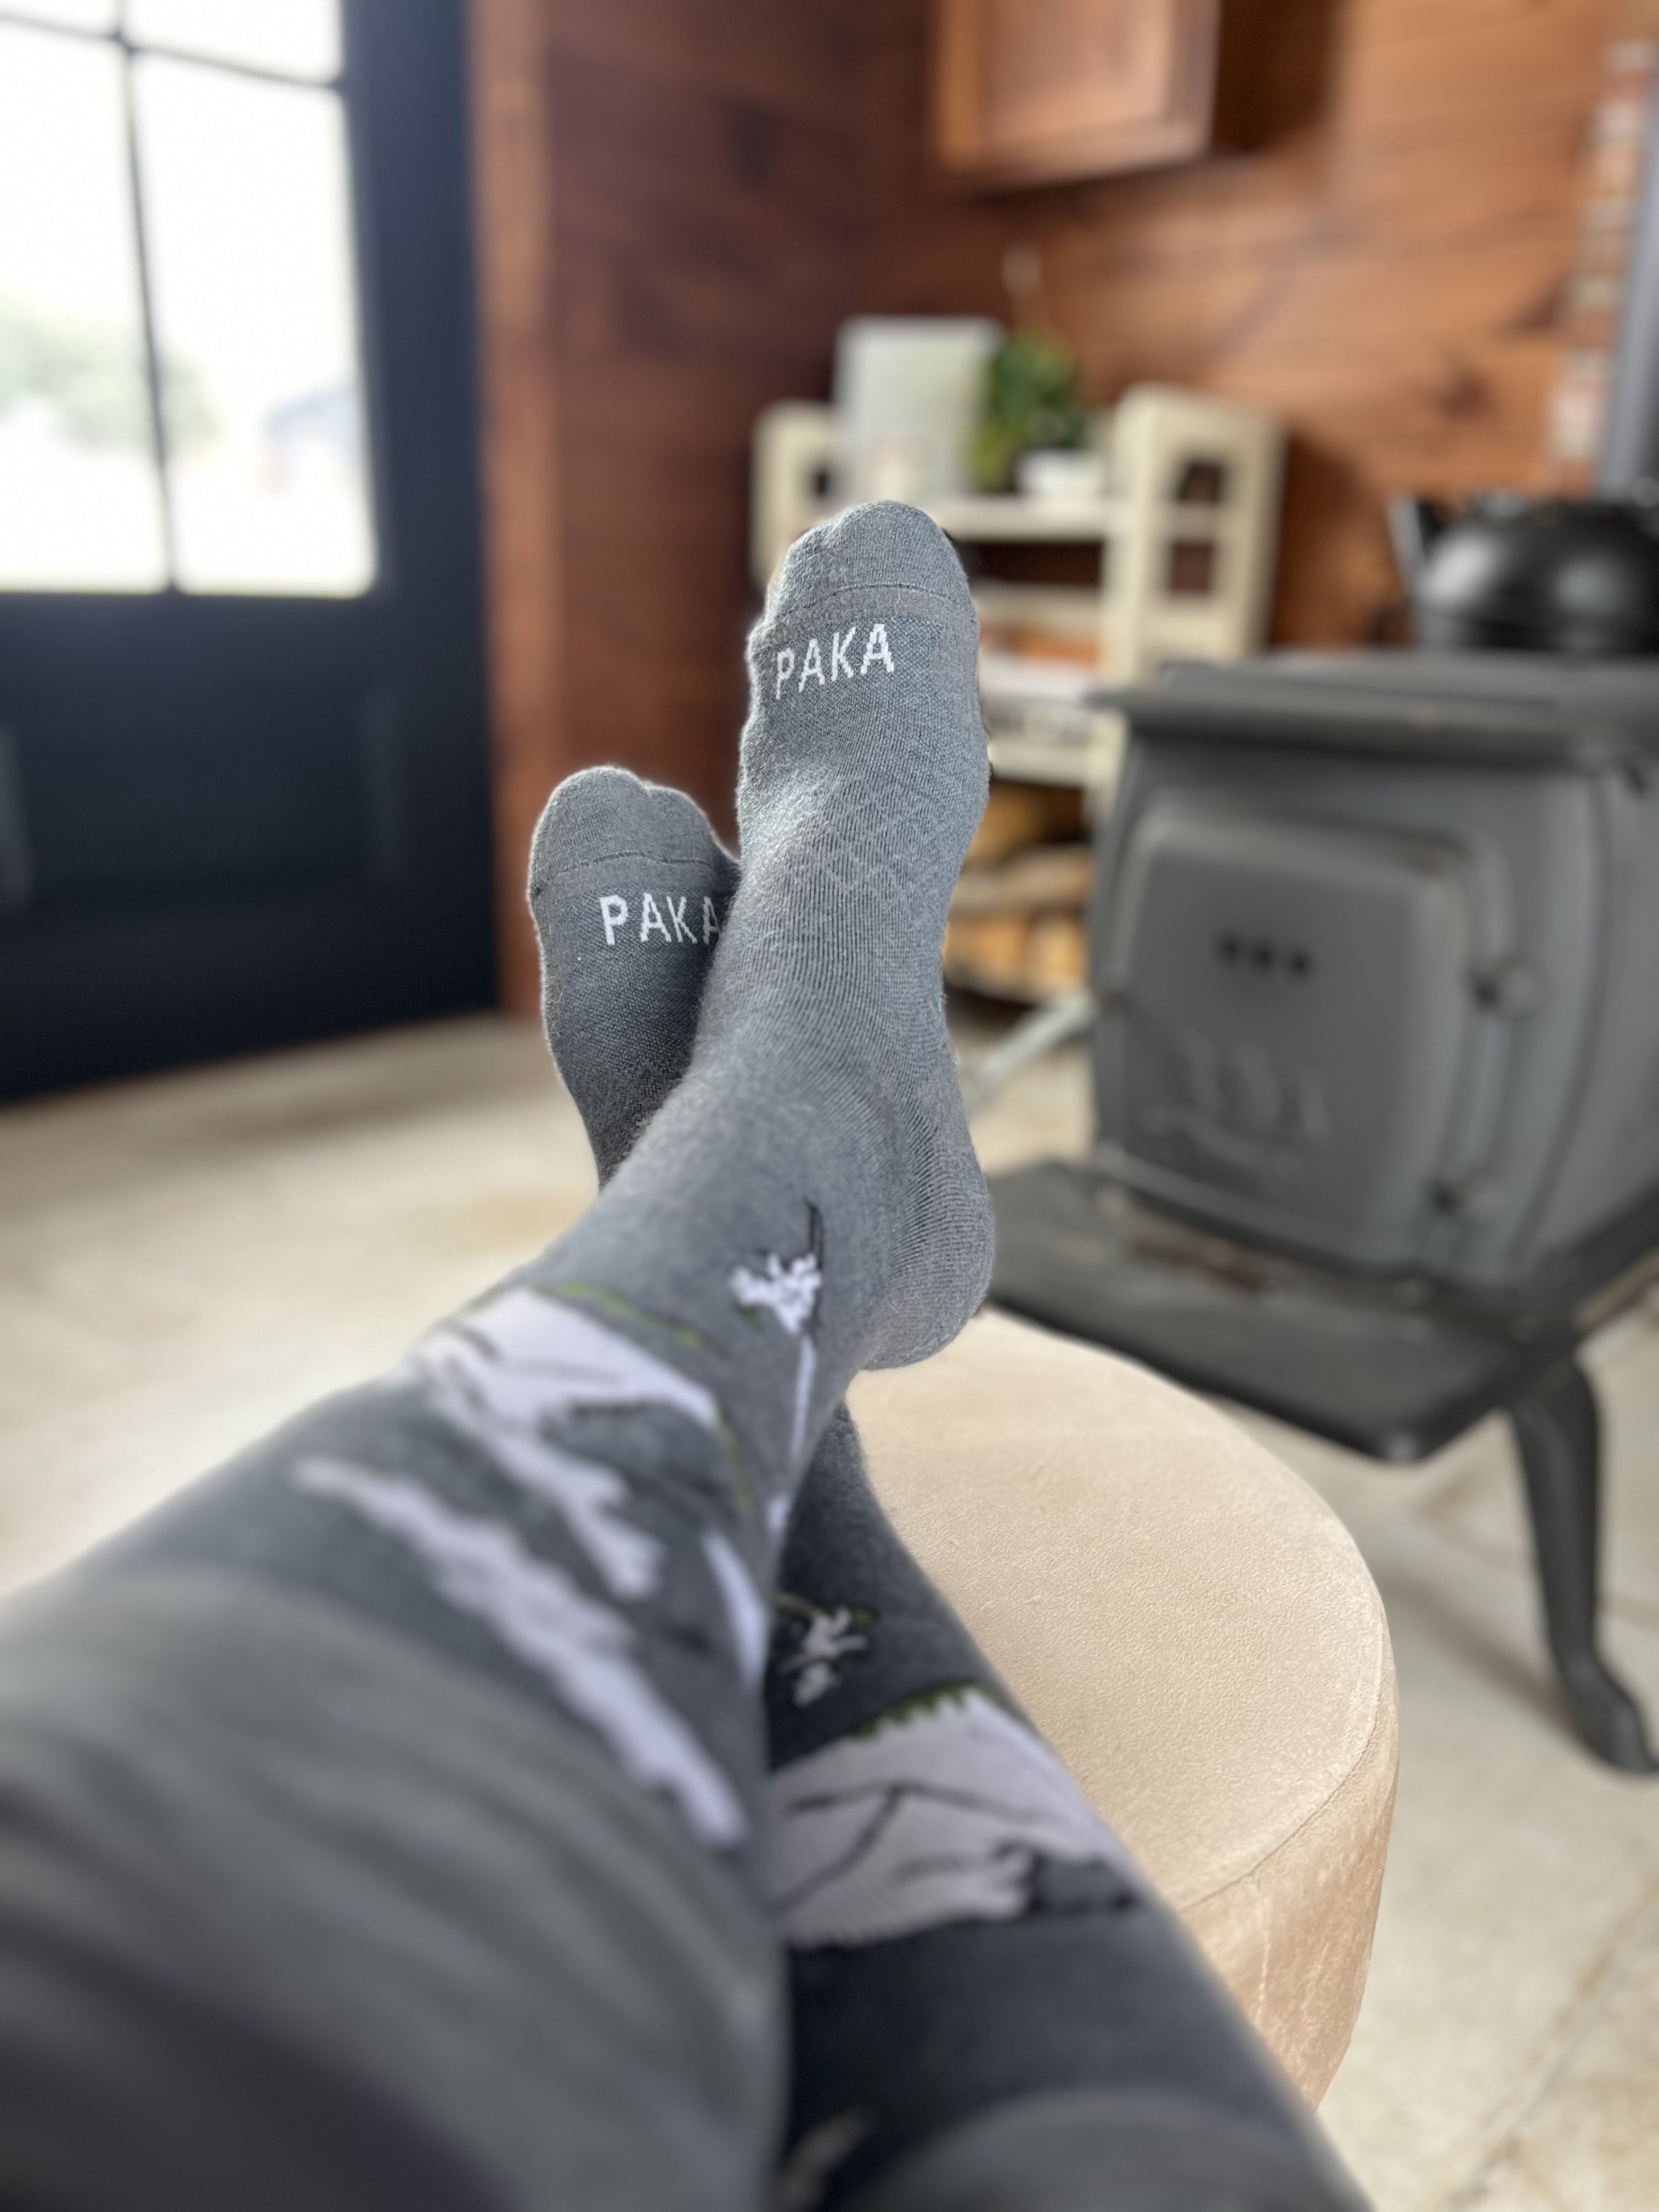
This winter I was introduced to a company that specializes in handmade sustainable Alpaca clothing, Paka Apparel. To experience the brand I received “The Hoodie” and a pair of their new Sebastian Ski Socks. While I usually review more technical clothing I was pretty excited to be exposed to a brand that has made some very positive impacts on a country I love, Peru. You can read the origin story here but I will just some it up that this company is incredibly environmentally conscious and ethical, paying their native workers more than live-able wages and providing university scholarships for many Peruvian women.
The Hoodie has quickly become my most worn non-technical piece of clothing this winter. It is the softest hoody I’ve ever owned and after ice climbing or backcountry skiing all day slipping into this hoodie is a joy. The material is so soft and thermoregulating I have found it is really comfortable for extended wear and I even find it great to sleep in. I prefer to sleep at a cooler room temperature then most (64 degrees) and the cozy warmth of this with the hood up definitely has led to some quality sleep. It’s a casual fit and a size large was perfect for my 5′ 9″ 185 LB 42 inch chest build.
The Sebastian Ski Socks fit great and the full length compression was welcomed on long tours. The size medium was perfect for my US size 9 feet.
If you are a fan of sustainable natural apparel from a company with solid ethics and practices take a look at Paka Apparel. They offer a full like of clothing from casual t-shirts to newly released insulated outer wear jackets underwear and more!
Affiliate links above support the content created here. Making a purchase through one of these links earns the author a small commission at no cost to you. Samples were provided to the author for purpose of review.
In the rolling hills of western New Hampshire in the small township of Pike, a unique and inviting new lodging property has opened on the slopes of Iron Mountain. The Innstead Mountain Getaway is exactly what its name implies. In our three day, two night stay we experienced the hospitality expected from a charming New England Inn coupled with a space artfully designed to help your family unplug and unwind.
Reservation Process:
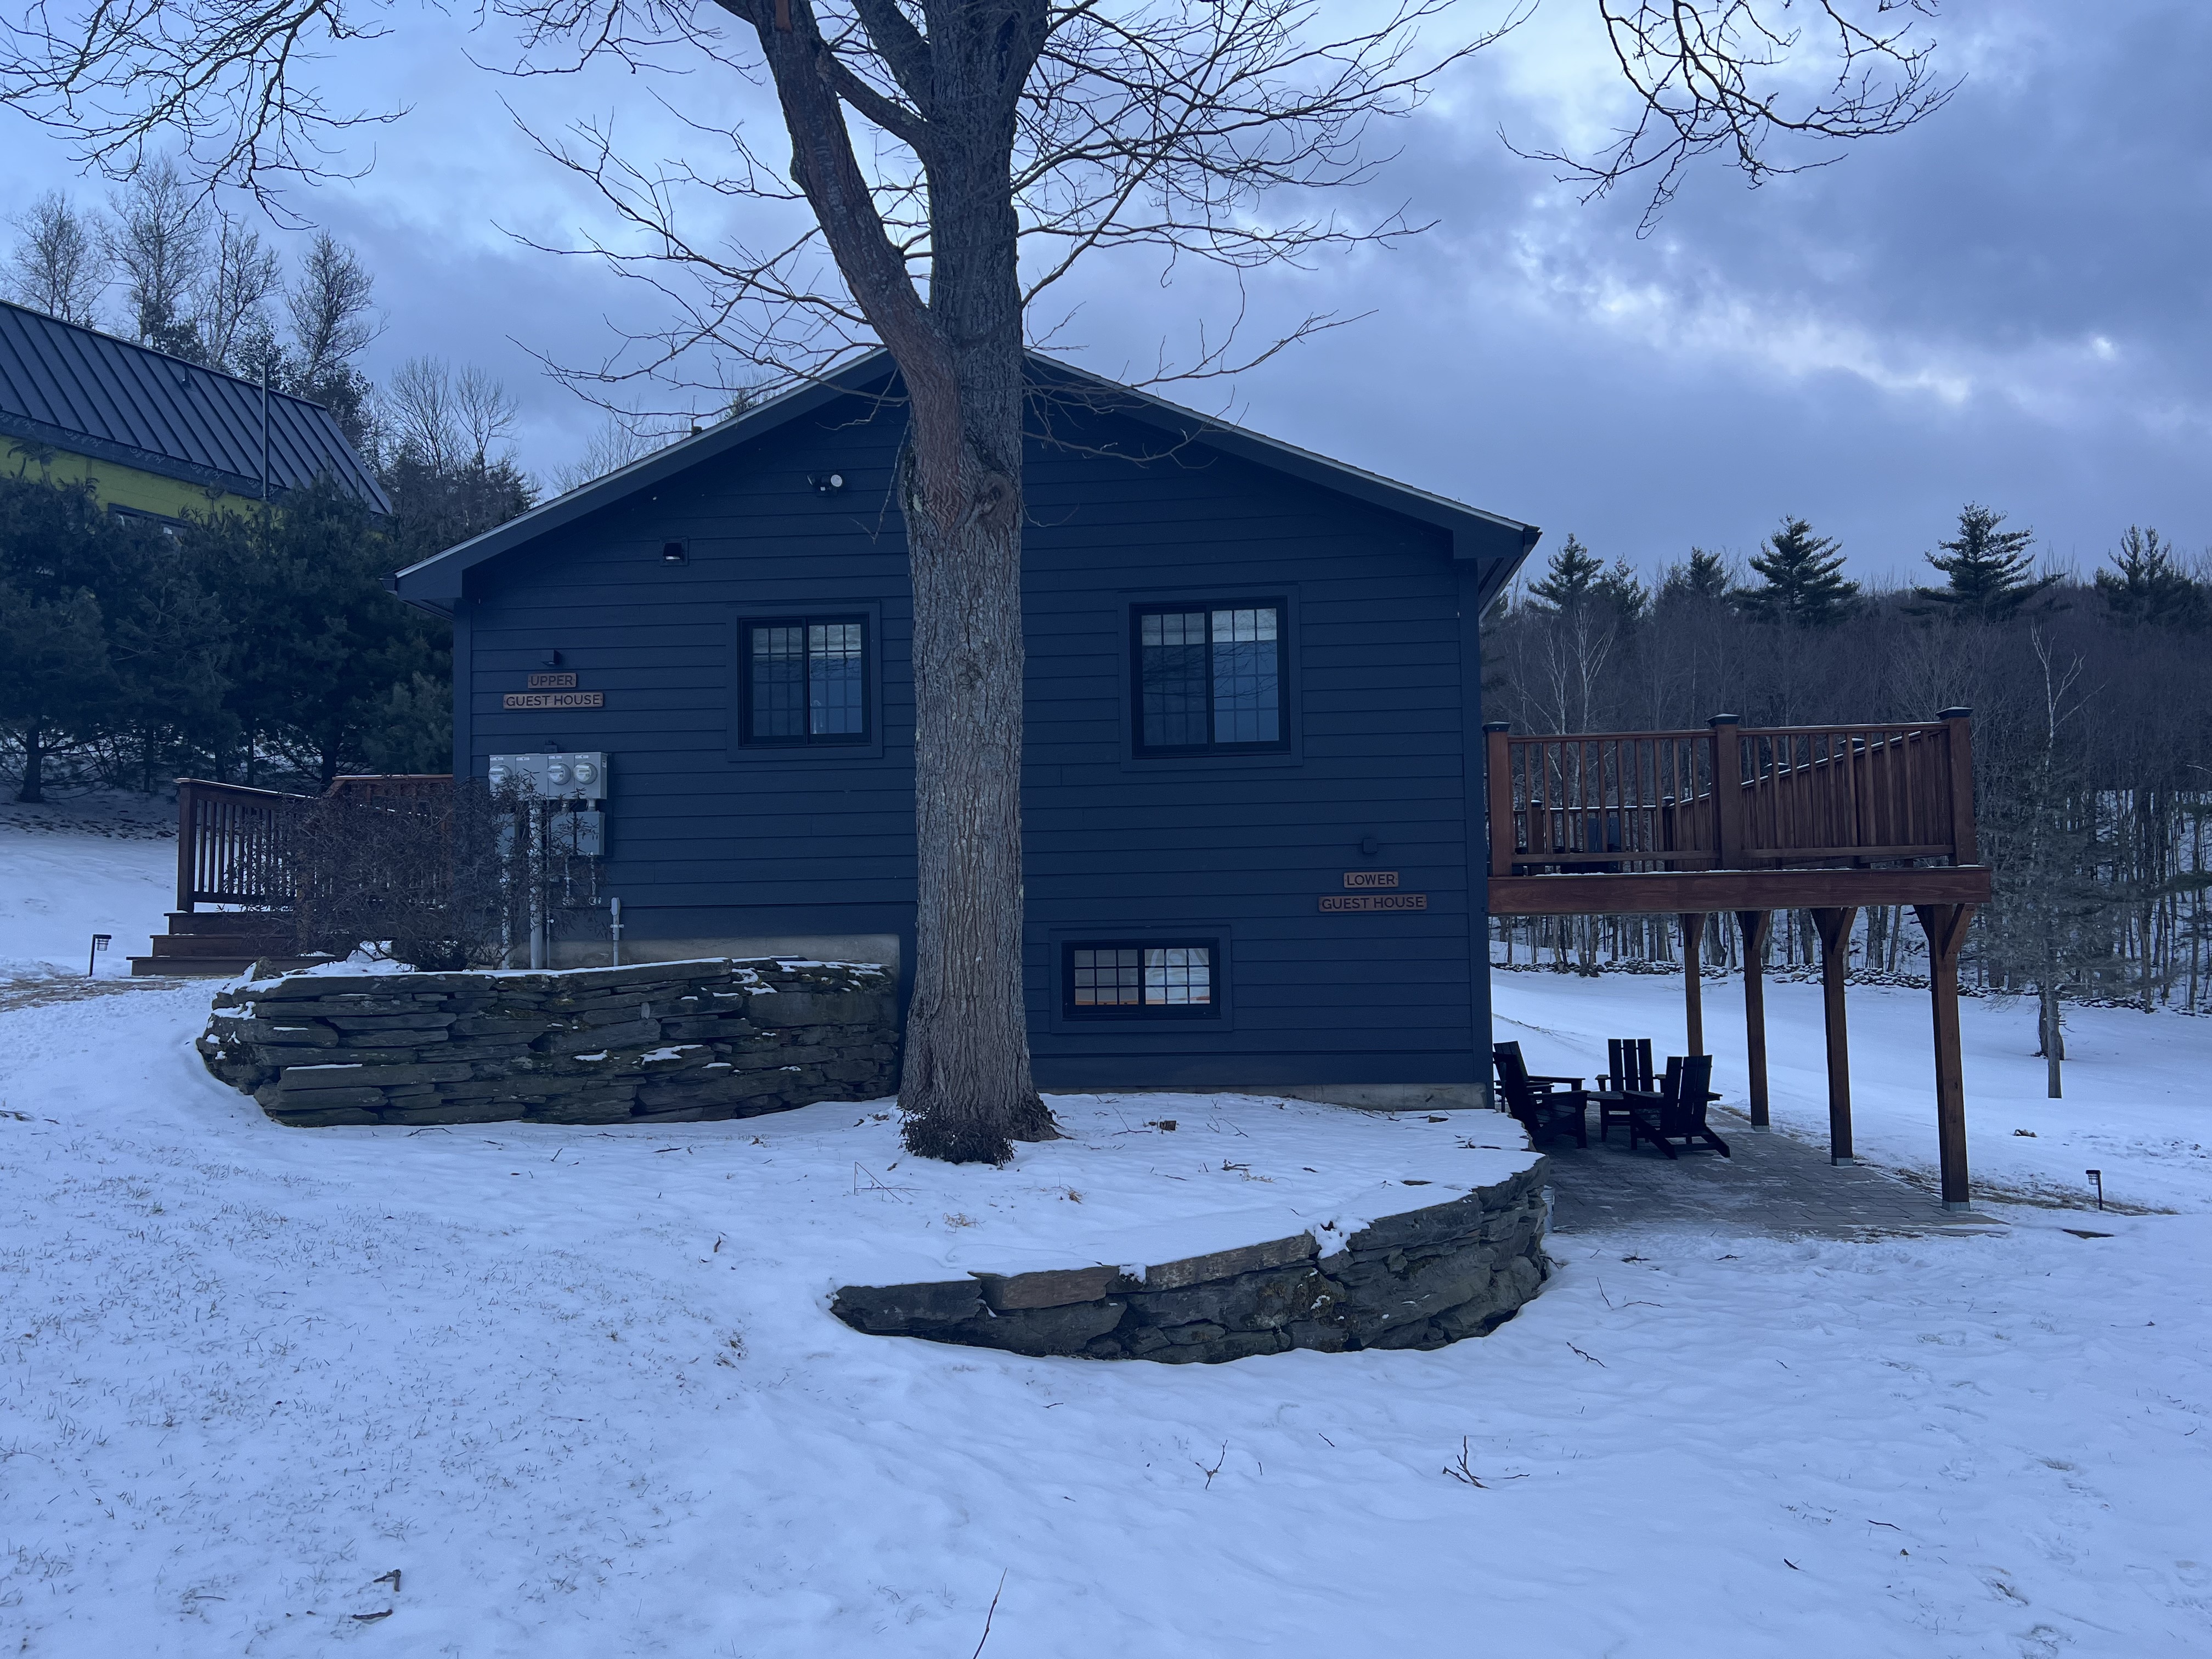
Currently there are three options available to book on the property. Upper and Lower Guest House, both of which can accommodate up to four guests, and the larger “Pike Station” which can sleep six. For our visit we stayed in the contemporary designed accessible (no stairs) Lower Guest House. A few days before our arrival we received helpful emails from Bill and Siobhan, the hosts and general managers, with information on the self check-in process, nearby attractions, property maps highlighting the extensive trail network on site, and more.
Our Experience:
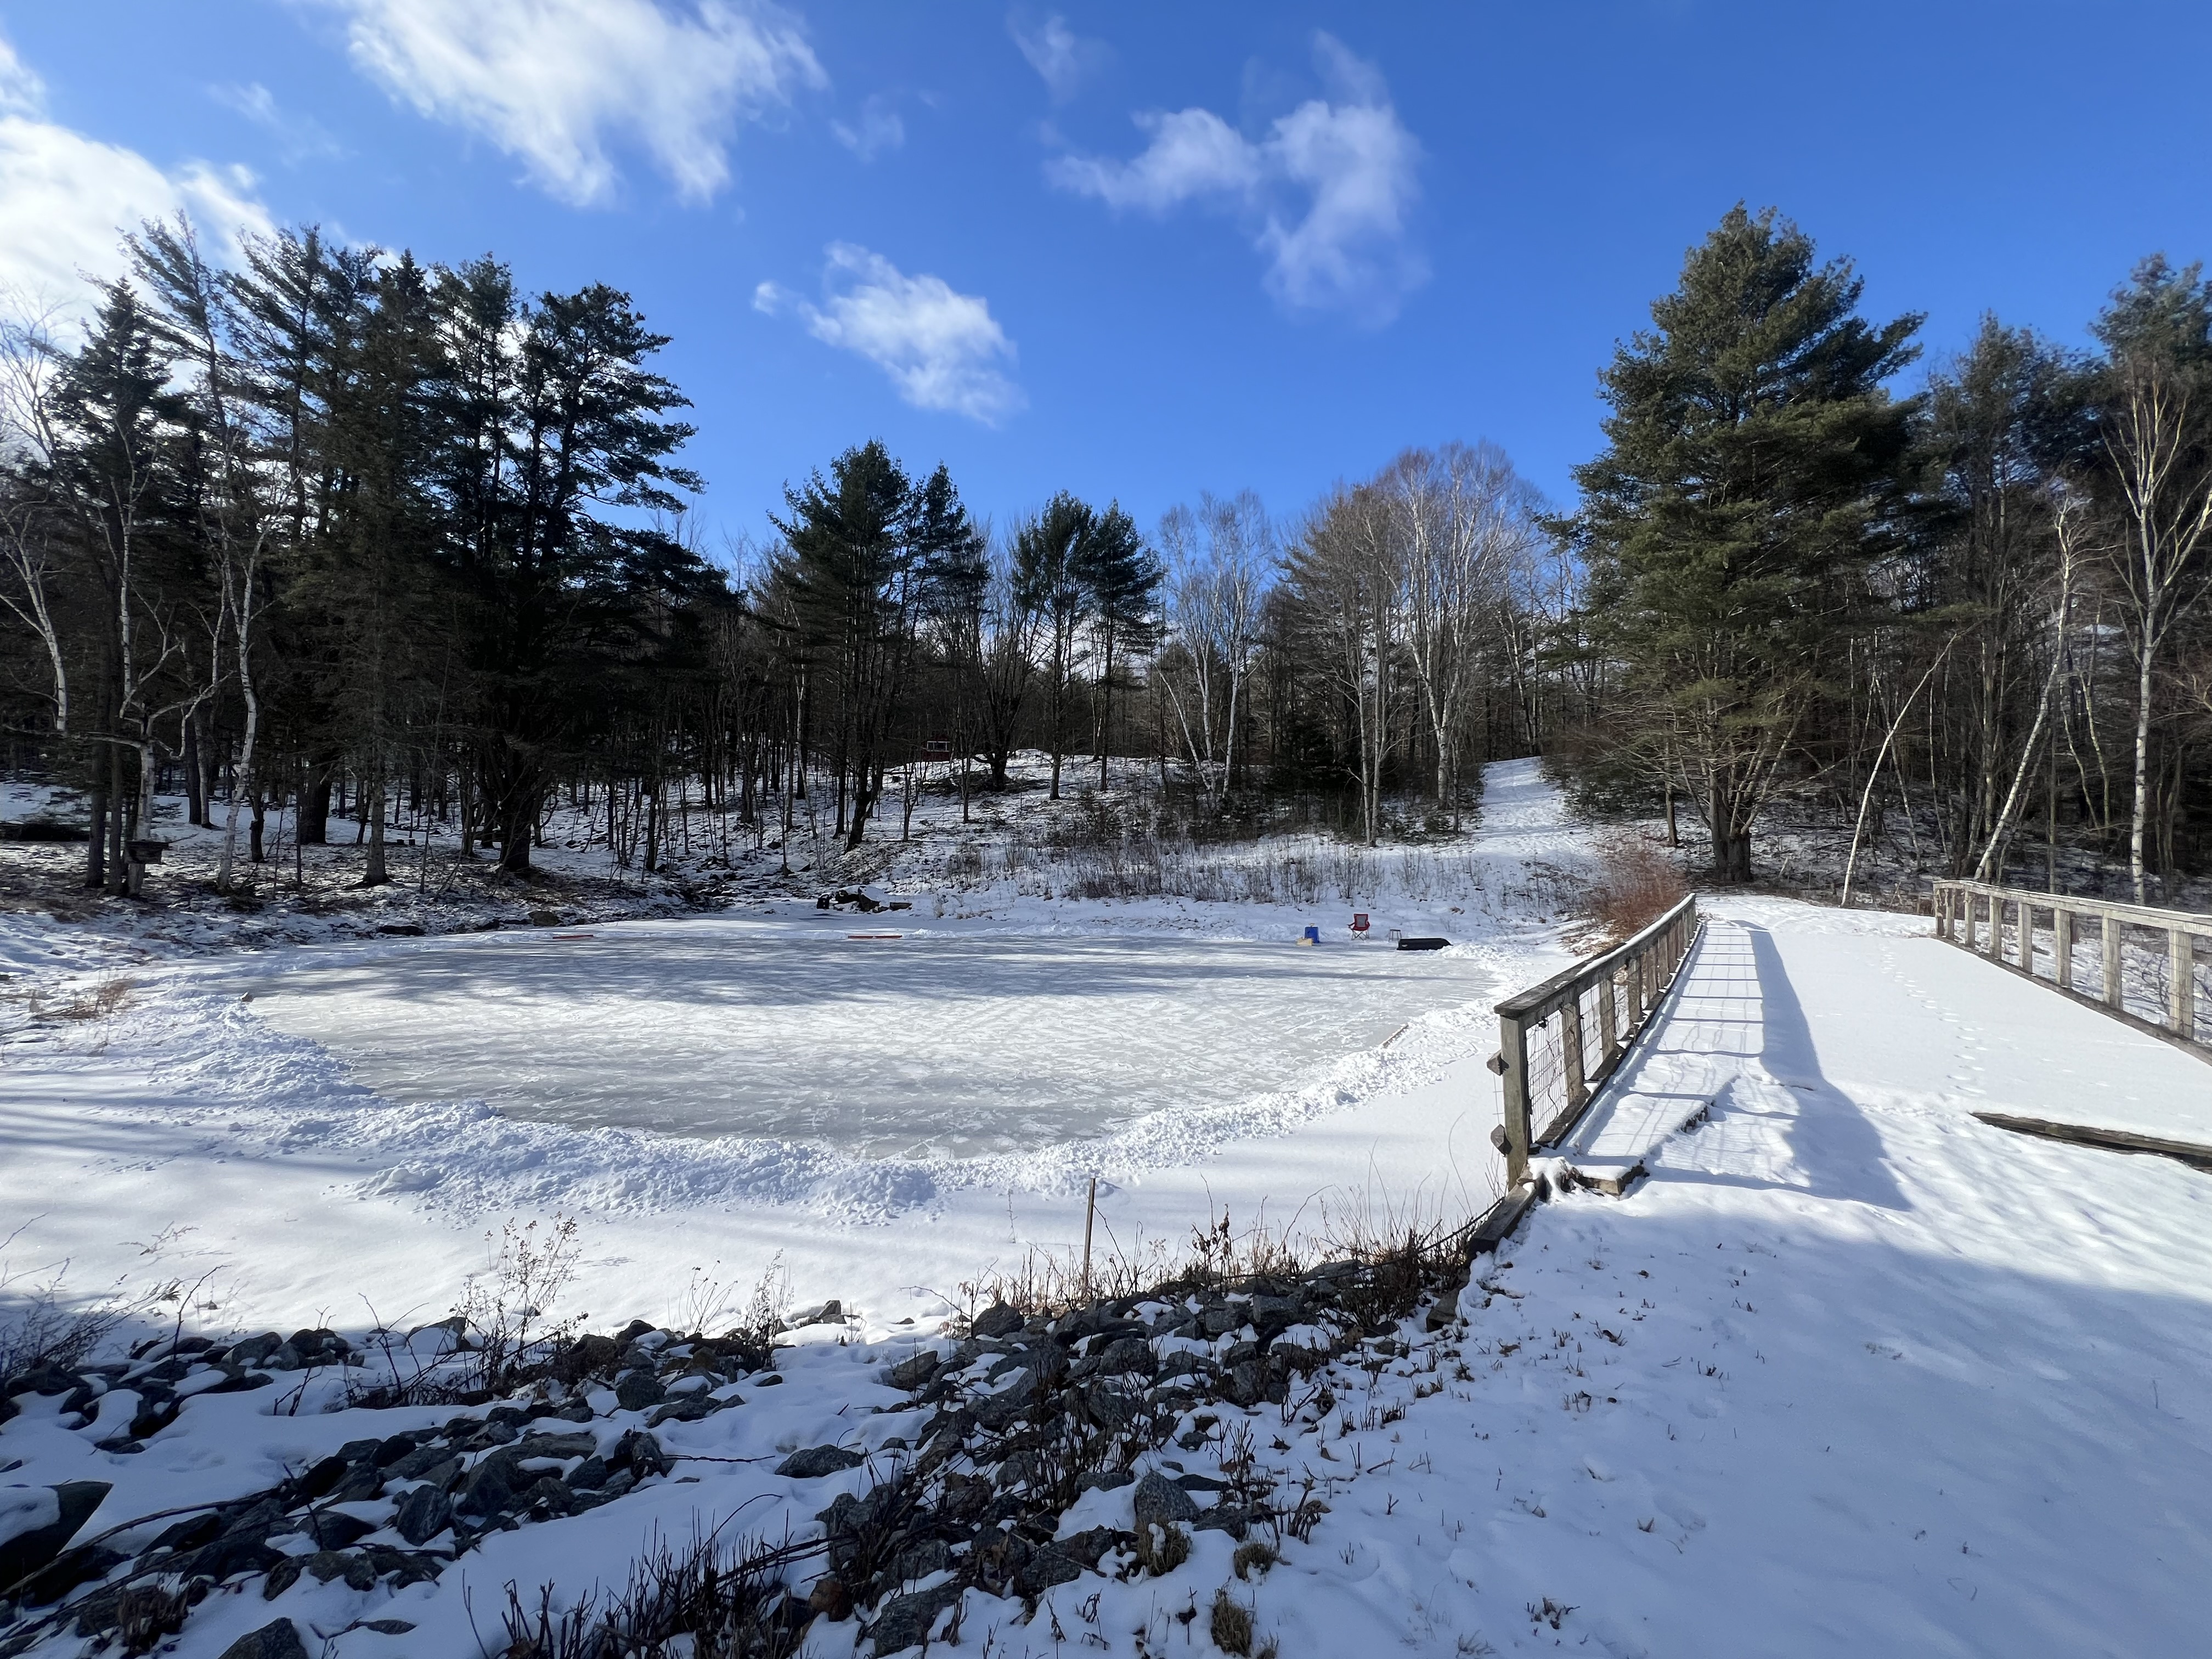
When we arrived in the later afternoon (check-in time is anytime after 3pm) we saw Bill and his children ice skating on the pond just a couple hundred feet from our car. Bill greeted us and we learned he had just confirmed the depth of the ice and cleared off the snow from the areas thick enough to skate on. They kids were having a blast and I made a note we would be bringing ice skates next time we visit.
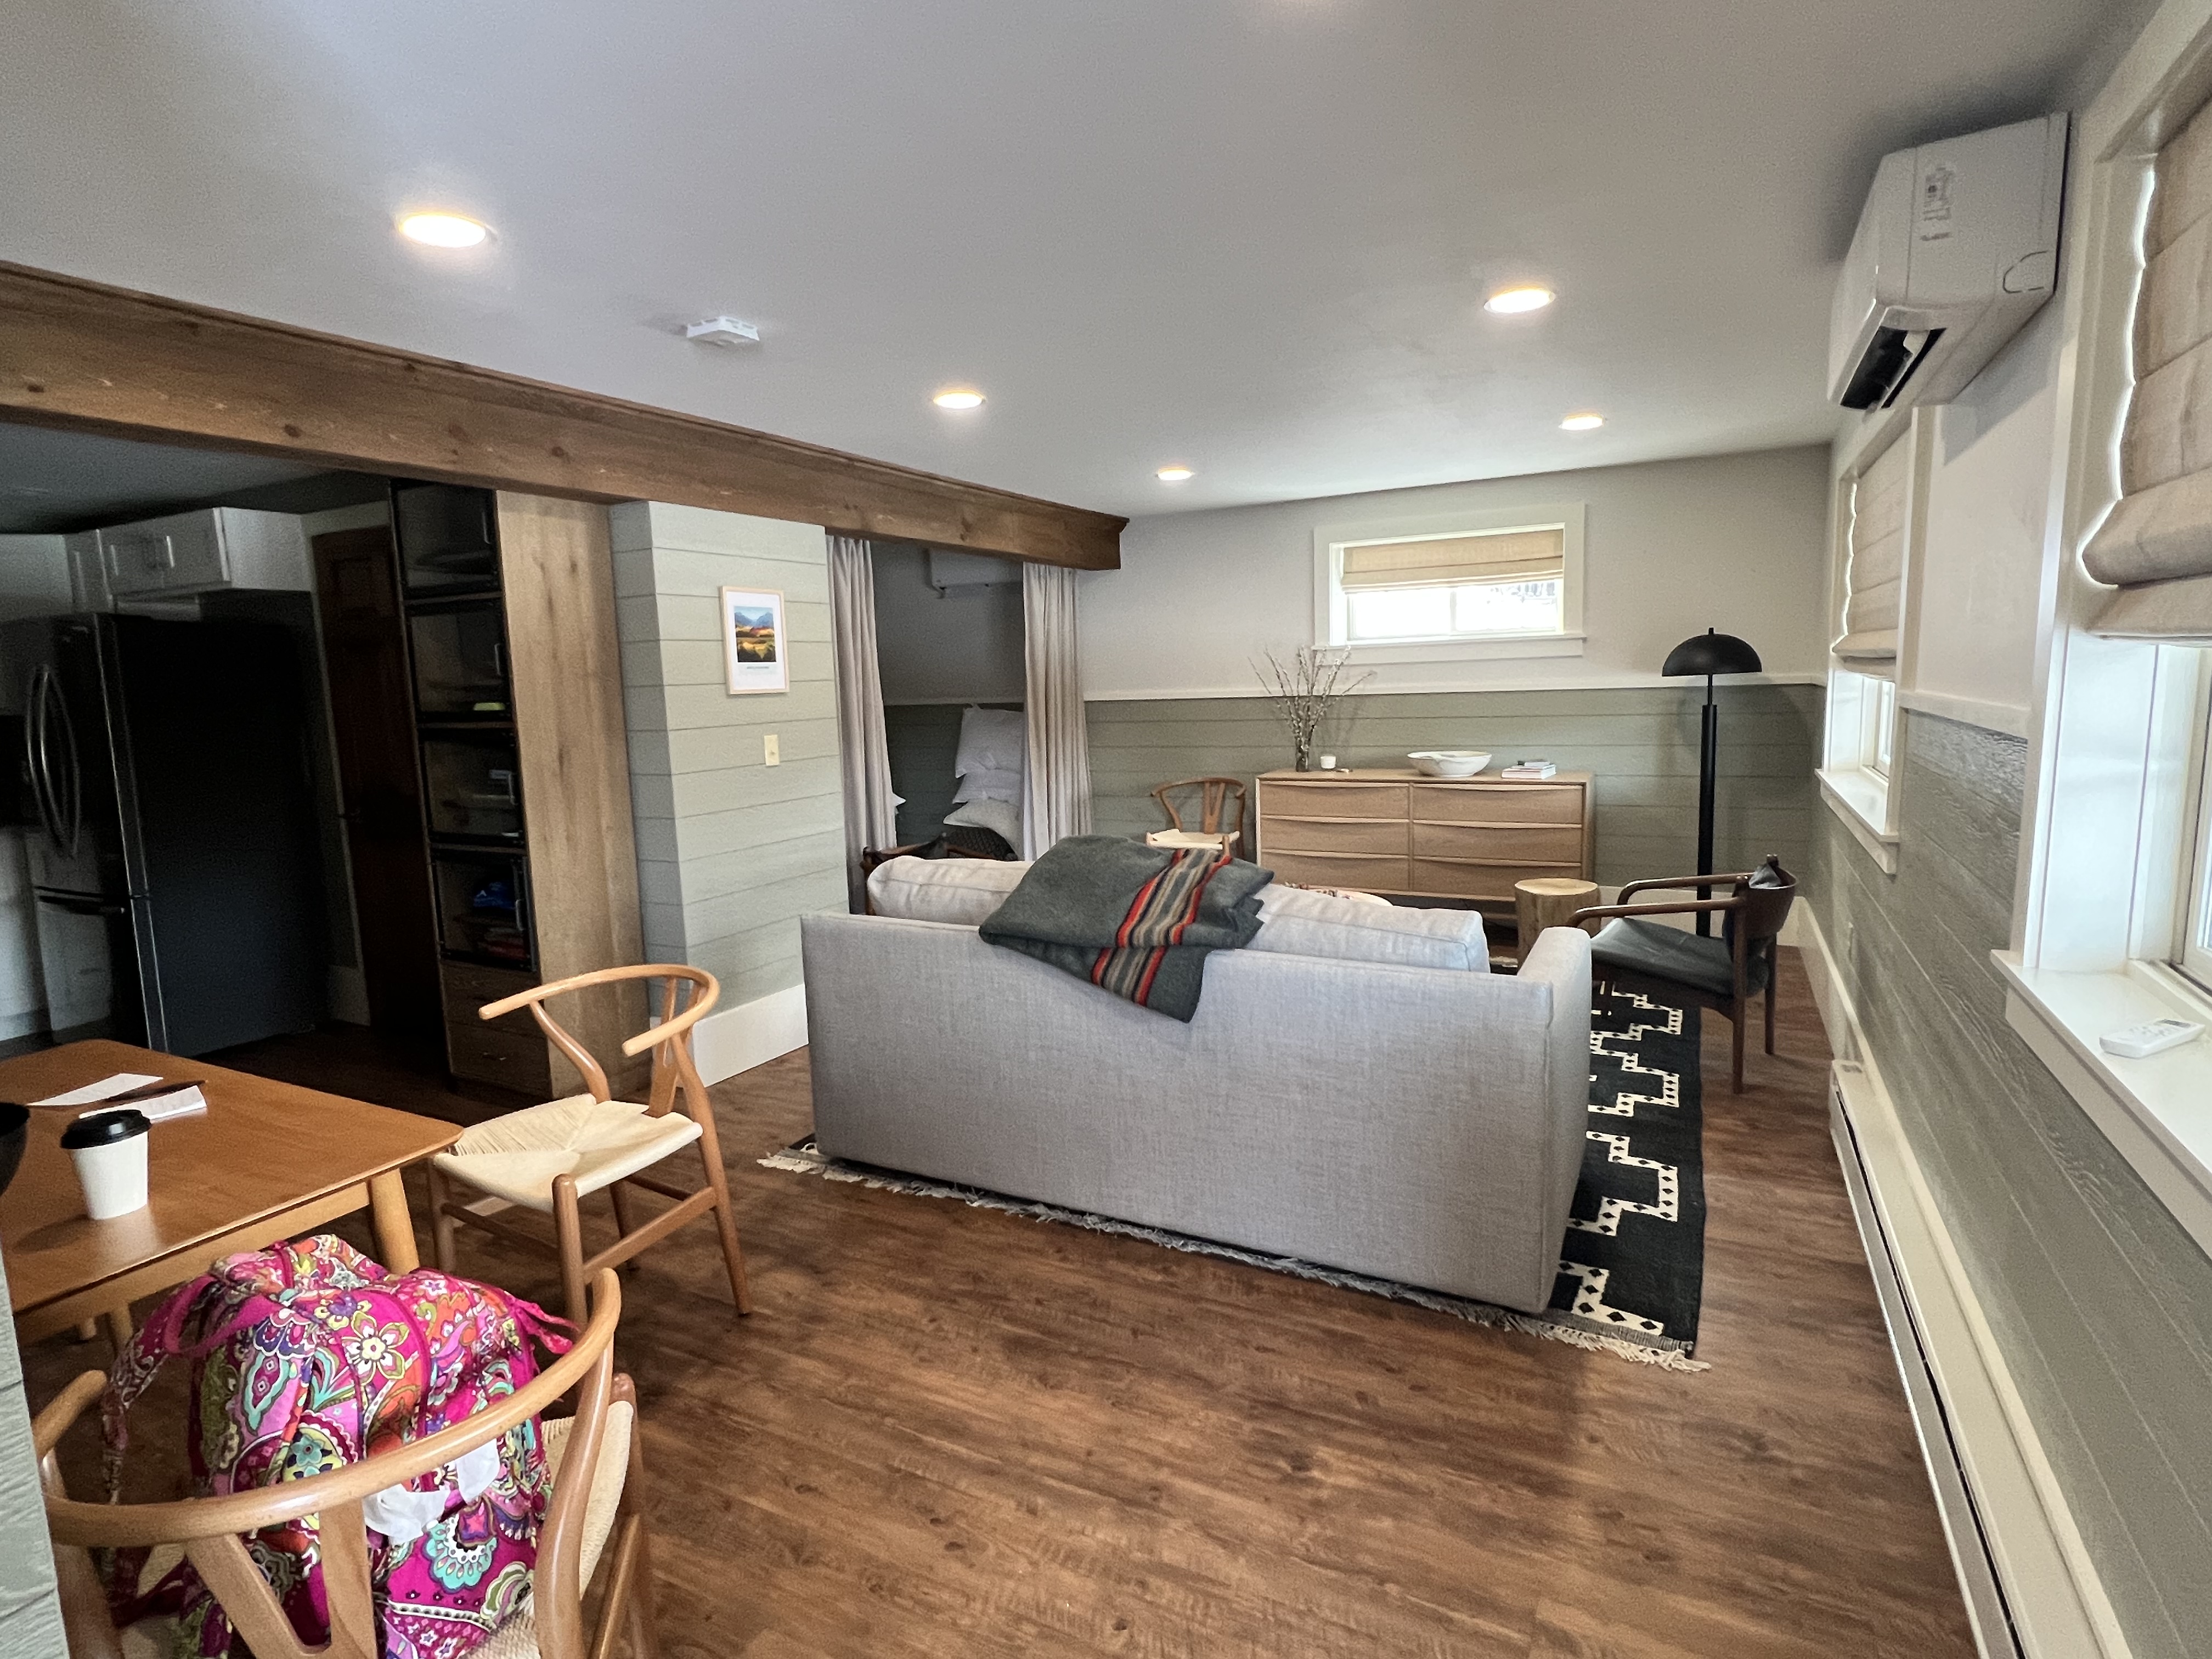
My son, age 12, and my daughter, age 8, ran to the door of our rental excited as always to see where we would be staying for a few days. Upon entering my daughter made the observation that there was no TV! We let her know that was by design, because the interior and exterior area of The Innstead are created to help families reconnect away from the digital distractions of our time. With that in mind there is still ample WiFi on the property so if you need to stay connected to work you can. Our unit had plenty to keep our family involved during our indoor time including chess, Scrabble, Mancala, Uno, and our own North Conway version of Monopoly we brought from home!
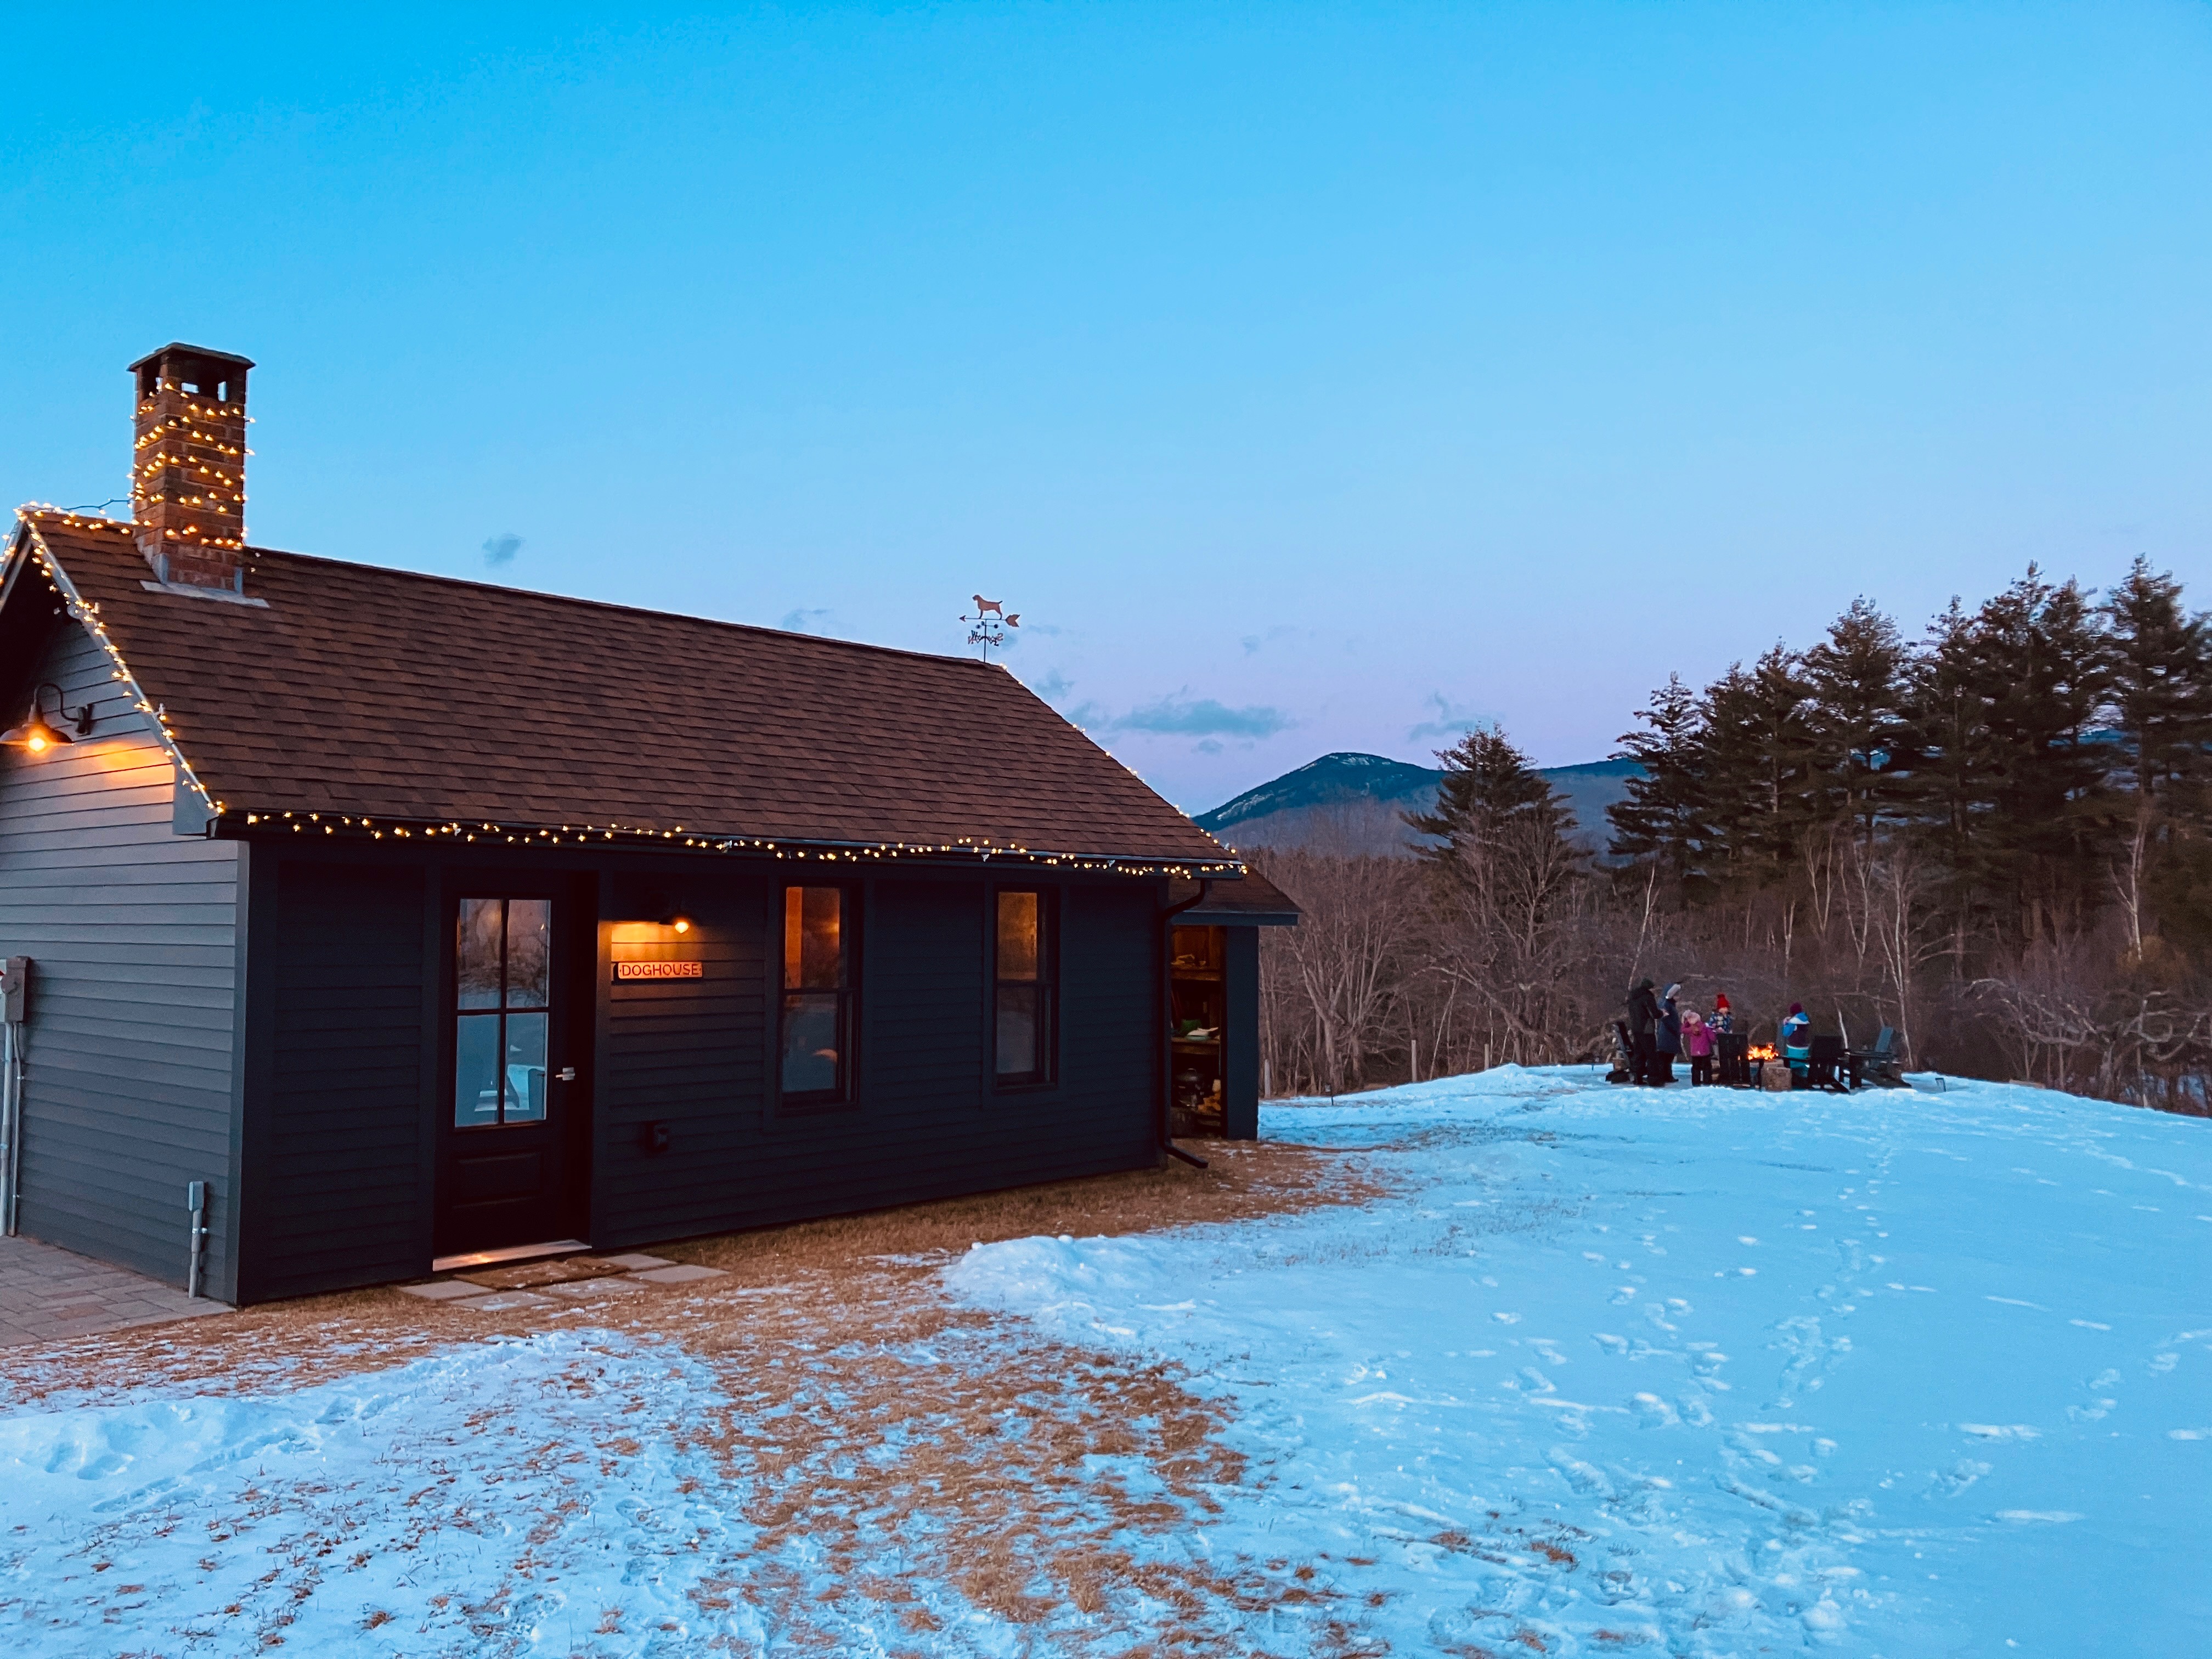
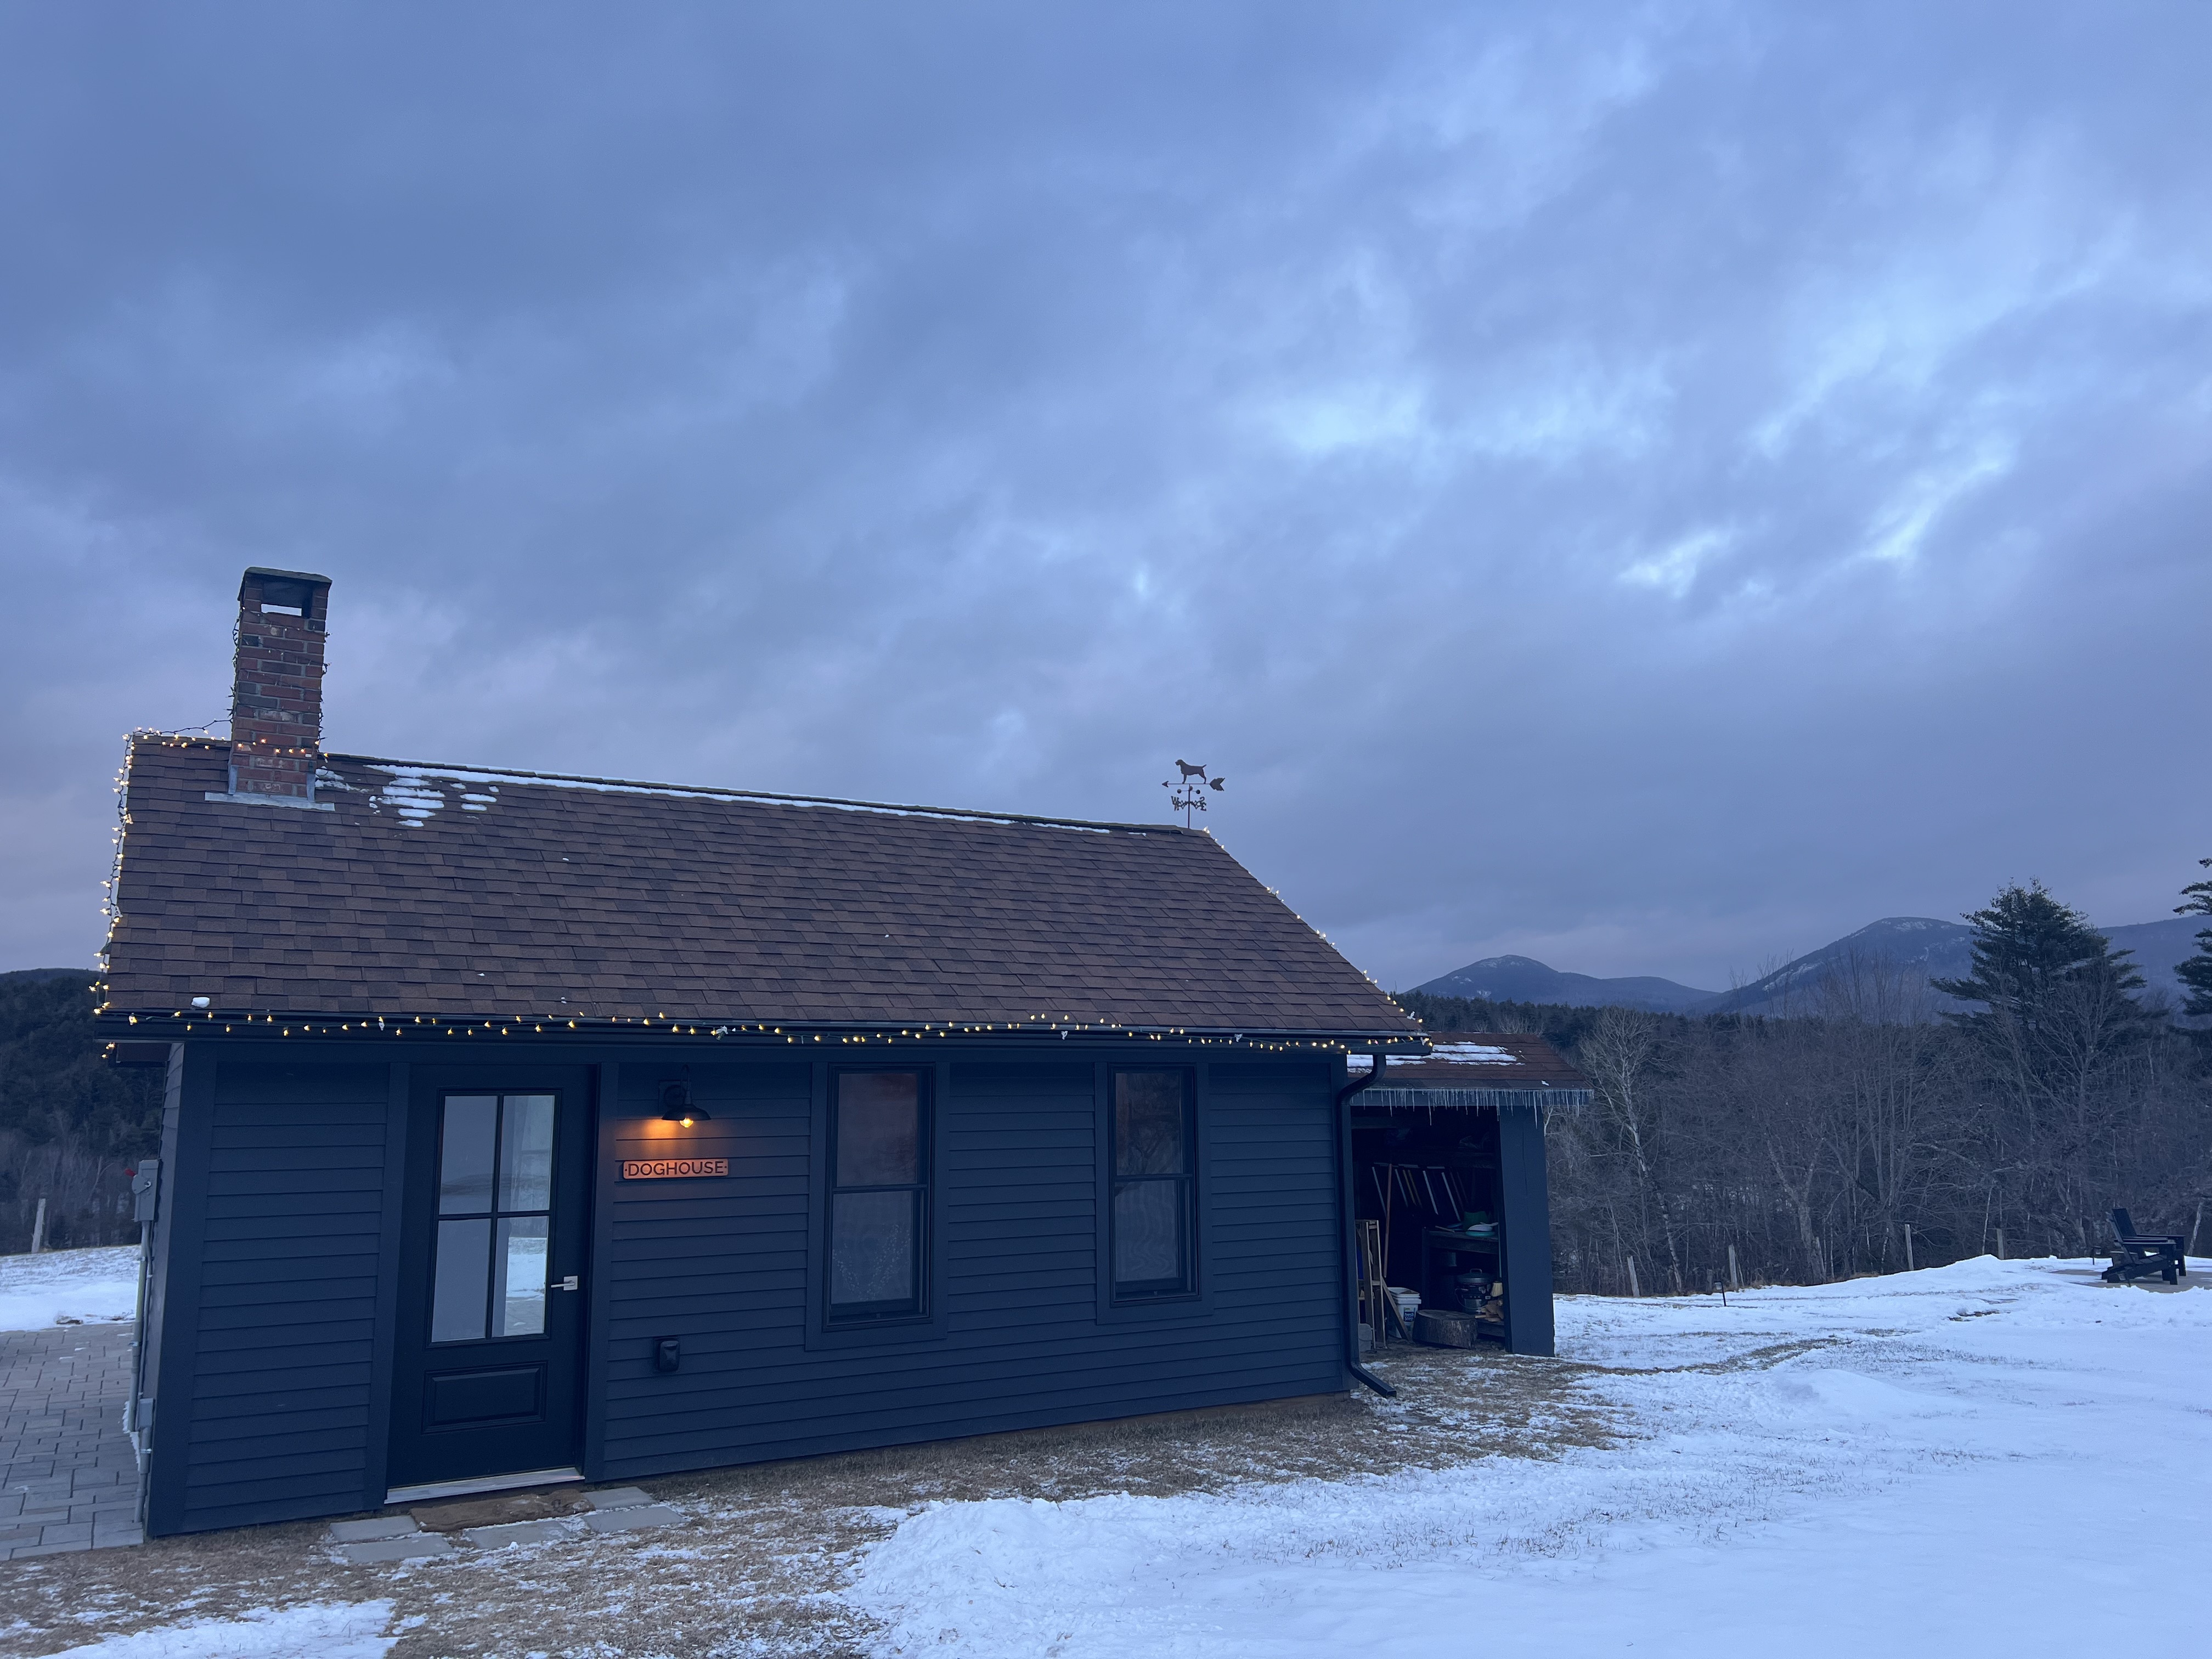
Before settling in for the evening we walked over to “The Doghouse”. This common building is a place to hangout with other guests, grab a complimentary snack or seltzer, and get some coffee and light baked goods and fresh fruit in the mornings. A short patio path from here leads to a fire pit where nightly Smore’s are made available (weather permitting).
Back in our room we settled in for an early evening with plans to go skiing at the Dartmouth Skiway the next morning. The Lower Guesthouse has a queen size bed in a small bedroom separated by the main living area by curtain. The sofa had a pullout queen sized bed that the kids took command of. We all slept great thanks to the quality mattresses and linens provided. We also appreciated the climate control of the Mini Split air conditioners.
Through a partnership with the Dartmouth Skiway we were able to purchase discounted lift tickets directly from The Innstead for only $30 per person (vs. $60 weekend window rates). It’s only about a 35 minute scenic drive to the Dartmouth Skiway and we enjoyed the scenic rolling farmland and the impressive Peaked Mountain that dramatically came into view around a corner.
I’ll save our experience at the Dartmouth Skiway for another post but will just mention that we had an excellent time there due to the quality snow making, grooming, terrain, and small mountain vibe. Other ski mountains within easy day tripping distance of The Innstead include:
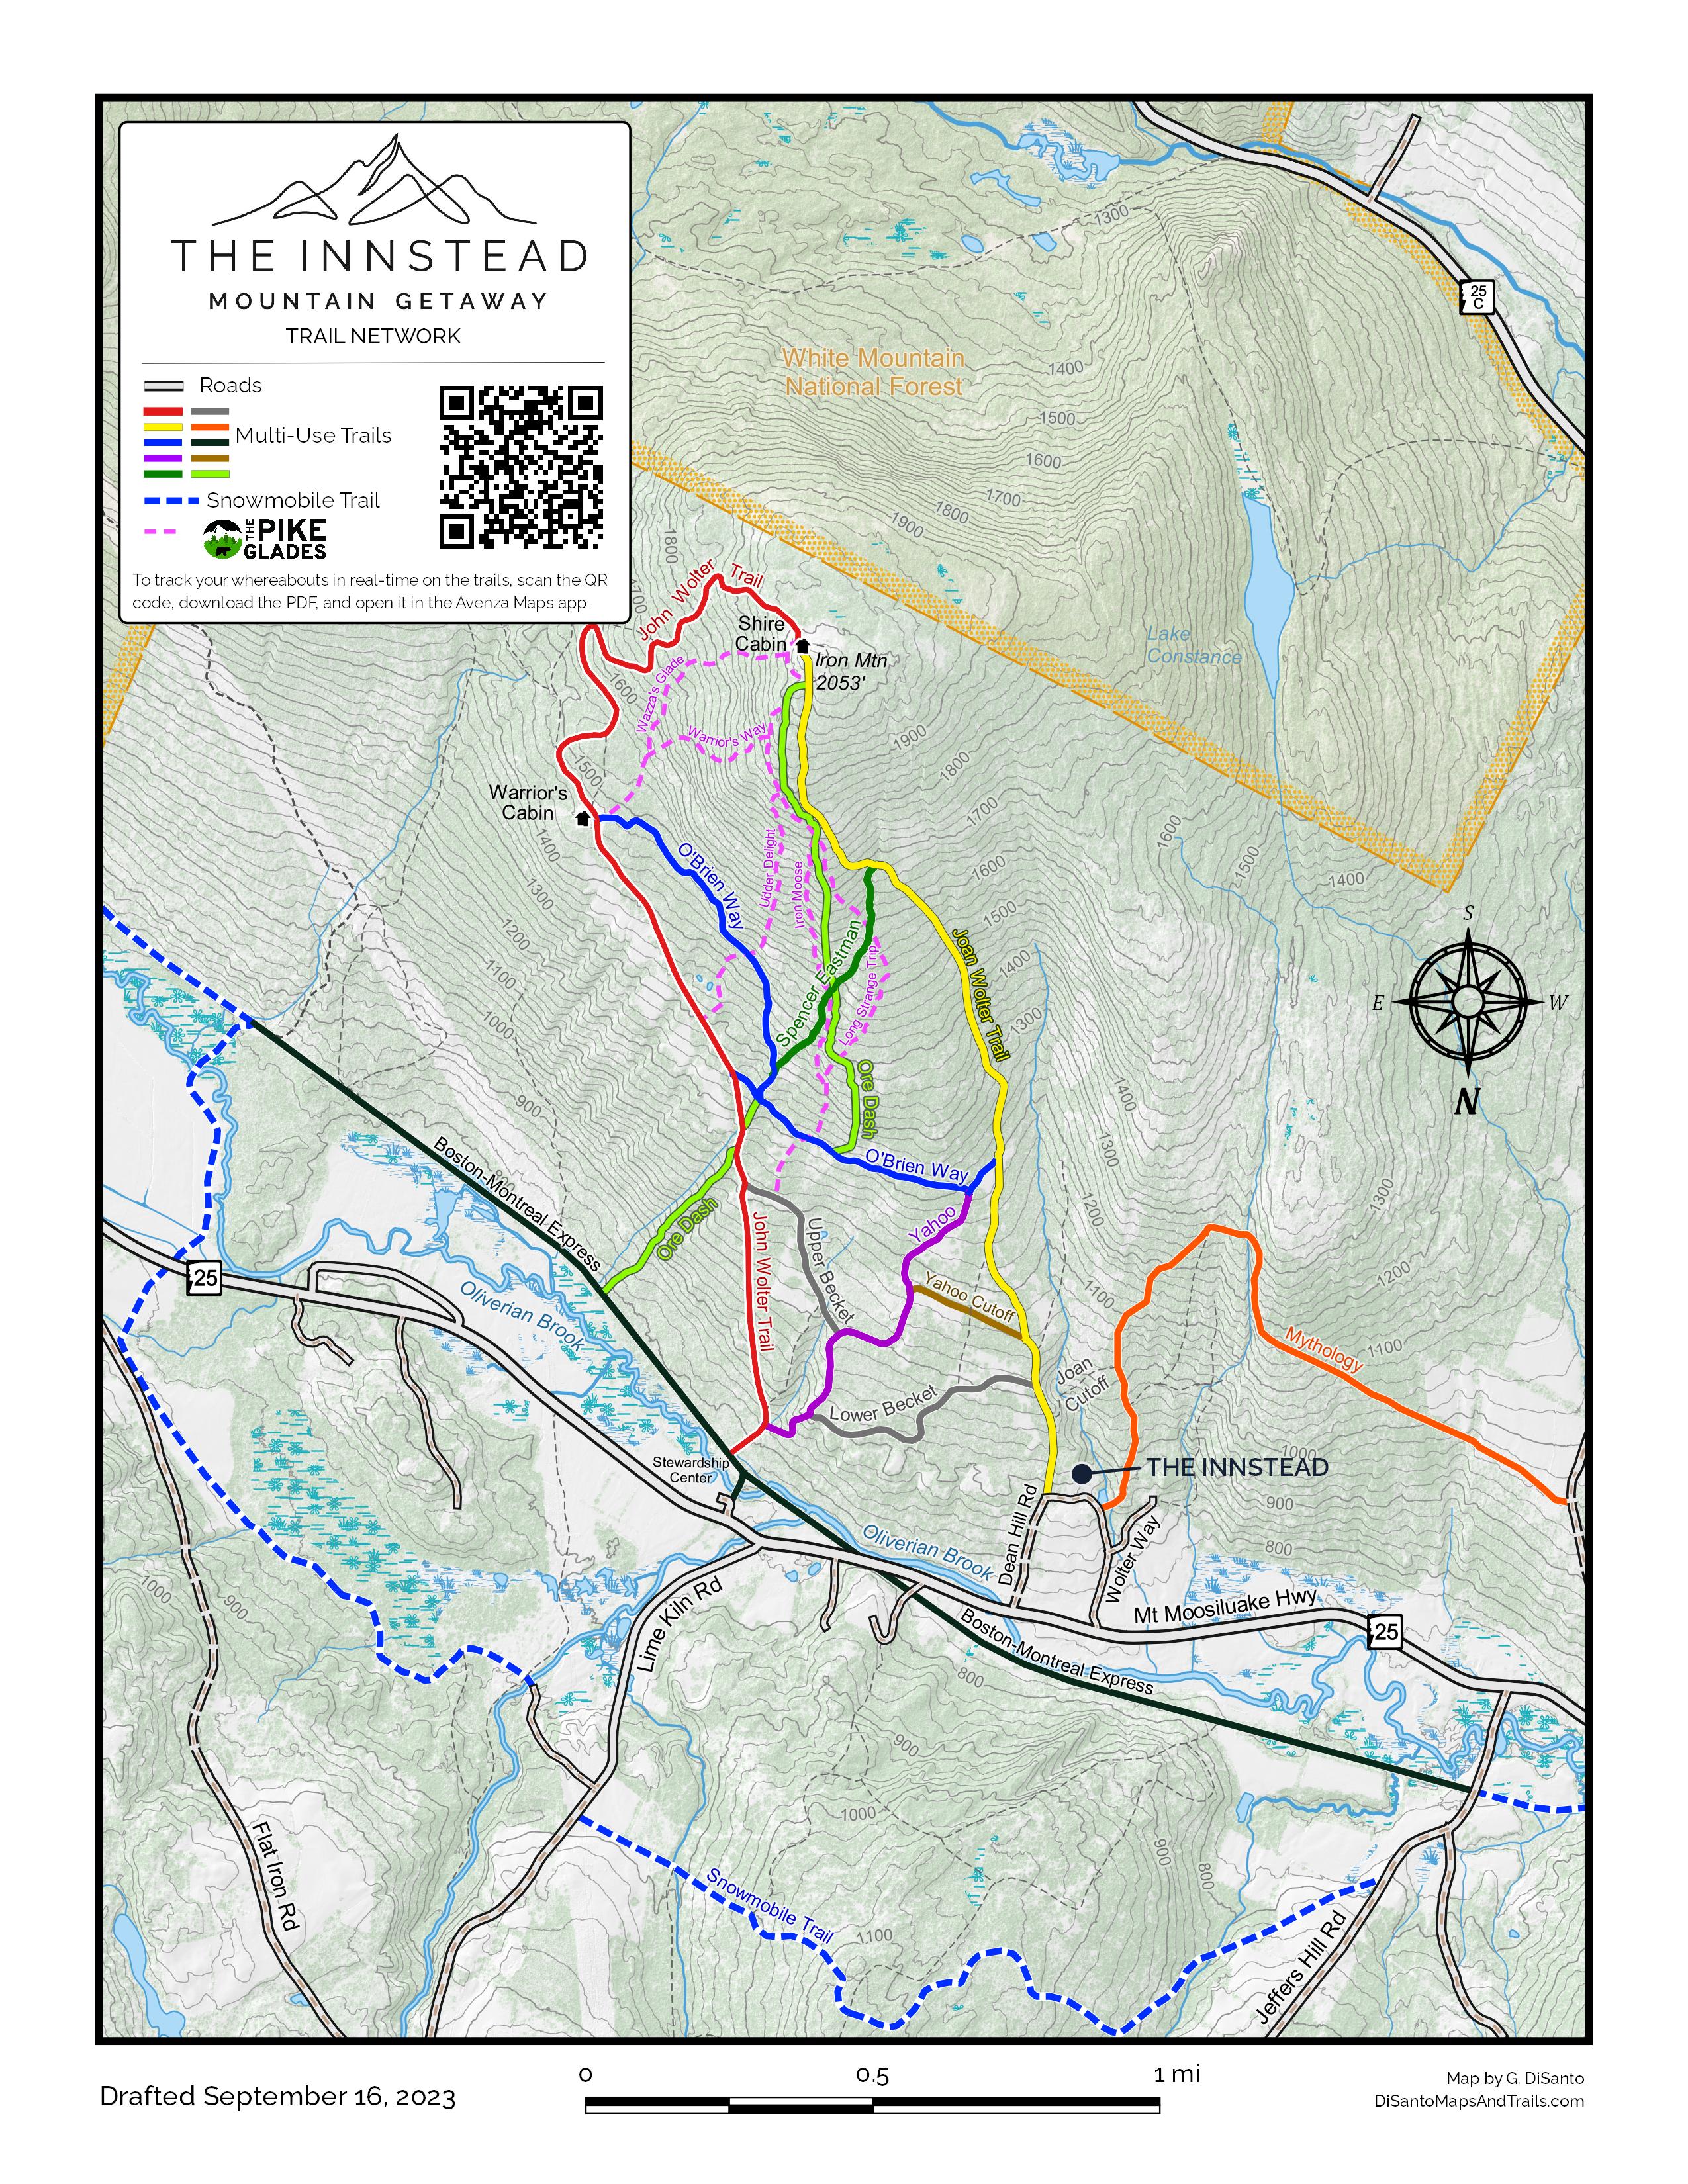
We returned to the property around 3:30pm and after checking local sunset time I decided to get ambitious and try to skin up Iron Mountain to check out one of the newest glade zones to be added to the Granite Backcountry Alliance. The rest of the family settled down for a little siesta while I put skins to skis and started up the well marked Joan Wolter trail from essentially the door of our lodging. This was an 1,100 foot climb over 1.6 miles long. Since I was hoping to beat sunset I kept a 20 minute/mile pace up the average 10% grade and I reached the summit in just under 50 minutes. Along the way I noted how much work has been done by The Pike Glades to artfully glade some steeper zones on the hillside along with some beautiful looking open fields that would be perfect for the beginner backcountry enthusiast to enjoy the sport.
Just below the geographic summit I took 10 minutes on the porch of a small rustic cabin charmingly called, “The Shire” on my CalTopo map to savor the views east of the frosted Mount Moosilauke, one of the most popular NH 4000 Footers, this one standing tall at 4,802 in elevation, the highest point between the Connecticut River Valley and the I93 corridor to the east. To the west I caught the last glimpses of sun and being unfamiliar with the vantage tried to see if I could spot Camel’s Hump in Vermont but couldn’t locate it given the visibility and possibly not having enough altitude.
Since light would wane quickly, I was solo, and the snow conditions were pretty thin for true glade skiing, I made the conservative choice to descend via the John Wolter Trail whose trailhead is the public access point for this Granite Backcountry Alliance zone off our NH Route 25, East Haverhill, and is basically the uphill skin route from that parking lot. This would also let me almost completely circumnavigate the whole area and make for a fun loop trip. During the descent I briefly stopped at “The Warrior’s Cabin”, which had a moving tribute to those who have fought for our freedoms. The former Marine in me let out a little “ooh-ra” before I continued my descent choosing lower “O’Brien Way” and “Yahoo/Yahoo Cutoff” to cut back over to The Innstead and avoid any road walking. With just a couple sections of flatter terrain and some herring-bone I was carving the last couple of turns right down to our cozy lodging an hour and a half after departing.
Bill greeted me in the parking lot to inquire on the conditions I found and the route I took. An AMC led tour group was coming the next day and he had plans to connect with them out on the trails. After a quick shower (excellent bathroom with quality organic soaps, shampoos, and towels) the family, mostly recovered from 4 hours of lift service and one slightly tired from one hot backcountry lap, jumped in the family van and headed to Bradford, VT, just 20 minutes away for a fantastic dinner at the Italian eatery, Colatina Exit. Call ahead for this place, the food and service makes it a hot spot. We were very happy with our meals and will definitely return if we are in the area again. Side tip, the GPS route to Bradford, VT from The Innstead is pretty much equidistant if you head south on Route 10 to the Piermont Bridge crossing, or travel north on Route 10 to the Newbury Crossing Road bridge. Because of that we recommend if visiting Bradbury to make it a loop trip so you can cross both state-line bridges and see more of the countryside!
Sidenote: Quietude
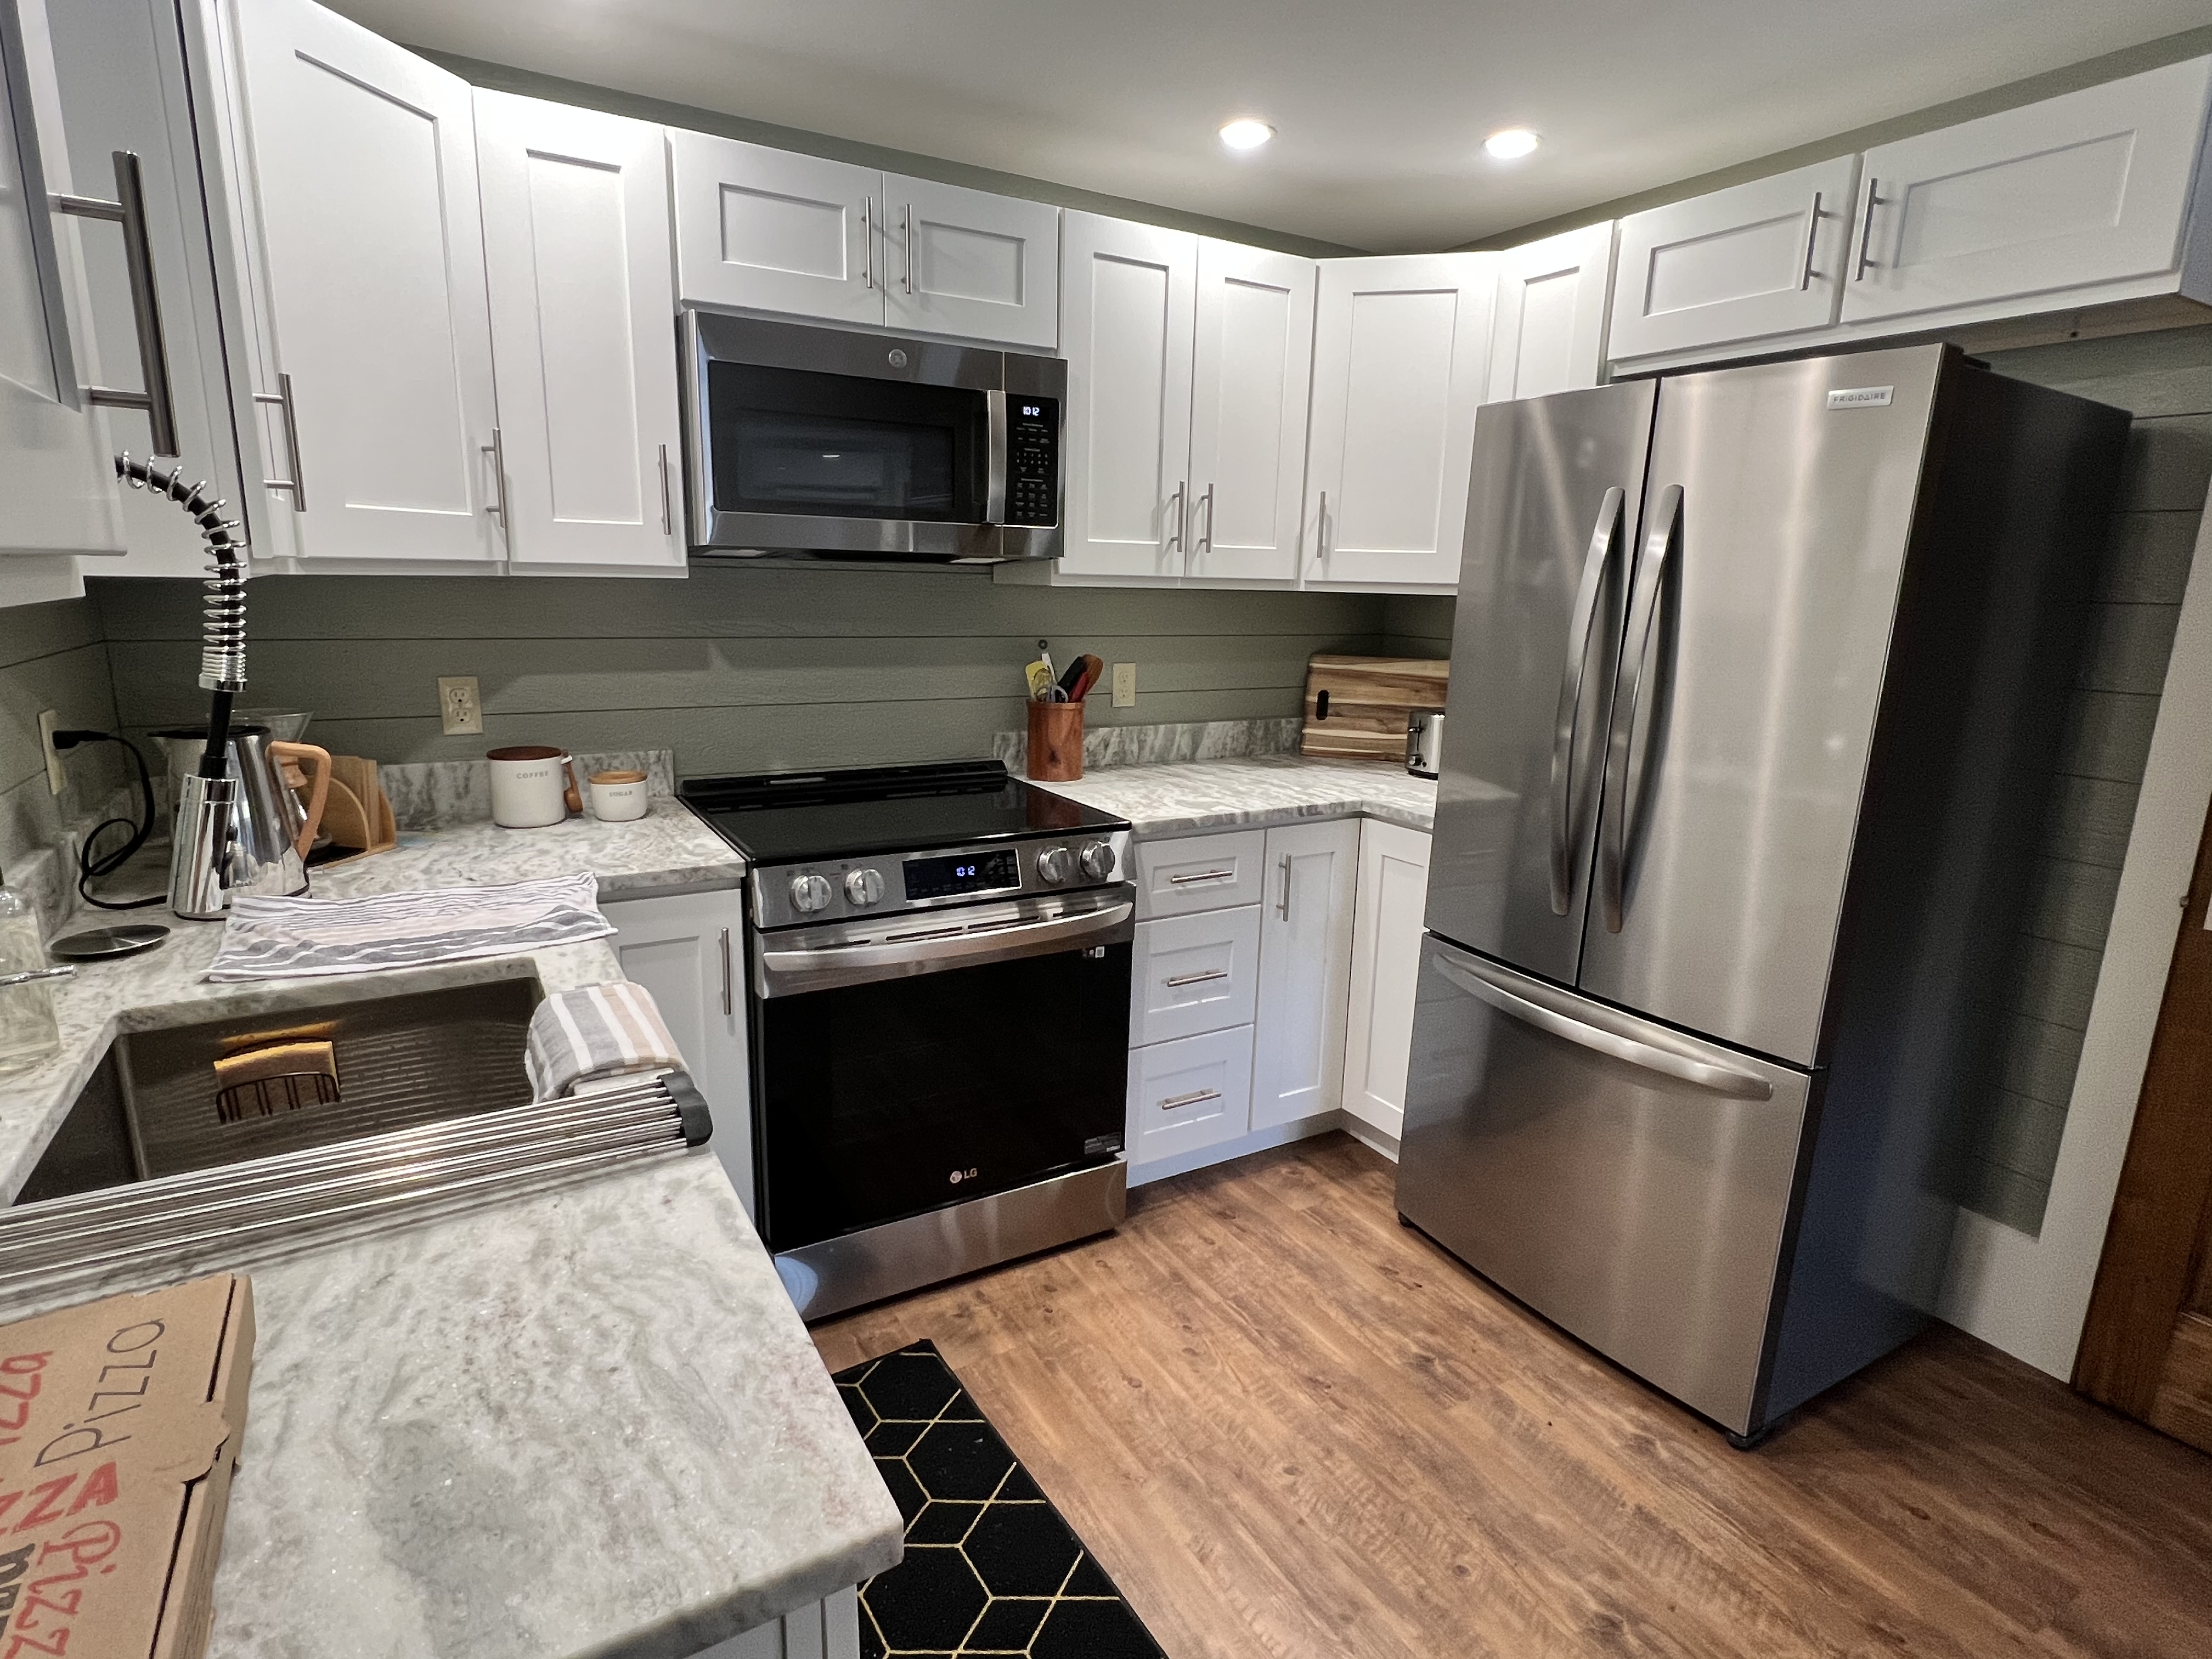
Coming from the bustling tourist area of Mount Washington Valley it was nice to be in an area with an old NH/VT feel. There is no Uber or Door Dash available here. Plan accordingly. Confirmation emails list the closest grocery stores based on what direction you are coming from. The Innstead room kitchens are fully equipped with brand new quality appliances. You could certainly save some money and just cook on site during your visit. We chose to spend some money in the surrounding towns and didn’t regret a single meal we had.
As we returned to The Innstead with full bellies and tired legs we caught sight of the lit up “Doghouse” up on the hillside just before turning up the long driveway. Even though we had only been guests for two days it felt like we were coming home in a way. While we had stayed out past the traditional Smore’s time the embers were still burning and even though we got our kiddos quickly into their PJ’s the Smore’s supplies were still out in the Doghouse and after chatting with Bill a bit about the inspiring growth and vision he and his wife have for the property I turned in for the evening and surprised both kiddos with a late night Smore treat… then made them brush their teeth again.
On the final morning we made one more stop at the beautiful Doghouse for some great coffee and home baked goods (Gramma Higgins coffee cake, handed down to Bill from his maternal grandmother!) before leaving for home. Siobhan and Bill joined us for some conversation regarding the current and future plans for their impressive property while my kiddos got to work making bead bracelets and necklaces with their own young daughters.
If you are looking for a place to unwind and unplug, to enjoy the natural world and its variety of weather conditions and lighting, somewhere with excellent hiking trails but not a lot of traffic, a vibe and energy that help you leave your phone in “Do Not Disturb” mode even though there is WiFi available, you should look at booking a stay at The Innstead Mountain Getaway.
Discount for Northeast Alpine Start Followers!
From now until the end of May my readers can get 15% off their stay at The Innstead with promo code “AlpineStart15“! There is a 2-night minimum stay but otherwise no restrictions!
Disclaimer: The author and his family were compensated a two night stay at this lodging in exchange for sharing their experience. No other compensation was made and all opinions stated are that of the author.
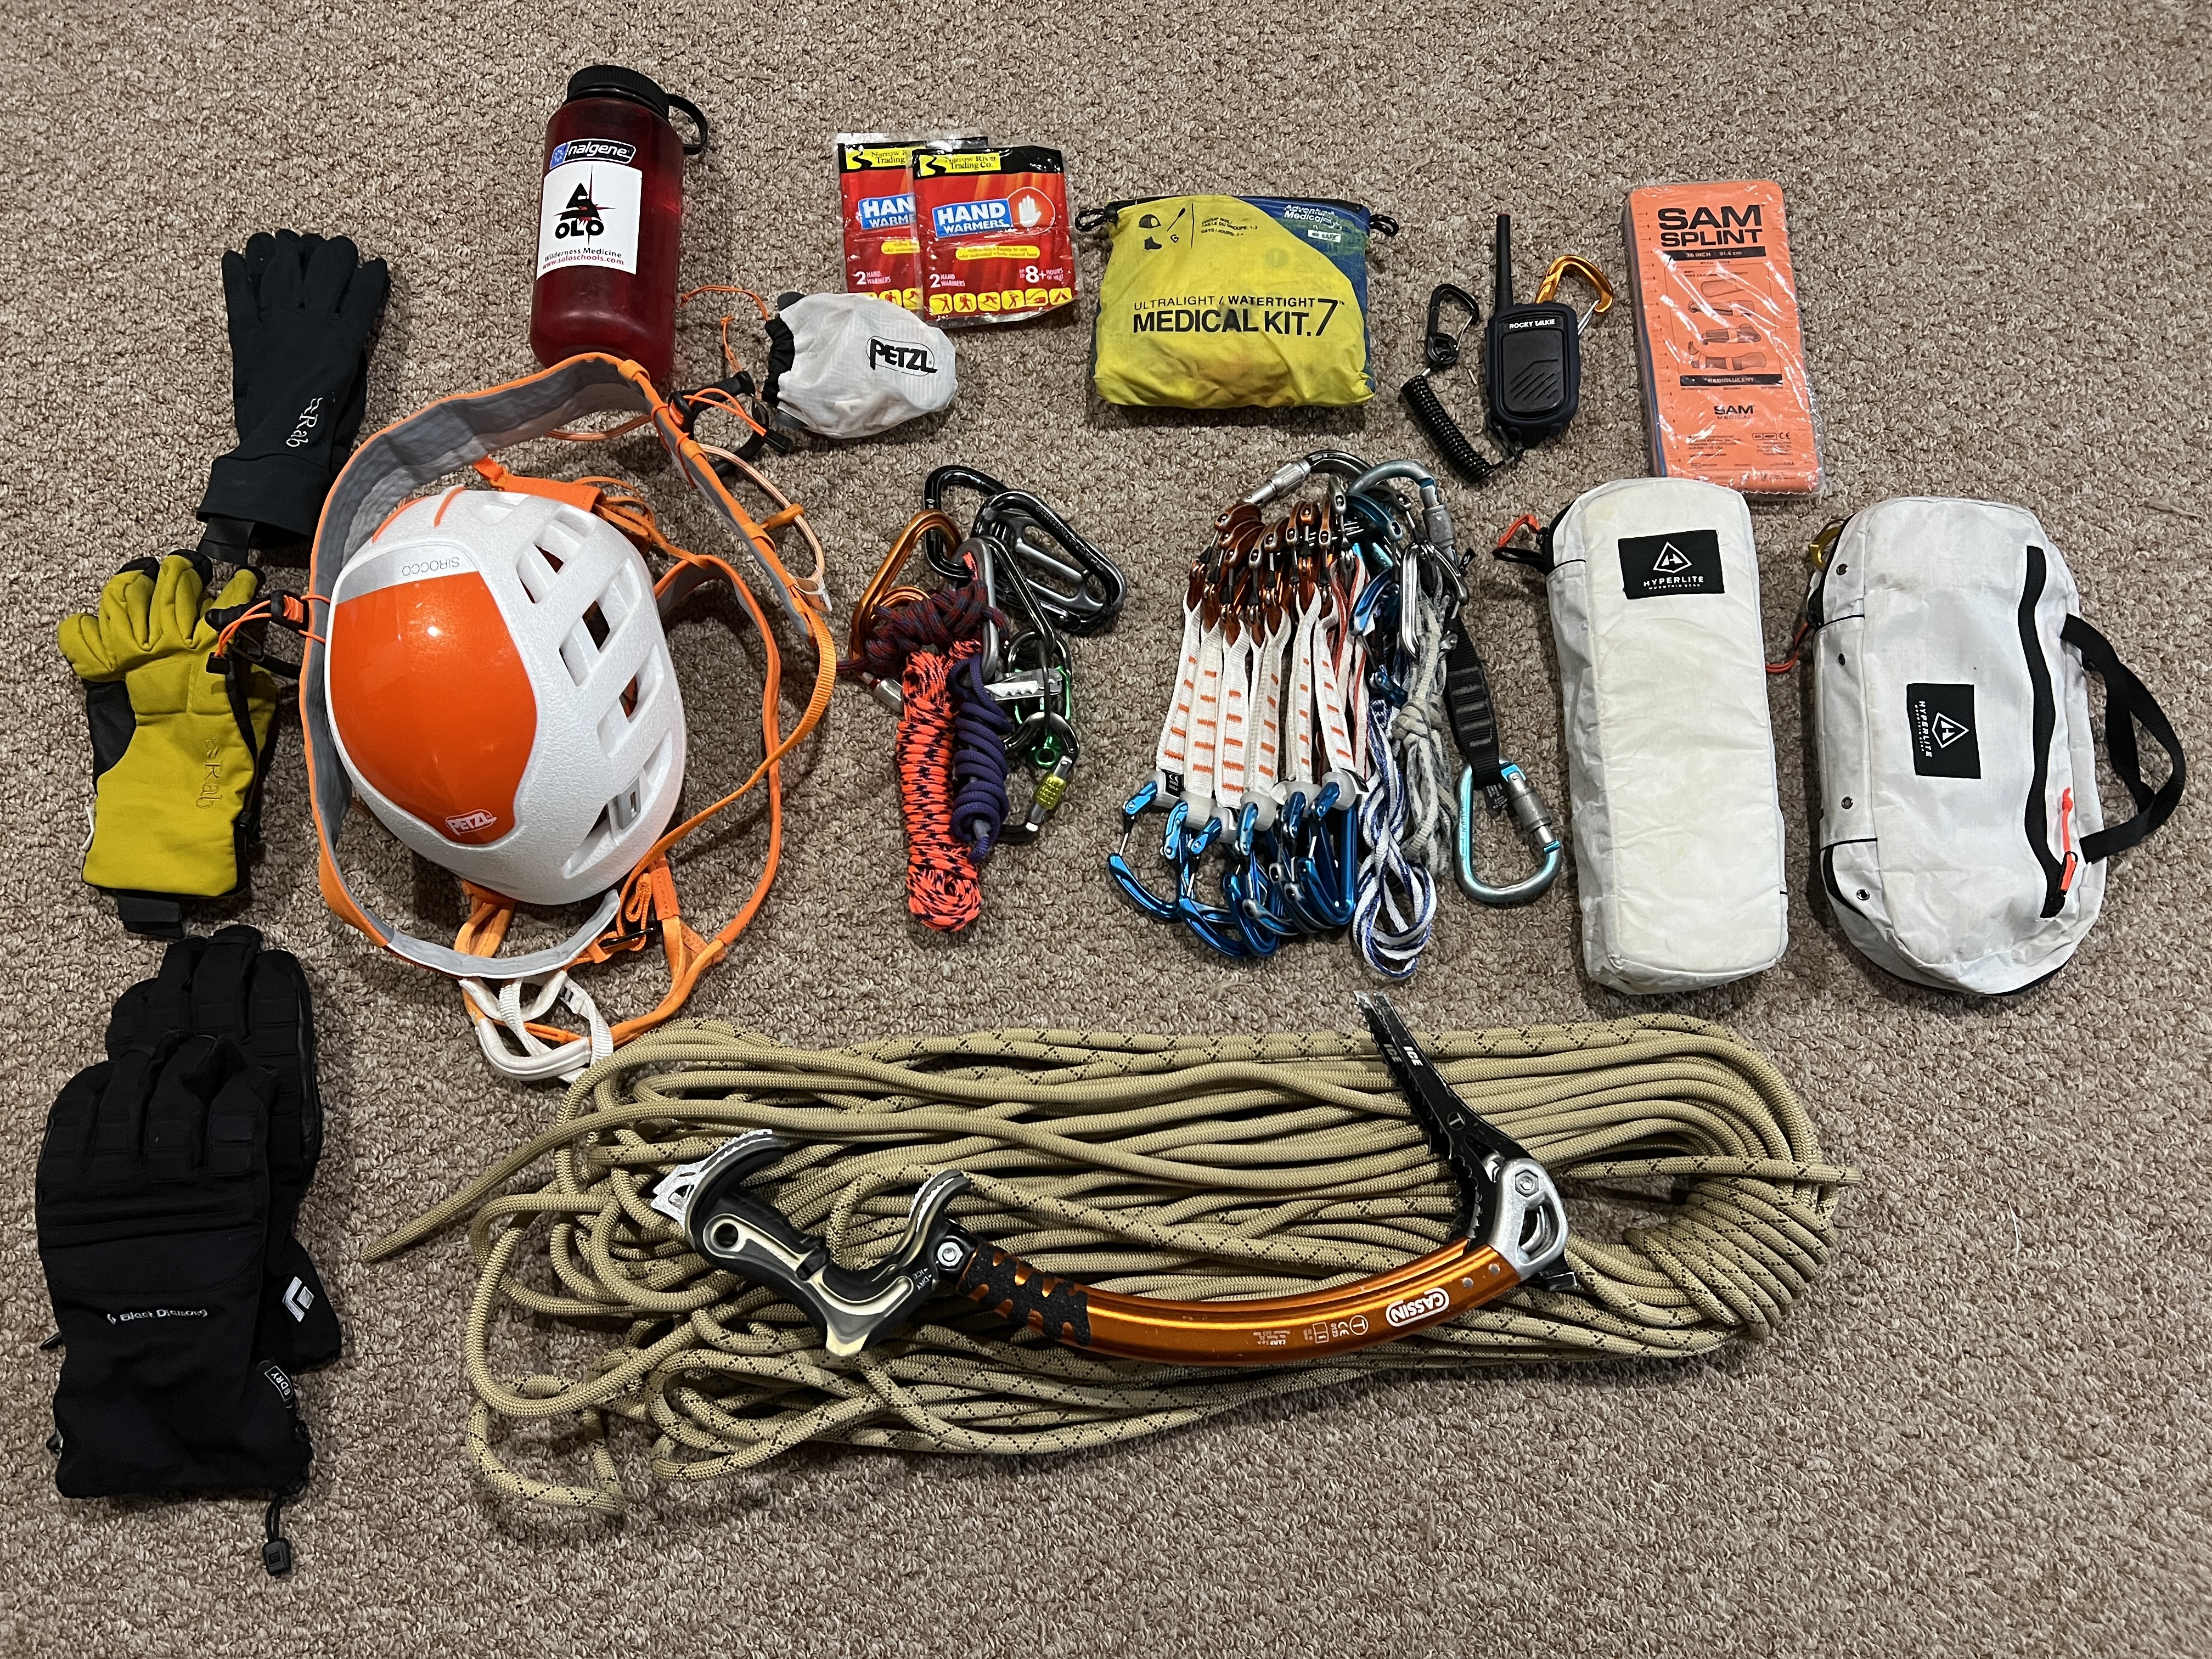
While the New England ice climbing season is off to a bit of a sluggish start a follower recently asked if I had a gear list for what I take ice climbing. Thanks for the inspiration for this post Kyle! I’m going to list items in the order that I usually pack my pack.
I’ve tested over a dozen packs specifically designed for waterfall ice climbing and this pack has held onto my #1 spot for best ice climbing pack. You can find my full review of this pack here.
If there is any chance of mixed or liquid precipitation I prefer the reliability of a synthetic insulated belay parka, and the Patagonia DAS Parka is an industry leading choice.
If there is zero chance of encountering mixed or liquid precipitation I prefer the warmth and packability of a down insulated belay parka, and for that the Rab Mythic Ultra Jacket is an excellent choice.
If it is wicked cold out I’ve been known to pack a second light puffy so I can “double up” on my belay jackets. Conversely, if it’s really mild out I might just up for carrying a lighter puffy then the two jackets I mention above. For that the Black Diamond First Light Hybrid Hooded Jacket is a great choice. You can find my recent detailed review of this one here.
I typically only carry one 32 ounce wide mouth water bottle for most ice climbing day trips. I do not use any type of insulated parka to keep it from freezing. I just pack in above my belay jackets and close to the small of my back. In the coldest of temps I have never had it freeze when packed up against my back. If I want something with more flavor then water I reach for some of my Skratch Labs stash. If it’s a really cold mission, or a really long day, I also pack an insulated water bottle with some Borvo Broth. This stuff really tastes amazing and is an excellent mid-day energy refresher!
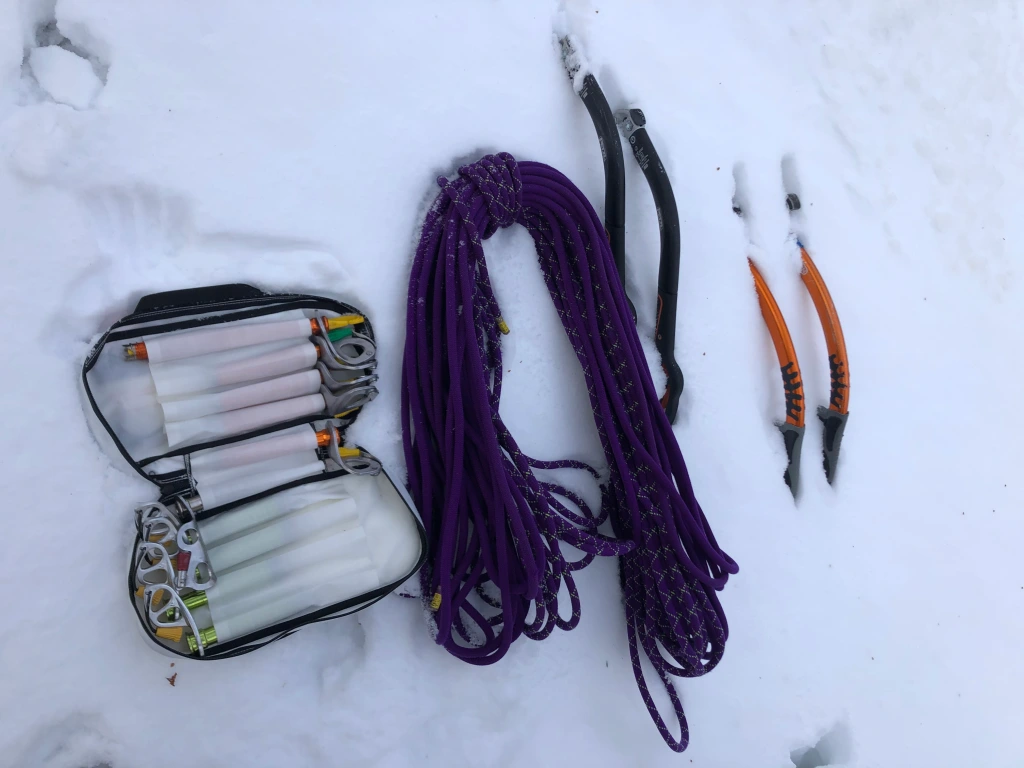
This case is perfect for packing and protecting my ice screws. I’ve used Petzl and Black Diamond screws for over two decades of ice climbing with few complaints. This season I have swapped out almost my entire rack for a set of the new Blue Ice Aero Ice Screws. I’ll have a review out on these as soon as Mother Nature brings the ice back into condition. For sizes my typical set up is one 22cm, eight 13cm, and one 10cm. If heading to the bigger ice at Willoughby I will add four 17 to 19cm screws. I carry a Grivel Candela V-Thread Tool which conveniently nestles inside my 22cm ice screw. In the zippered pocket in the ice screw case I have some zip ties and the allen wrench for my CAMP USA X-Dream Alpine Ice Tools.
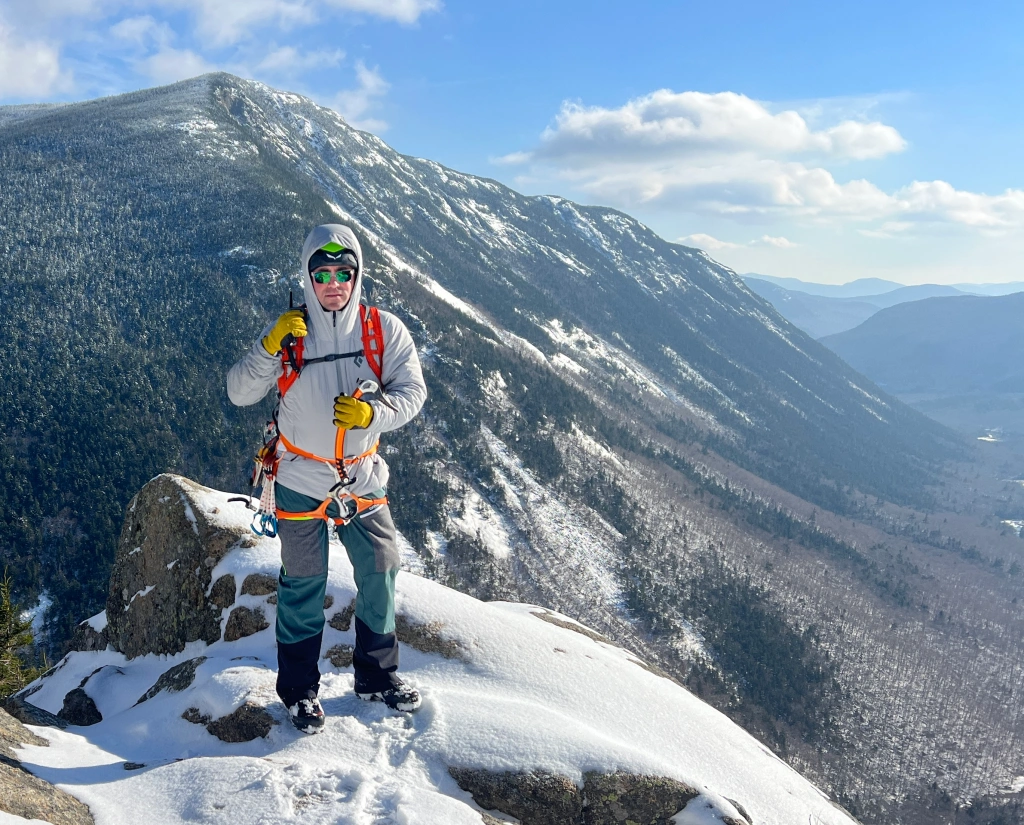
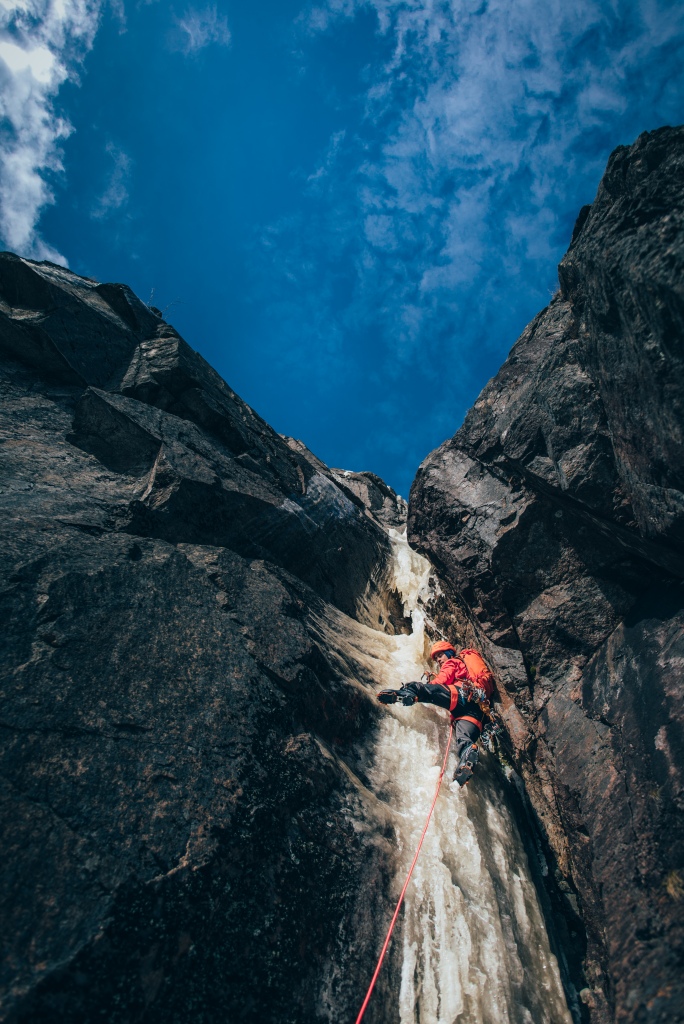
Author on Black Pudding Gully, WI4 – photo by Brent Doscher
Next I stuff my warmer Black Diamond Guide Gloves in. It has to be heinous out there for me to end up switching into these beasts but I won’t risk not being able to keep my hands warm in the winter so these get packed even though I rarely wear them. I do most of my ice leading wearing CAMP USA Geko Ice Pro Gloves and Rab Power Stretch Pro Glove Liners.
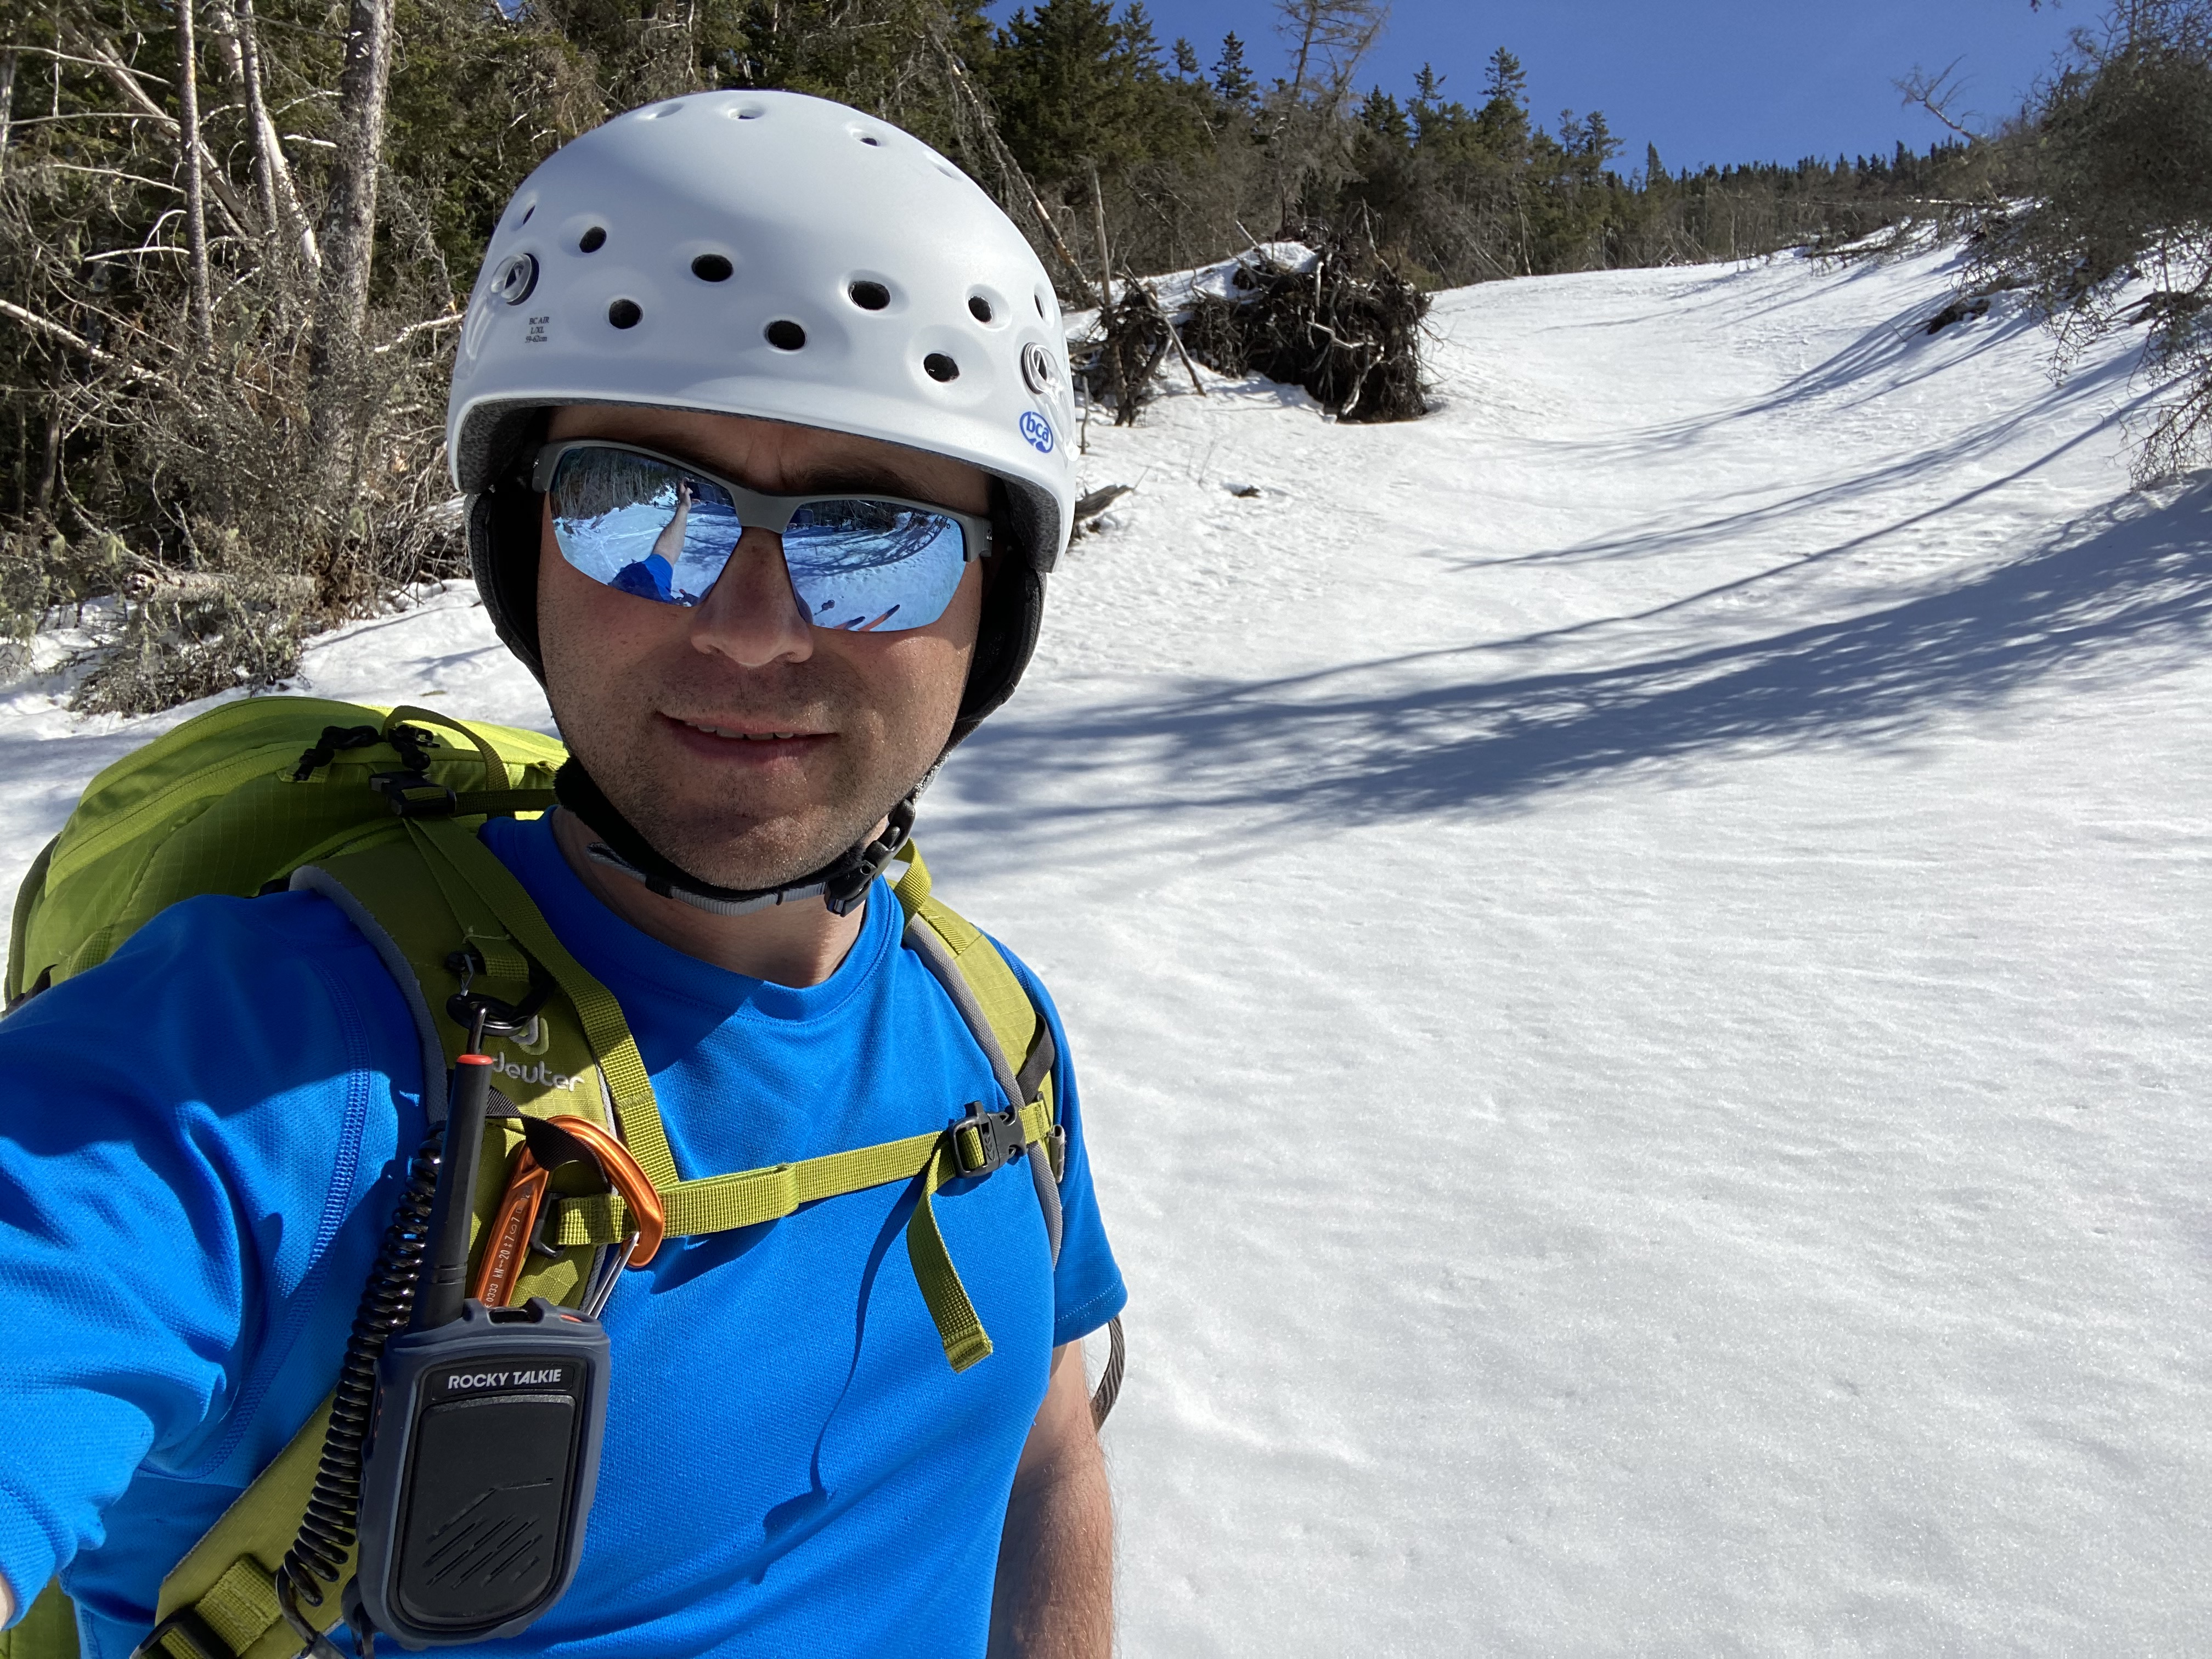
November 25th, 2023 early season ice mission into Tuckerman Ravine, Mount Washingon
In the top pocket of my pack I stick my Petzl IKO Core Headlamp along with some hand warmers, my snacks and food for the day. And since I know you are wondering what my favorite on mountain food choice is I’ll share that hands down the best food to take ice climbing is left over pizza from Flatbread NoCo!
For a rope I prefer the Sterling Rope Fushion Nano IX 9mm by 60m rope. It’s a triple rated rope (single, twin, half) so it is ideal for guiding two clients on multi-pitch ice. I have two of them in the bi-pattern.
While I already mentioned it above my ice tools of choice are the CAMP USA X-Dream Alpine Ice Tools. You can find my original in depth review of these tools here.
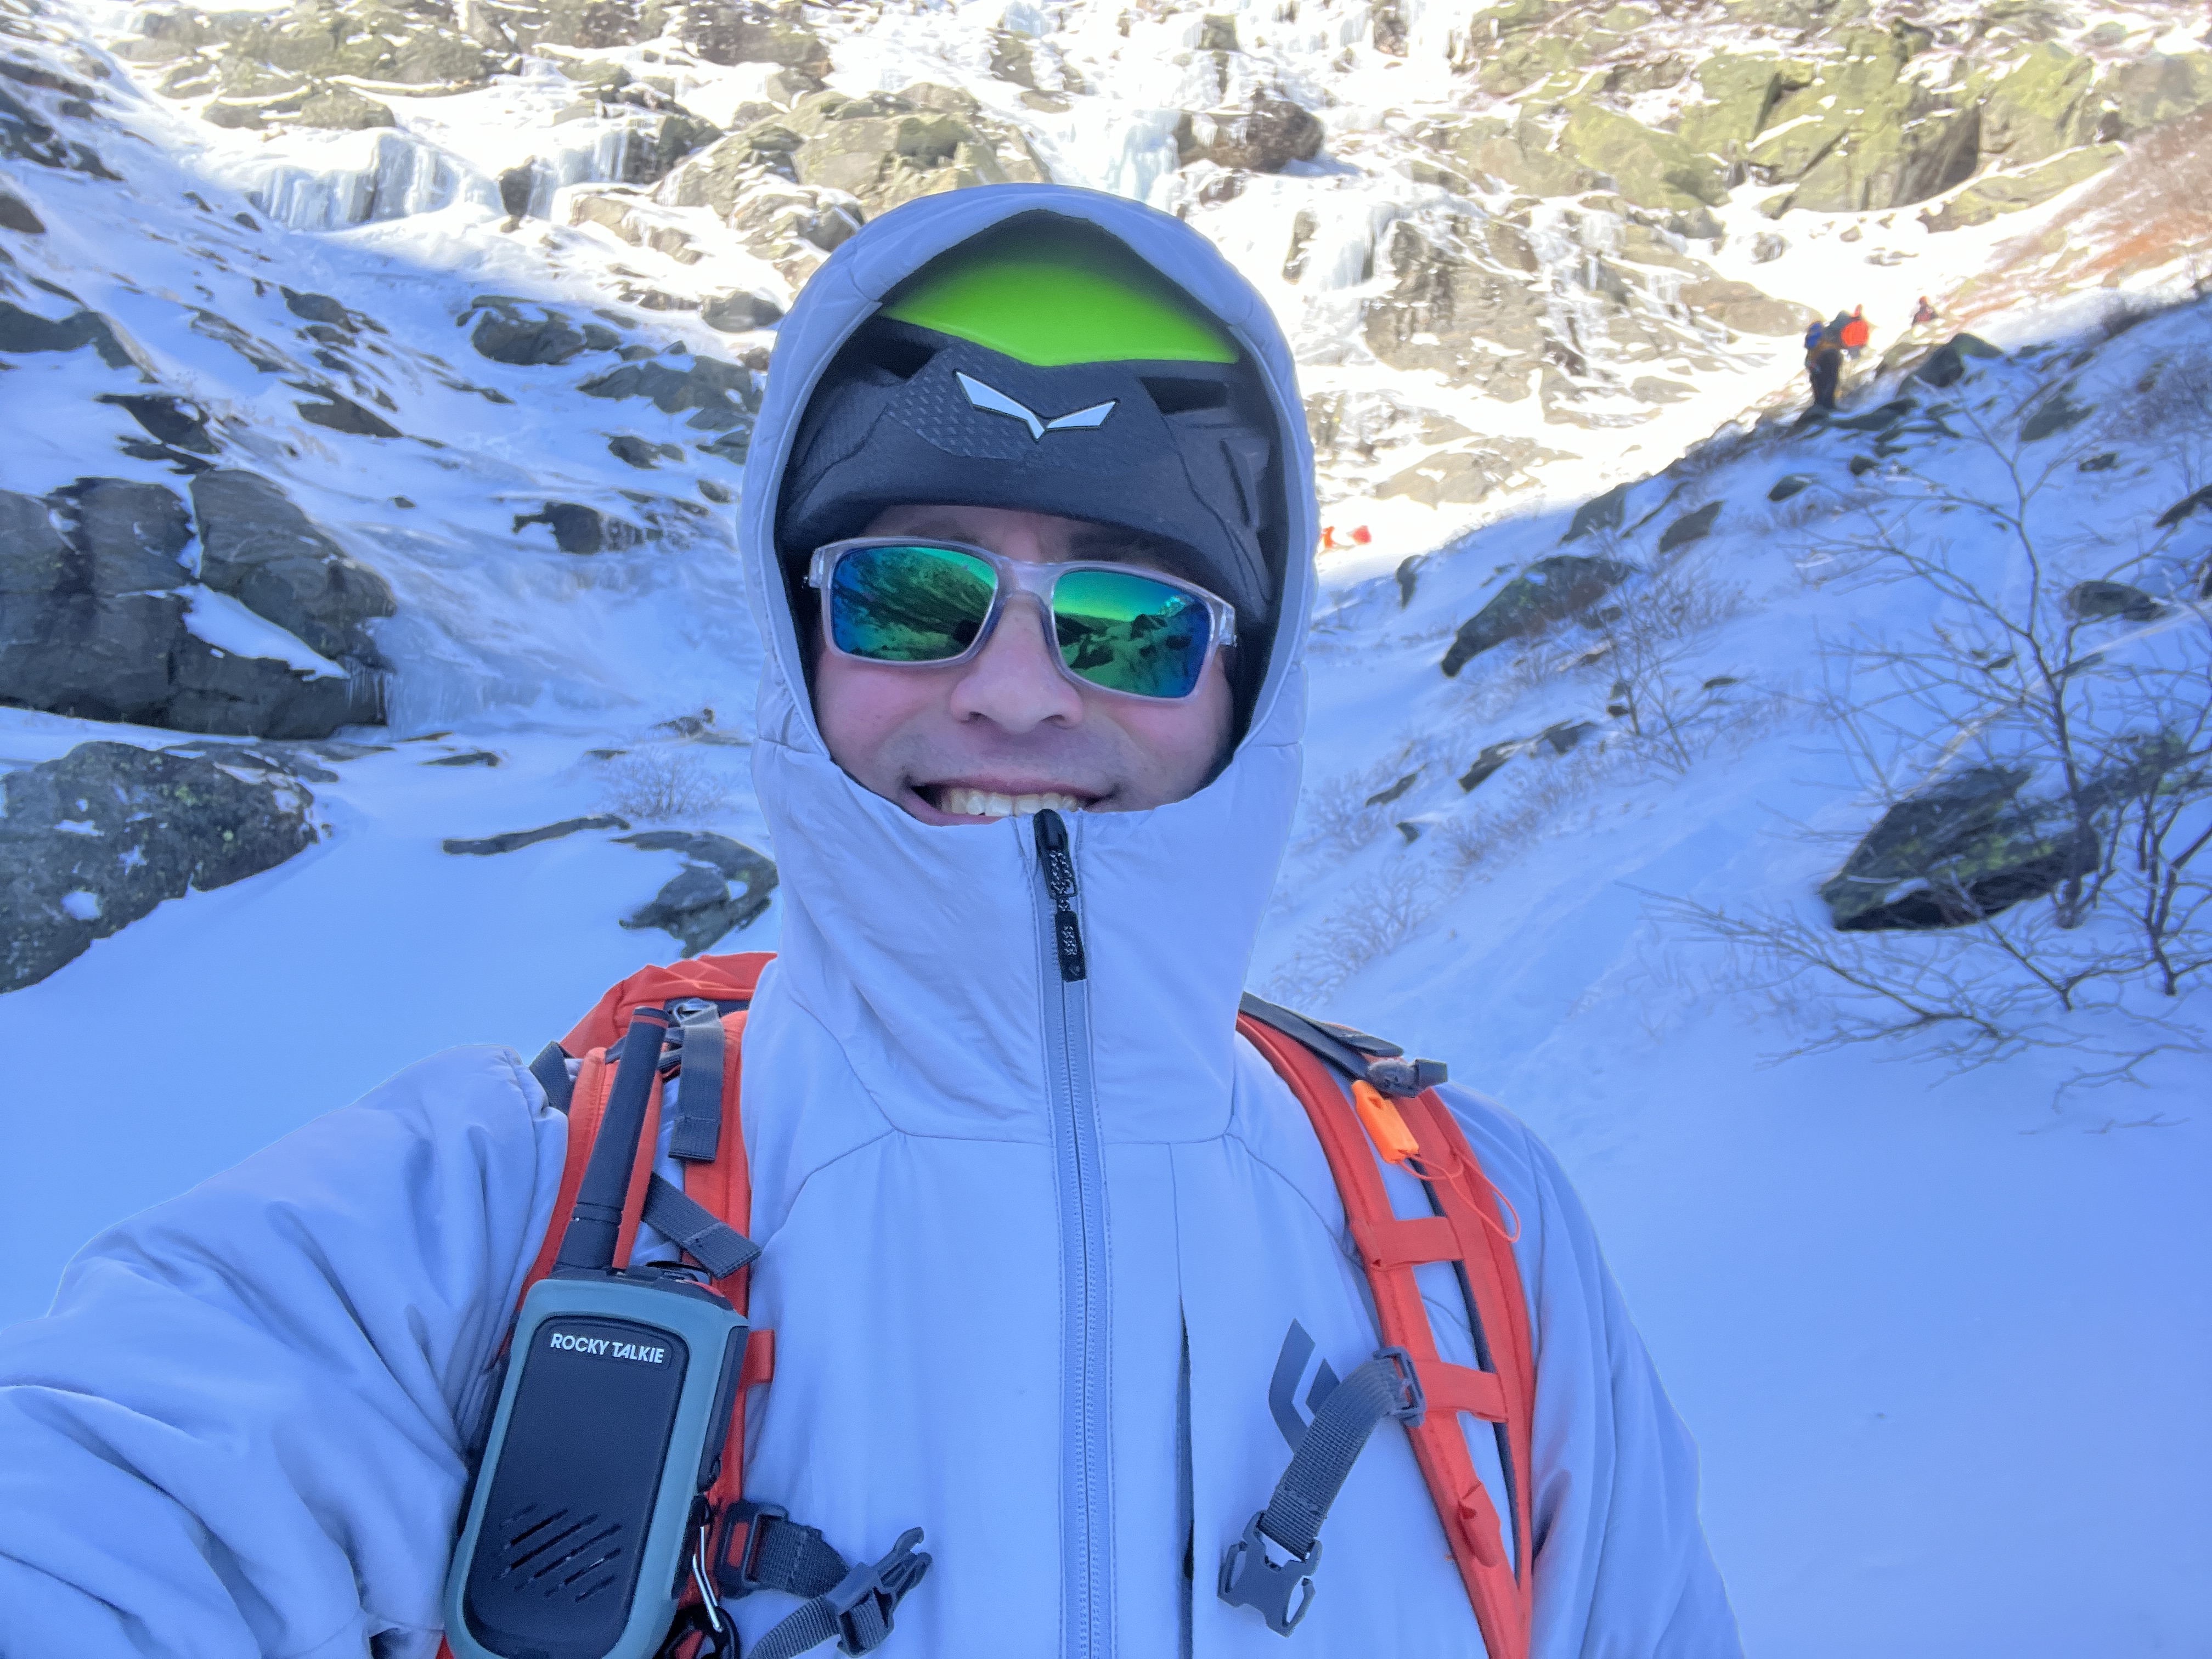
Finally on the outside of my shoulder strap I clip my Rocky Talkie Mountain Radio. If you’ve been following me for awhile you know I’m a huge fan of these radios. They make climbing & skiing so much better than it was before. Did you know you can get ten percent off of them with code “AlpineStart10”?
Links above are affiliate links. That means if you make a purchase from an online retailer after visiting those links I will earn a small commission at no additional cost to you. These commissions keep this blog afloat. Thank you.
Well that pretty much sums up what I pack for a day of ice climbing in the White Mountains of New Hampshire. I can go into my clothing system in another post if there is interest. Did I miss anything? What do you bring that I don’t? Got any questions about anything in my kit? Please comment below if you do have a question or if you found this post helpful in anyway. Temperatures are finally getting colder so I’m hoping to get out later this week and actually use this gear for what it is intended for!
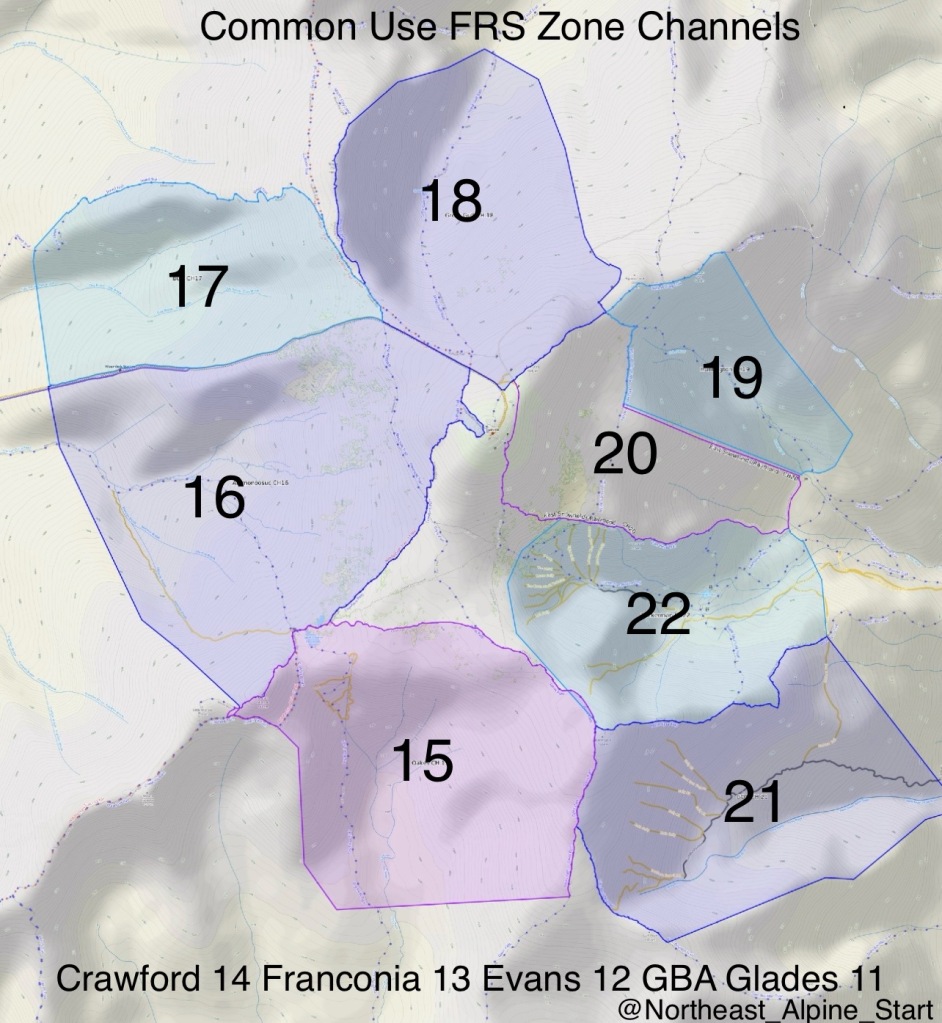
With the welcomed increase of backcountry travelers using FRS and GMRS radios for internal group communication it is time we utilize a “Common Use Zone” system to improve group to group communication in the most popular zones of our region.
Modeled after the Utah Avalanche Center’s “Group to Group Radio Channel Initiative” this system would be for these intended uses:
Intended Uses & Radio Protocols:
A way for riders to communicate with people within their party and more importantly communicate with potential groups below and above you and your group.
To send a distress call to your group and other parties to aid in self rescue and to alert of potential threatening avalanche hazards.
To ask for someone to call 911 to mount an organized rescue, when 911 can’t be reached directly on your own.
Radio communication between partners at areas of safety
Radio communication regarding potential hazards, snow and avalanche information
Radio communication when you and your group are clear of a given line or area
Radio Communication between you and your group:
Radio communication between partners at areas of safety
Radio communication regarding potential hazards, snow and avalanche information
Radio communication when you and your group are clear of a given line or area
General communication
Radio Communication between multiple groups:
Route selection and timing to avoid riding directly above other groups
Radio communication regarding potential hazards, snow and avalanche information
Radio communication when your group is clear of a given line or area, alerting other groups of a clear run-out zone
General communication
Here are some examples of the types of communication you might share or hear on these common use zone channels:
“This is Sarah on channel 21 reaching the ridge via the south snowfields. With no signs of instability and inconclusive hand shears our party of three is heading over to the top of Main Gully”
“This is Mark on channel 20, we just pulled out a small wind slab on our approach into Left Gully. Due to poor visibility we are transitioning here and dropping the bottom third of Left in a few minutes.”
“Mayday, mayday, mayday. This is Lisa on channel 19, we have a medical emergency near the base of Yale Gully. We are unable to raise 911. Does any one copy?”
The use of these radios does not take the place of solid decision making and carrying a Personal Locator Beacon like the Garmin inReach Mini 2 that can initiate a rescue if outside of both cell phone service and the limited range of FRS/GMRS radios.
It’s important to understand that most FRS radios are single channel monitoring. Some GMRS radios can monitor two channels simultaneously but may require a license.
The Common Use Zone Channel List*
Tuckerman Ravine
FRS/GMRS Channel 22
Gulf of Slides
FRS/GMRS Channel 21
East Snowfields & Raymond Cataract
FRS/GMRS Channel 20
Huntington Ravine
FRS/GMRS Channel 19
Great Gulf
FRS/GMRS Channel 18
Burt Ravine
FRS/GMRS Channel 17
Ammonoosuc Ravine
FRS/GMRS Channel 16
Oakes Gulf/Dry River
FRS/GMRS Channel 15
Crawford Notch
FRS/GMRS Channel 14
Franconia Notch
FRS/GMRS Channel 13
Evans Notch
FRS/GMRS Channel 12
GBA Glades
FRS/GMRS Channel 11
*No CT or Privacy Codes (0)
In order to send and receive traffic on these channels from other groups you must ensure your radio is not using a CT/DTS privacy code. Check your radio’s user manual on how to turn these privacy codes off (or set to zero).
Rocky Talkie 5-Watt* FRS/GMRS Radio My pick for professional mountain guides, avalanche course instructors, search & rescue teams 10% off with “ALPINESTART10”
*Due to using over 2 watts of power of the Rocky Talkie 5-Watt* FRS/GMRS Radio requires licensing with the FCC. The process is quite simple online, took me about 30 minutes to complete, and cost $35. Detailed instructions how how to obtain a license can be found here. The above links are affiliate links which means if you purchase a radio through these links I will earn a small commission at no additional cost to you.
I’m hoping this suggestion becomes widely adapted by our backcountry community. Since a growing percentage of backcountry travelers are already carrying radios it makes good sense that we improve the overall communities safety by adapting a common use zone list like this.
ZONE MAP STICKERS! $2 each!
3 x 3 inch stickers of the zone map pictured above are available! Put one in your field book and on your skis or board! $2ea., free pickup in Conway, NH, or $1 S&H. Venmo preferred. Please include local pickup or shipping address with payment.
Yesterday I posed the question, “What are the conditions that promote the growth of Surface Hoar”. There were many correct answers. Let’s dive a little deeper into the conditions and take it beyond the level 1 understanding.
In my AIARE 1 avalanche courses I teach students to remember the three “C’s” that promote the growth of surface hoar.
Cold- Unsurprisingly it needs to be below freezing (32°F, 0ºC) for surface hoar to form.
Clear- The mechanisms that drive the growth of surface hoar require rapid radiative heat loss from the snowpack. This only occurs on clear nights. Cloud cover has an insulating effect on the earth and pretty much prevents the type of heat loss needed for this process to occur.
Calm- Surface hoar crystals, once formed, are vulnerable to moderate wind speeds. The ice forms have very little horizontal strength, and if you find a pocket of decent sized surface hoar you can test this easily by getting close to the crystals and giving them a hearty blow of air from your own lungs.
That is pretty much the level 1 type knowledge I instill in my students. Now let’s dive deeper into other important considerations that contribute to the snowpack’s ability to form surface hoar.
Humidity & Dewpoint– Basically surface hoar is winter’s equivalent of “dew”. There must be a high level of humidity (over 70%) in the air right at ground level.
Air movement– Since the crystal growth of surface hoar is removing vapor (moisture) from the air as it grows that moisture must be replaced for the crystals to keep growing. The air movement required is so light that an observer would record “calm” for wind speed.
Temperature Inversion/Gradient– A strong inverted temperature gradient is needed right at the snow surface. This gradient is best achieved by the rapid radiative heat loss scenario promoted by cold clear nights. Even a light breeze will remove this ground level inversion and inhibit growth.
Now that we’ve gotten the sciencey weather stuff out of the way let’s get into some practical terrain considerations for the topic.
Sheltered/Lee– Since we know any noticeable wind inhibits surface hoar growth we can expect to find it in areas protected from the wind, i.e. lee.
Canopy– Because surface hoar requires rapid radiative heat loss any tree canopy will inhibit growth. Surface hoar is often found in clearings that are not obstructed by any tree cover.
Aspect– It is reasonable to assume northern aspects may be more likely to grow surface hoar as they are colder aspects. In areas with predominant west winds (White Mountains) you may have more luck finding surface hoar on your North to East aspects.
Elevation– Since above treeline conditions rarely promote the growth of surface hoar this weak layer is more common below treeline, and in the right conditions middle elevations.
Slope Angle– Surface hoar has what is called “anisotropic” structure. What this basically means is it is strong on the vertical axis and very weak on the horizontal axis. This property is the main reason it is such a reactive weak layer when buried by new snow. Its ability to withstand gradual increases in load until it reaches its breaking point is why in certain snow climates it’s the primary issue for human triggered avalanches. It is also why you would not expect this in steeper start zones. In the rare case of this forming on a 40 degree start zone of an alpine gully any cohesive snow that falls on top of it will quickly overwhelm its horizontal strength. Field observations show this is a common layer for remotely triggering avalanches on flat terrain. Twenty five degree rollovers are also commonly triggered on surface hoar.
Slope Shape– Research shows that concave slopes inhibit growth. This is due to the reduced radiative heat loss on concave slopes. Conversely, convex slopes may see more progressive growth as they can accelerate rapid radiative heat loss and a stronger surface left temperature gradient. Yet another reason convexities on a slope are common trigger points.
Proximity to Water– Because the ground level humidity needs replenishment you can often find this growing next to creeks, streams, and steam “vents”. These “vents” are pretty cool, even on a negative temperature day if you stick your thermometer in one of them you’ll find the air temp hovering around freezing (32°F, 0ºC).
Snow Climate– The prior mentioned weather conditions are most common in Continental (Rocky Mountain) snow climates. Surface hoar can, and does, form in any snow climate, but it’s most prevalent in Continental snow climates.
Local Examples– I have found a few places in Mount Washington Valley that I consider “surface hoar farms”.
The most reliable spot I have found is just south of the trestle cut at the top of Crawford Notch where some sheltered steam vents on the west side of the tracks often have surface hoar crystals around them. Unfortunately the railroad is active this winter and no trespassing signs are posted so I don’t recommend heading there.
The field just outside the AMC Highland Center has had some brilliant surface hoar displays over the years through they are usually short lived as calm clear weather doesn’t last long at the top of the notch.
The base of the Cog Railway has small slopes that have produced some of the largest surface hoar crystals I have ever seen in person, some up to 4 centimeters in size!
I’ll often find small pockets on the sides of the Tuckerman Ravine Trail but the spot on the east side of Mount Washington I’ve had the most luck is on the Summer Lion Head trail, right as the trail steepens and crosses an old avalanche path there are a couple small steam vents on the left side that have a clear view of the sky (thanks to old avalanche activity).
Summary– Well that’s about it for my brain dump on surface hoar. Hope you’ve learned something new about what is likely my favorite type of ice formation. For more reading you can check out The Avalanche Handbook. It’s where most of my information is derived and a great resource for those who really want to dive into the minutiae of avalanche formation.
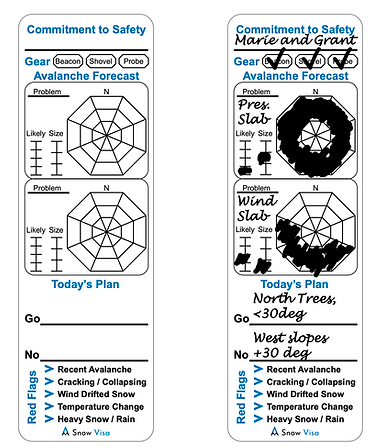
Learn more about this innovative snow safety tool here and enter to win one for free by clicking this link! Contest ends on at 8PM EST on 12/24/2023!
See you in the mountains,
Northeast Alpine Start
Affiliate links above support this blog. Purchases made through those links earn me a small commission at no additional cost. If you found this content to have value consider a small donation via Venmo or PayPal to support this blog. Thank you.
I’ve been testing the new Black Diamond First Light Stretch Hoody since early October and after a half dozen trips into the alpine with it I’m ready to share my thoughts.
TLDR Version: This is an outstanding addition to the “light puffy” market and I’m stoked to have this in my current rotation of outdoor clothes.
How I Tested: Two ice climbing trips to Mount Willard, an ice climbing trip into Tuckerman Ravine, two Mount Washington attempts (one successful summit, one bail at Lion Head due to very poor visibility and extreme winds higher)
Before I get into my personal opinions on this jacket let’s look at the manufacturer description and specifications:
Manufacturer Description:
The perfect layer for backcountry rock walls, big alpine faces, and frigid weekend ski tours, the Black Diamond First Light Stretch Hoody is the ultimate in dynamic four-season insulation that breathes efficiently and stretches with your every movement. The jacket packed with migration-resistant Primaloft Gold Active, maintaining breathability during even the most intense high-output pursuits. The 20D nylon ripstop face fabric and stretch liner resists weather and encourages full range of motion, while remaining incredibly durable through rugged talus, brushy approaches and daily use. Additional features include an adjustable, climbing-helmet-compatible hood, a low-profile, single-adjust hem and a highly packable design that stuffs into the internal stretch mesh pocket and clips onto your harness, all your needs are covered. Fit and overall design has been entirely overhauled for 2023.
PRODUCT FEATURES
Migration-resistant PrimaLoft® Gold Active Insulation
20D nylon ripstop face fabric with PFC-free DWR Technology
Lightweight, stretch lining for added breathability
Mapped insulation throughout body, shoulders, and arms
Adjustable, climbing-helmet-compatible hood with drawcord adjustment
Underarm gussets for added range of motion
Low-profile, single-adjust hem
Stows in internal left hand pocket with carabiner clip loop
Two concealed-zip hand pockets
Primary fabric is Bluesign approved
ECO Label Status
Fit: Regular
Claimed Weight: 14.29 ounces
November 25th, 2023 early season ice mission into Tuckerman Ravine, Mount Washingon
Personal Opinions:
The “light puffy” has become a staple in my winter outdoor clothing scheme. My biggest requirements in a quality piece are; high warmth to weight ratio, high breathability, high packability, decent water resistance, wind proof, well fitting. The Black Diamond First Light Stretch Hoody checks all the boxes!
High Warmth to Weight Ratio: Black Diamond uses mapped PrimaLoft® Gold Active Insulation. Primaloft® Gold is one of the best synthetic insulators available with a CLO value of 0.92, which is roughly equivalent to the warmth of 500 or 550 fill-power down and achieves 98% thermal efficiency (and still retains heat if it gets wet, unlike down). The nylon shell fabric is lightweight and soft to the touch, allowing for the whole jacket to weight less than a pound. For a synthetic insulated hooded jacket this is quite impressive, so I give this a 5/5 in the warmth to weight ration category!
High Breathability: The biggest test of the breathability of this jacket came yesterday as I was breaking trail in thigh deep new snow from tree line to the summit cone on Mount Washington. Temps were 6 degrees Fahrenheit (-14 Celcius), winds were around 40 mph (64 Kph), and the wind chill was about -23 Fahrenheit (-30 Celcius). The uphill battle was slow going and a bit exhausting. I needed more than my base layers and soft shell jacket to stay comfortable but I was working pretty hard. I pulled this on over my soft shell and kept working uphill thinking I’d likely start to overheat soon and need to take it off. That didn’t happen and I reached the summit with it still on. So it is definitely breathable. I didn’t take it off until I was back to tree line and out of the wind for the quick walk back to the trailhead.
High Packability: While similar down jackets can pack smaller I prefer the extra insurance of synthetic for my light puffy jackets and only have one big down parka these days that is always in my pack for the most arctic of trips. Despite being a synthetic hooded jacket I am impressed with the Diamond First Light Stretch Hoody ability to get small. Without much coaching it will pack into it’s own zipper right side hand pocket at takes up just a little more space then your standard wide mouth Nalgene water bottle.
Decent Water Resistance: Black Diamond uses pretty standard PFC-free DWR Technology to give this jacket some water resistance. I was only exposed to a little dripping water on a warmish ascent of Hitchcock Gully earlier this year and as expected any drops that hit me just rolled off the fabric. Since it is a synthetic and not down I’m less concerned about how water resistant a light synthetic puffy is as I will still pack a hardshell if there is a significant chance of liquid precipitation on my trip.
Wind Proof: 100% this jacket is indeed windproof as I tested it in those 40+mph conditions I mentioned above. All I can really add here is I am impressed with how windproof the jacket seems while being so breathable at the same time. Must be the 20 denier fabric that Black Diamond used for the shell fabric, it just strikes the right balance in this regard.
Well Fitting: Ok I kind of saved the best for last here. I love the way this jacket fits and movies. Black Diamond says it’s a “regular” fit and while that means it isn’t supposed to fit like your tapered skinny jeans I don’t find the fit to be too bulky at all either. For my 5’9″ 185 pound frame the large fits over my skin layers and soft shell jacket perfectly. The length is perfect for tucking in under my climbing harness, and the stretchy panels under the arms keep in tucked in while I’m ice climbing and raising my hands far above my head often. The insulated hood is comfortable and well fitting with or without a climbing helmet on thanks to the drawcord adjustment. The fit is somehow technical while casual as I’ve found myself grabbing this jacket for everyday where and not just saving it for mountain missions.
Summary: The synthetic light weight hooded jacket is one of my favorite categories of gear to test. You can find many of my reviews of this style of jacket over the years on my review page. If your “light puffy” is ready for replacement or upgrade, or you have yet to add the “light puffy” to your outdoor wardrobe, I highly suggest you check the Black Diamond First Light Hooded Jacket out!
Affiliate links above help support this blog. When you make a purchase through one of those links the author earns a small commission at no additional charge to you. Thank you.
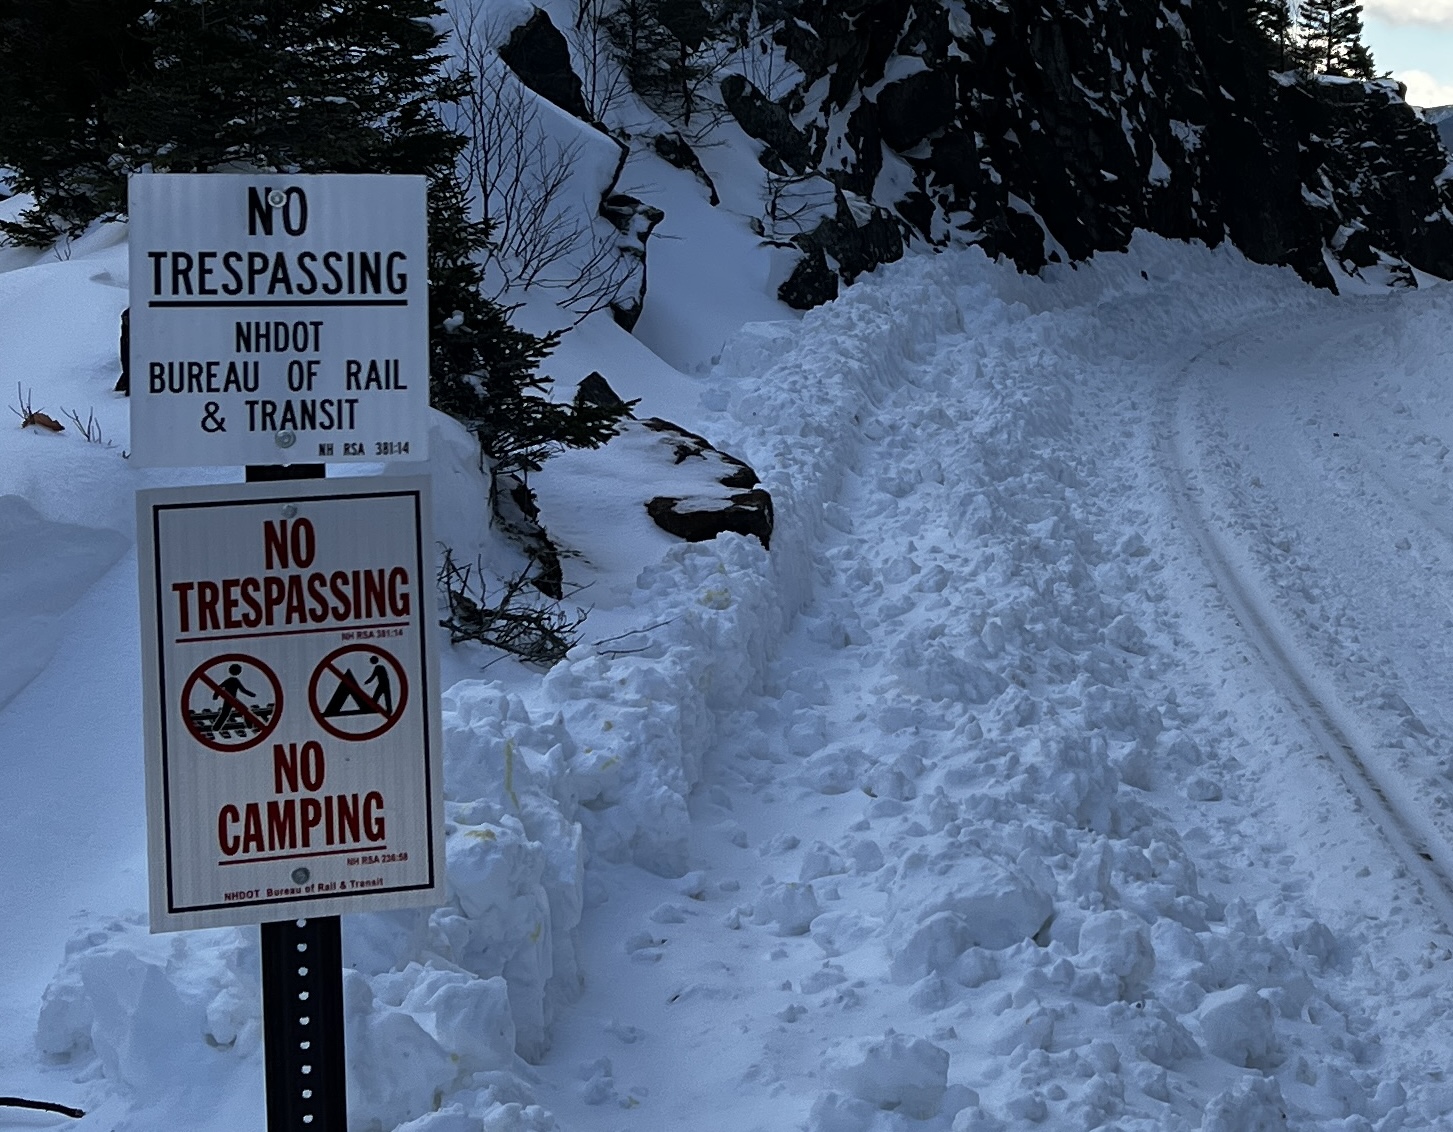
This winter the Conway Scenic Railroad will be running trains through Crawford Notch State Park. Despite a long history climbers being able to access the ice climbing in the area by conveniently walking along the train tracks this may change. Here is what you should know.
These signs refer to the state law regarding traveling on an active railroad. Specifically:
381:14 Criminal Trespass on Railroad Property. – Any person who enters or remains in a railroad station, upon the platform or grounds adjacent to a station, or upon any property of a railroad knowingly without license or privilege to do so, or a person who enters or remains upon or returns to said property in defiance of an order of a station agent or any police officer shall be guilty of criminal trespass as provided in RSA 635:2.
Simply put, you could be charged with a misdemeanor and end up with a fine.
I have heard talks will be happening between parties who this would effect, likely guide services, snowmobile rental companies, and the NH DOT and NH Department of Tourism to see if a solution could be worked out that is amicable to all parties involved, including recreationalists. Whether this speculation works out or not is to be determined.
In the meantime I have some advice on how we, as a climbing community, can not do damage to the efforts that are being started to protect our access to one of the greatest ice climbing destinations in the world.
First, BE COOL. I’ve already seen knee-jerk statements being made on social media. We don’t need to use language like “this battle”. It’s not there yet and hopefully won’t ever be. Don’t feel ENTITLED. Regardless of “what you’ve done for 10+ years”, NH has laws protecting private property owners rights. That’s life. Don’t blame it all on a land/business owner. There are state laws that supersede any decision a business owner might make about running their business.
Use approaches that minimize or eliminate any travel on the tracks
To that end I offer these maps to help you figure out the best way to get to the climbs you are trying to get to. First, for the southern area of Frankenstein (basically the Amphitheater and Lost in the Woods area) use the Frankenstein Cliff Hiking Trail, accessible from both the upper and lower parking lots.
DO NOT climb in the Trestle Cut Flows area this winter. These climbs are just too close to the tracks.
For accessing the northern climbs at Frankenstein (Hanging Gardens, Dracula, Standard Route) use the alternate northern approach shown on this map.
This approach, while you have to climb about 170 feet in elevation from the road, is actually quite a bit faster then the tradition approach along the tracks. It only takes about 15 minutes and puts you within .2 miles of the base of Standard Route. As soon as you can get off the tracks do so. For example, if heading to Standard Route take the approach up towards Hanging Gardens, then follow the climber’s path under Dropline, Penguin, and over to Standard.
DO NOT leave backpacks at the base of Standard Route. Ok, I’m going to climb up on a little soap box for a moment on this one. Why do people leave their backpacks at the bottom of a three pitch ice climb with a walk off? It has never made sense to me. After racking up for multi-pitch ice what is left in my backpack? My belay jacket. My food and water. My first aid kit. My headlamp. My extra gloves. Why would I leave this less-then ten pound backpack on the ground while I leave on a 2 hour adventure? You can climb Grade 3 ice with a backpack on. Trust me.
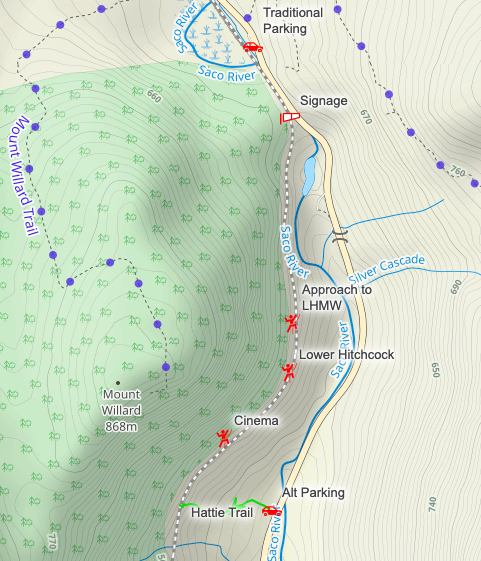
Ok, off my soap box and on to Mount Willard. This area is much harder to access without using the tracks. For the numbered gullies, Great Madness, and Cinema Gully, use the Hattie Trail approach shown on the map below. Like the northern approach at Frankenstein this is actually faster then the traditional approach from the climber’s parking lot at the top of the notch. You’ll have to gain about 300 feet of elevation from the road but it takes about 20 minutes and puts you within 700 feet of the base of Cinema.
The harder to reach climbs are unfortunately the most popular on Willard, Hitchcock Gully and Left Hand Monkey Wrench. There is just no real alternative to getting to these routes without significant time traveling along the tracks.
The purpose of this post is not stir any controversy or debate but to inform the reader of alternate options and behaviors that will hopefully reduce the possibility of any negative encounters with the railroad employees and climbers. My personal hope is that the railroad comes to see the sight of ice climbers scaling frozen waterfalls near the train as a selling feature for their passengers, something that adds value to the tickets they purchased. Just think about that 8 year kid with his face plastered to the train window when he spots a climber high up on Standard Route as the train passes through… he might just get inspired and grow up to become the next Zac St Jules.
Finally, the last thing we can all do this season is maybe spend a bit more time visiting OTHER climbing areas that don’t require legally questionable approaches. I know it’s been awhile since I’ve been out to Texaco Amphitheater and Arethusa Falls, both close by. I have never been out to Mount Avalon but I have friends that go there ever year. This is my winter to check that place out. The North End of Cathedral is often swamped but the nearby Barking Dog area just past Humphrey’s Ledge is pretty cool. Silver Cascade and The Flume are right across the street from Willard and offer lots of fun pitches of snow & ice climbing. I haven’t been to Grafton Notch yet either so I’m adding that to my list this year.
If you do choose to travel on the tracks do so informed that technically, it is illegal. Whether that will start being enforced or changed could largely be up to how any interactions occur between climbers and train employees. Smiles, waves, and politeness can possibly see us through this uncertain time while those who have a bigger seat at the table look for solutions. Patience and kindness. I hope this info helps.
Today only, Monday, November 27th, 2023, you can book an adventure or course with Northeast Mountaineering and save some serious moo-lah! Basically if you book one of these adventures today you get to bring a friend for free! I’m going to share exactly what programs are eligible and what the out of pocket cost per person would be if you decide to split this adventure with your adventure buddy, starting with the absolute best deal of them all!
AIARE 1 Avalanche Course $550 ($275pp)
Photo courtesy of Alexander Robert
This is by far the most affordable way this season to get this essential course for anyone looking to spend time in avalanche terrain touring, ice climbing, or mountaineering. It’s a three day course that covers a semester worth of information in a mix of class room and field sessions. This education hasn’t been this affordable since I took my first avalanche course two decades ago. Grab your touring partner and sign up for this today while we still have many dates available! Sign up here and use promo code “DAVIDNEM” to be able to bring your friend for free! Discount lodging at the NEM Bunkhouse is also available!
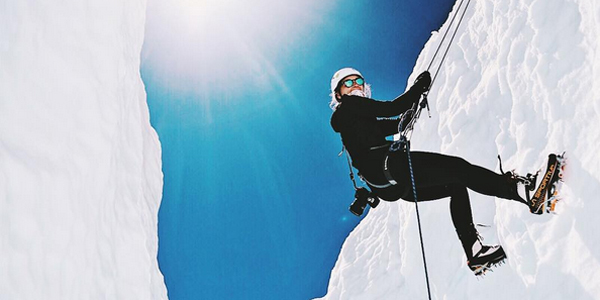
AIARE Avalanche Rescue Course $195 ($97.50pp)
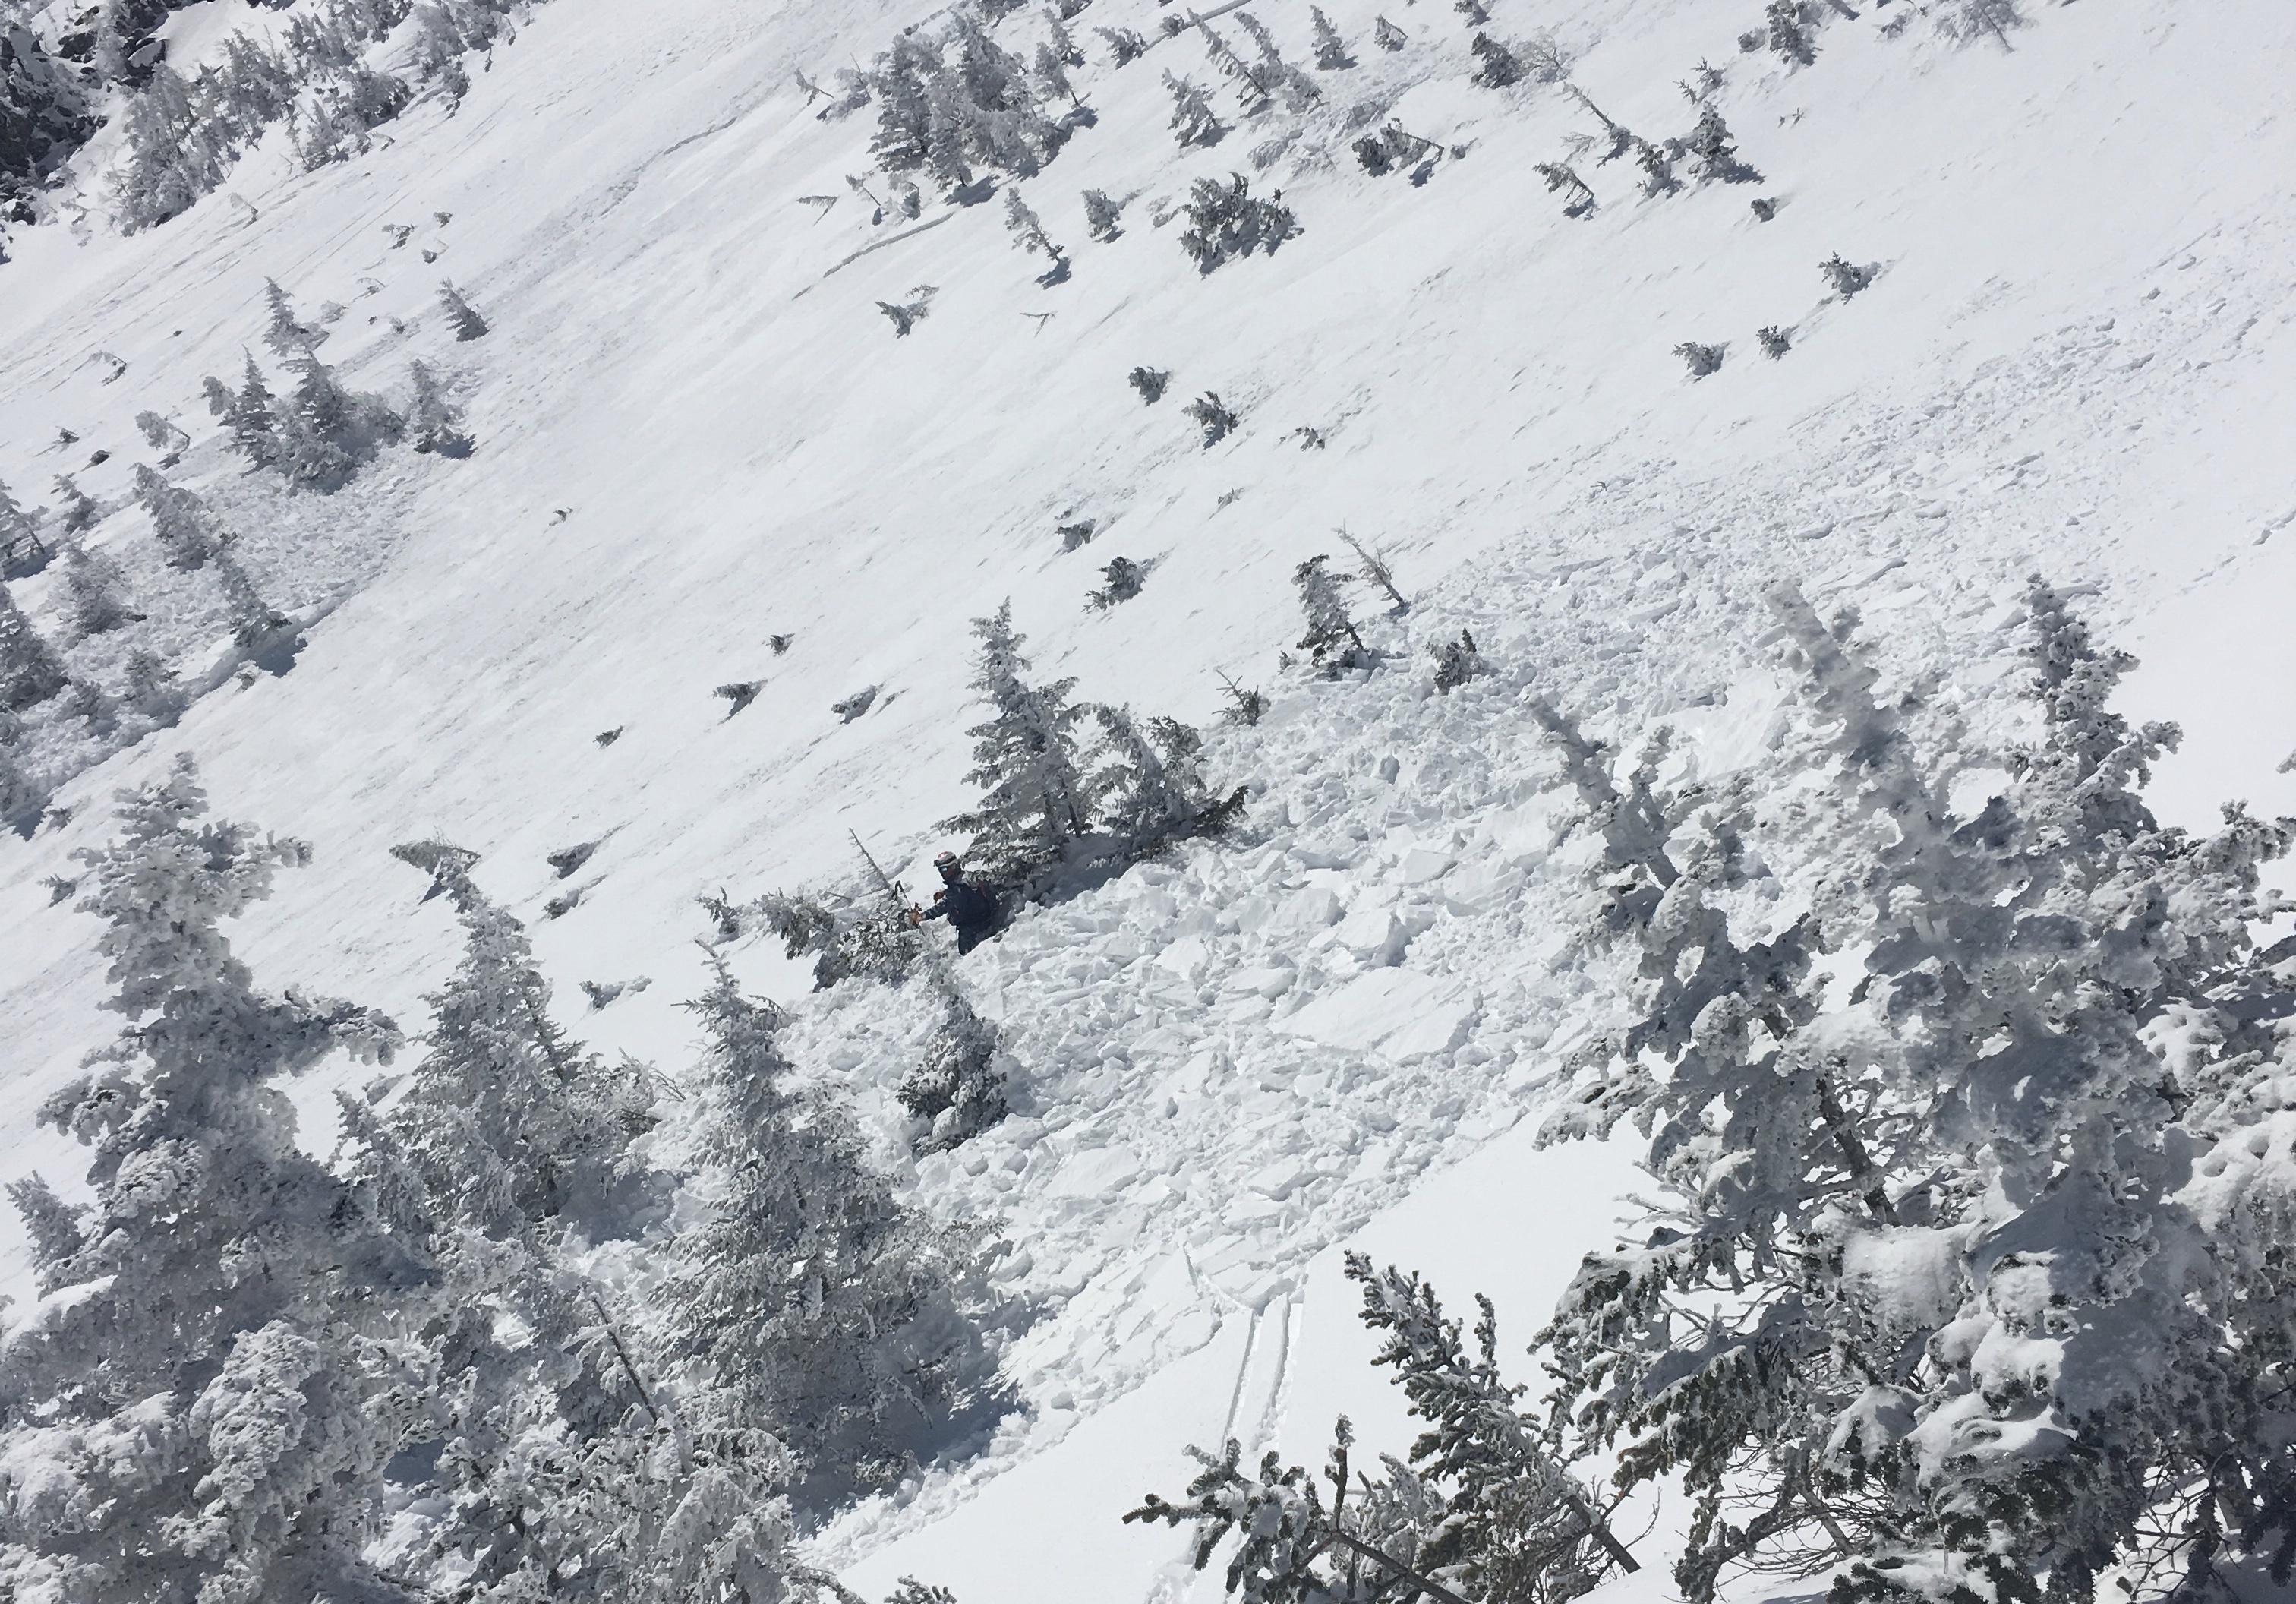
Buried to my waist in an avalanche I remotely triggered… this rescue went smoothly
This 8 hour course is for anyone who might venture into avalanche terrain. It is designed for anyone who has yet to take a formal avalanche course like the AIARE 1 mentioned above, anyone looking to take their AIARE 2 course listed below, or anyone who hasn’t refreshed their avalanche rescue skills in awhile. A little bit of classroom followed by a lot of in the field realistic avalanche rescue practice. Time and money well spent! We only have two dates open this season so don’t delay grabbing a spot for you and your partner here and use promo code “DAVIDNEM”. Discount lodging at the NEM Bunkhouse is also available!
Ice Climbing $325 ($162.50pp)
Author on Drool of the Beast (Grade 5), photo courtesy of Brent Doscher
Been curious about expanding your climbing season to the frozen months? Use this Cyber Monday deal to make it attainable! Book here and use promo code “DAVIDNEM”.
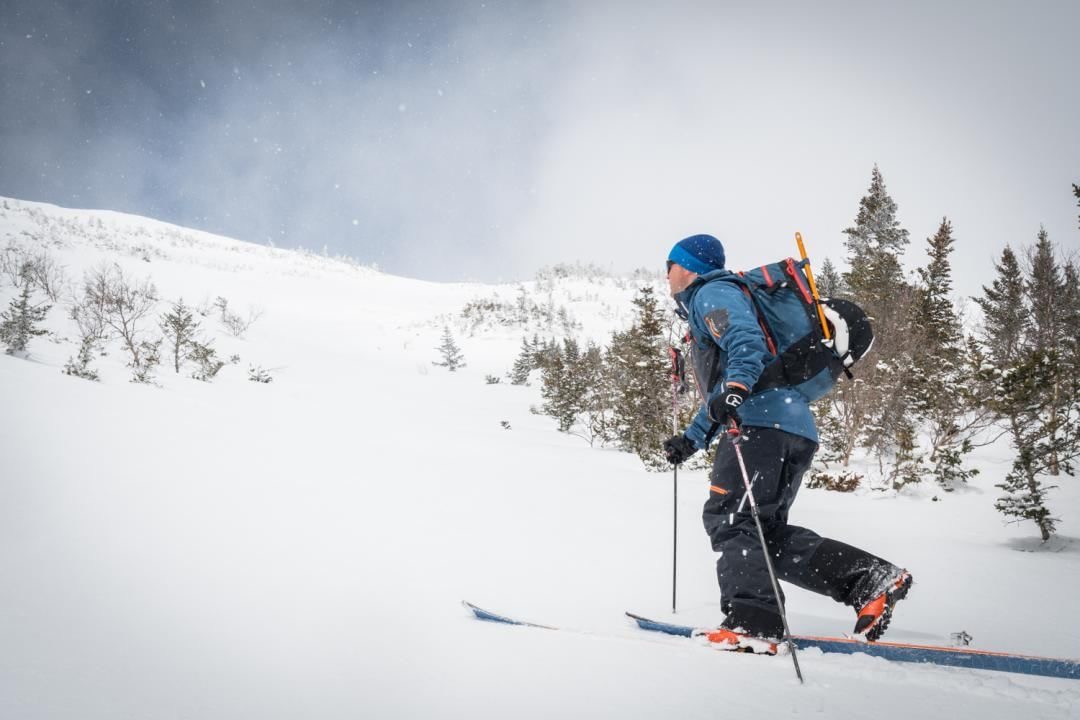
Introduction to Backcountry Skiing $325 ($162.50pp)
Photo courtesy of Erik Howes
Are you an expert skier at the resorts and looking to take adventure to the next level? Our backcountry ski skills course is jammed packed with necessary skills to get your shredding the pow out of bounds and away from the lines. Skiing the backcountry is about freedom and adventure. Out here, you earn your turns – but as you will discover the uphill travel is just as rewarding as the downhill descent.
Participants need to be competent skiing intermediate [blue] terrain at their local ski hill. The outdoor portion of this course may be held at Pinkham Notch or in Crawford Notch if condition allow it may also be held at one of the local ski hills with an uphill policy.
Backcountry Ski Touring $325 ($162.50pp)
Photo courtesy of Corey Fitzgerald
Already have your basic backcountry ski skills dialed and looking to expand your skill set? This course is designed to get you into more involved terrain like the more advanced Granite Backcountry Alliance glades and areas like Gulf of Slides, Tuckerman Ravine, Burt Ravine, etc.
This course is for the proficient backcountry tourer who wants to work on some more technical skills like snow anchors, roped/glacier movement, rappelling, and more to access the most difficult of ski terrain.
One Day Mountaineering Skills Course $295 ($147.50pp)
If you’ve never worn mountaineering boots or practiced “self-arrest” with an ice axe this is the course for you. Learn the foundation of skills that will help you travel in the mountains during winter more safely and comfortably. This is an excellent course for those pursuing the winter 4000 footers!
Have some bigger mountains on your bucket list? You don’t need to travel out west to hone the skills needed to do so safely and efficiently. This course covers the rope skills used to manage risk on glaciers and includes learning about improvised hauling systems, mechanical rope ascension, and crevasse recognition and avoidance.
Ready to attempt the biggest peak in the northeast in winter? This summit attempt is more than just a climb of the peak. Along the way your guide will teach you about proper preparation, common cold weather injuries and prevention, avalanche awareness, navigation, and more. No prior winter hiking experience is necessary but good fitness is key. The one day Winter Mountaineering Skills course above is often booked before this course if you want to feel best prepared for the day!
There isn’t much! Just book at the direct links I provided today before midnight PST (3am Tuesday EST). Make sure you put “DAVIDNEM” in the promo code to receive the special deal. Booking through the website does not guarantee I will be your guide for the chosen adventure, though if I am available on that date I will be your assigned guide. You can reach out to me at the contact info below with your requested dates and I will get back to you by this evening. My winter season is pretty well booked so far but I do have some mid-week availability still.
This is the single biggest sale I have seen a guide service offer in recent years, so if you’ve been looking for a bargain on quality experiences and education, this… is… it!
CONTACT INFO: You can use the contact form at the bottom of this page to send me a message, or email me at nealpinestart@gmail.com, or message me through my Instagram
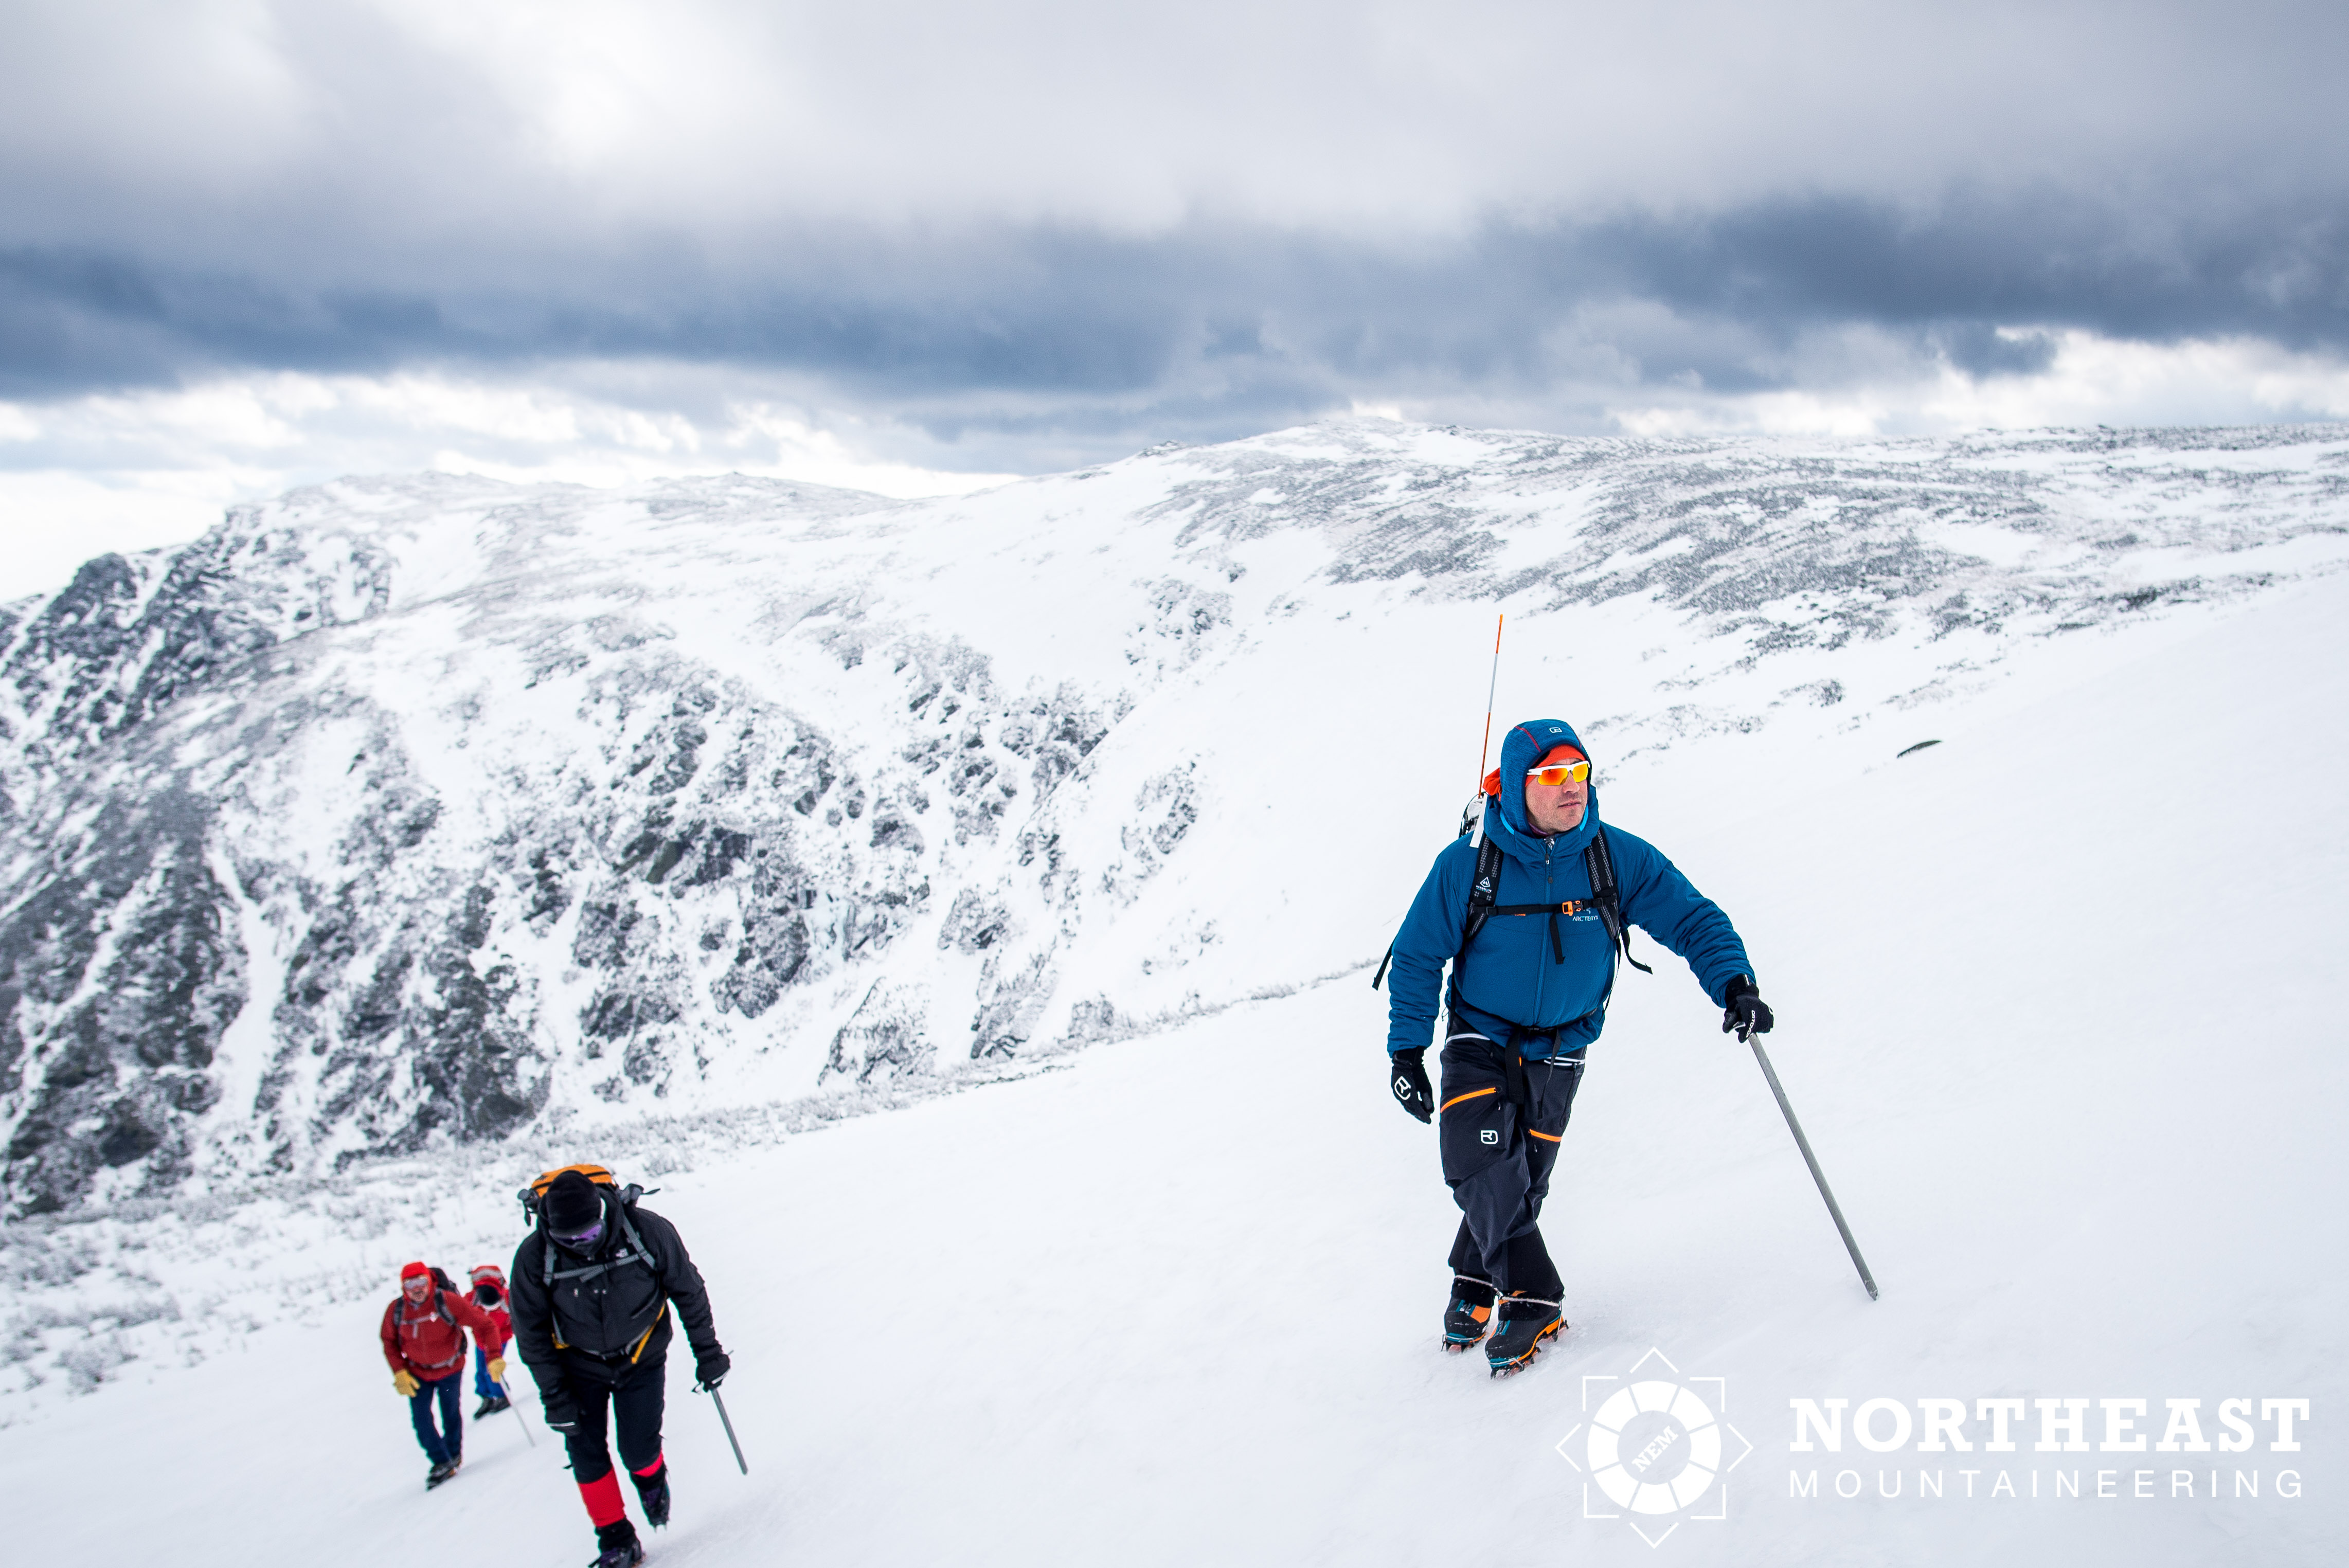
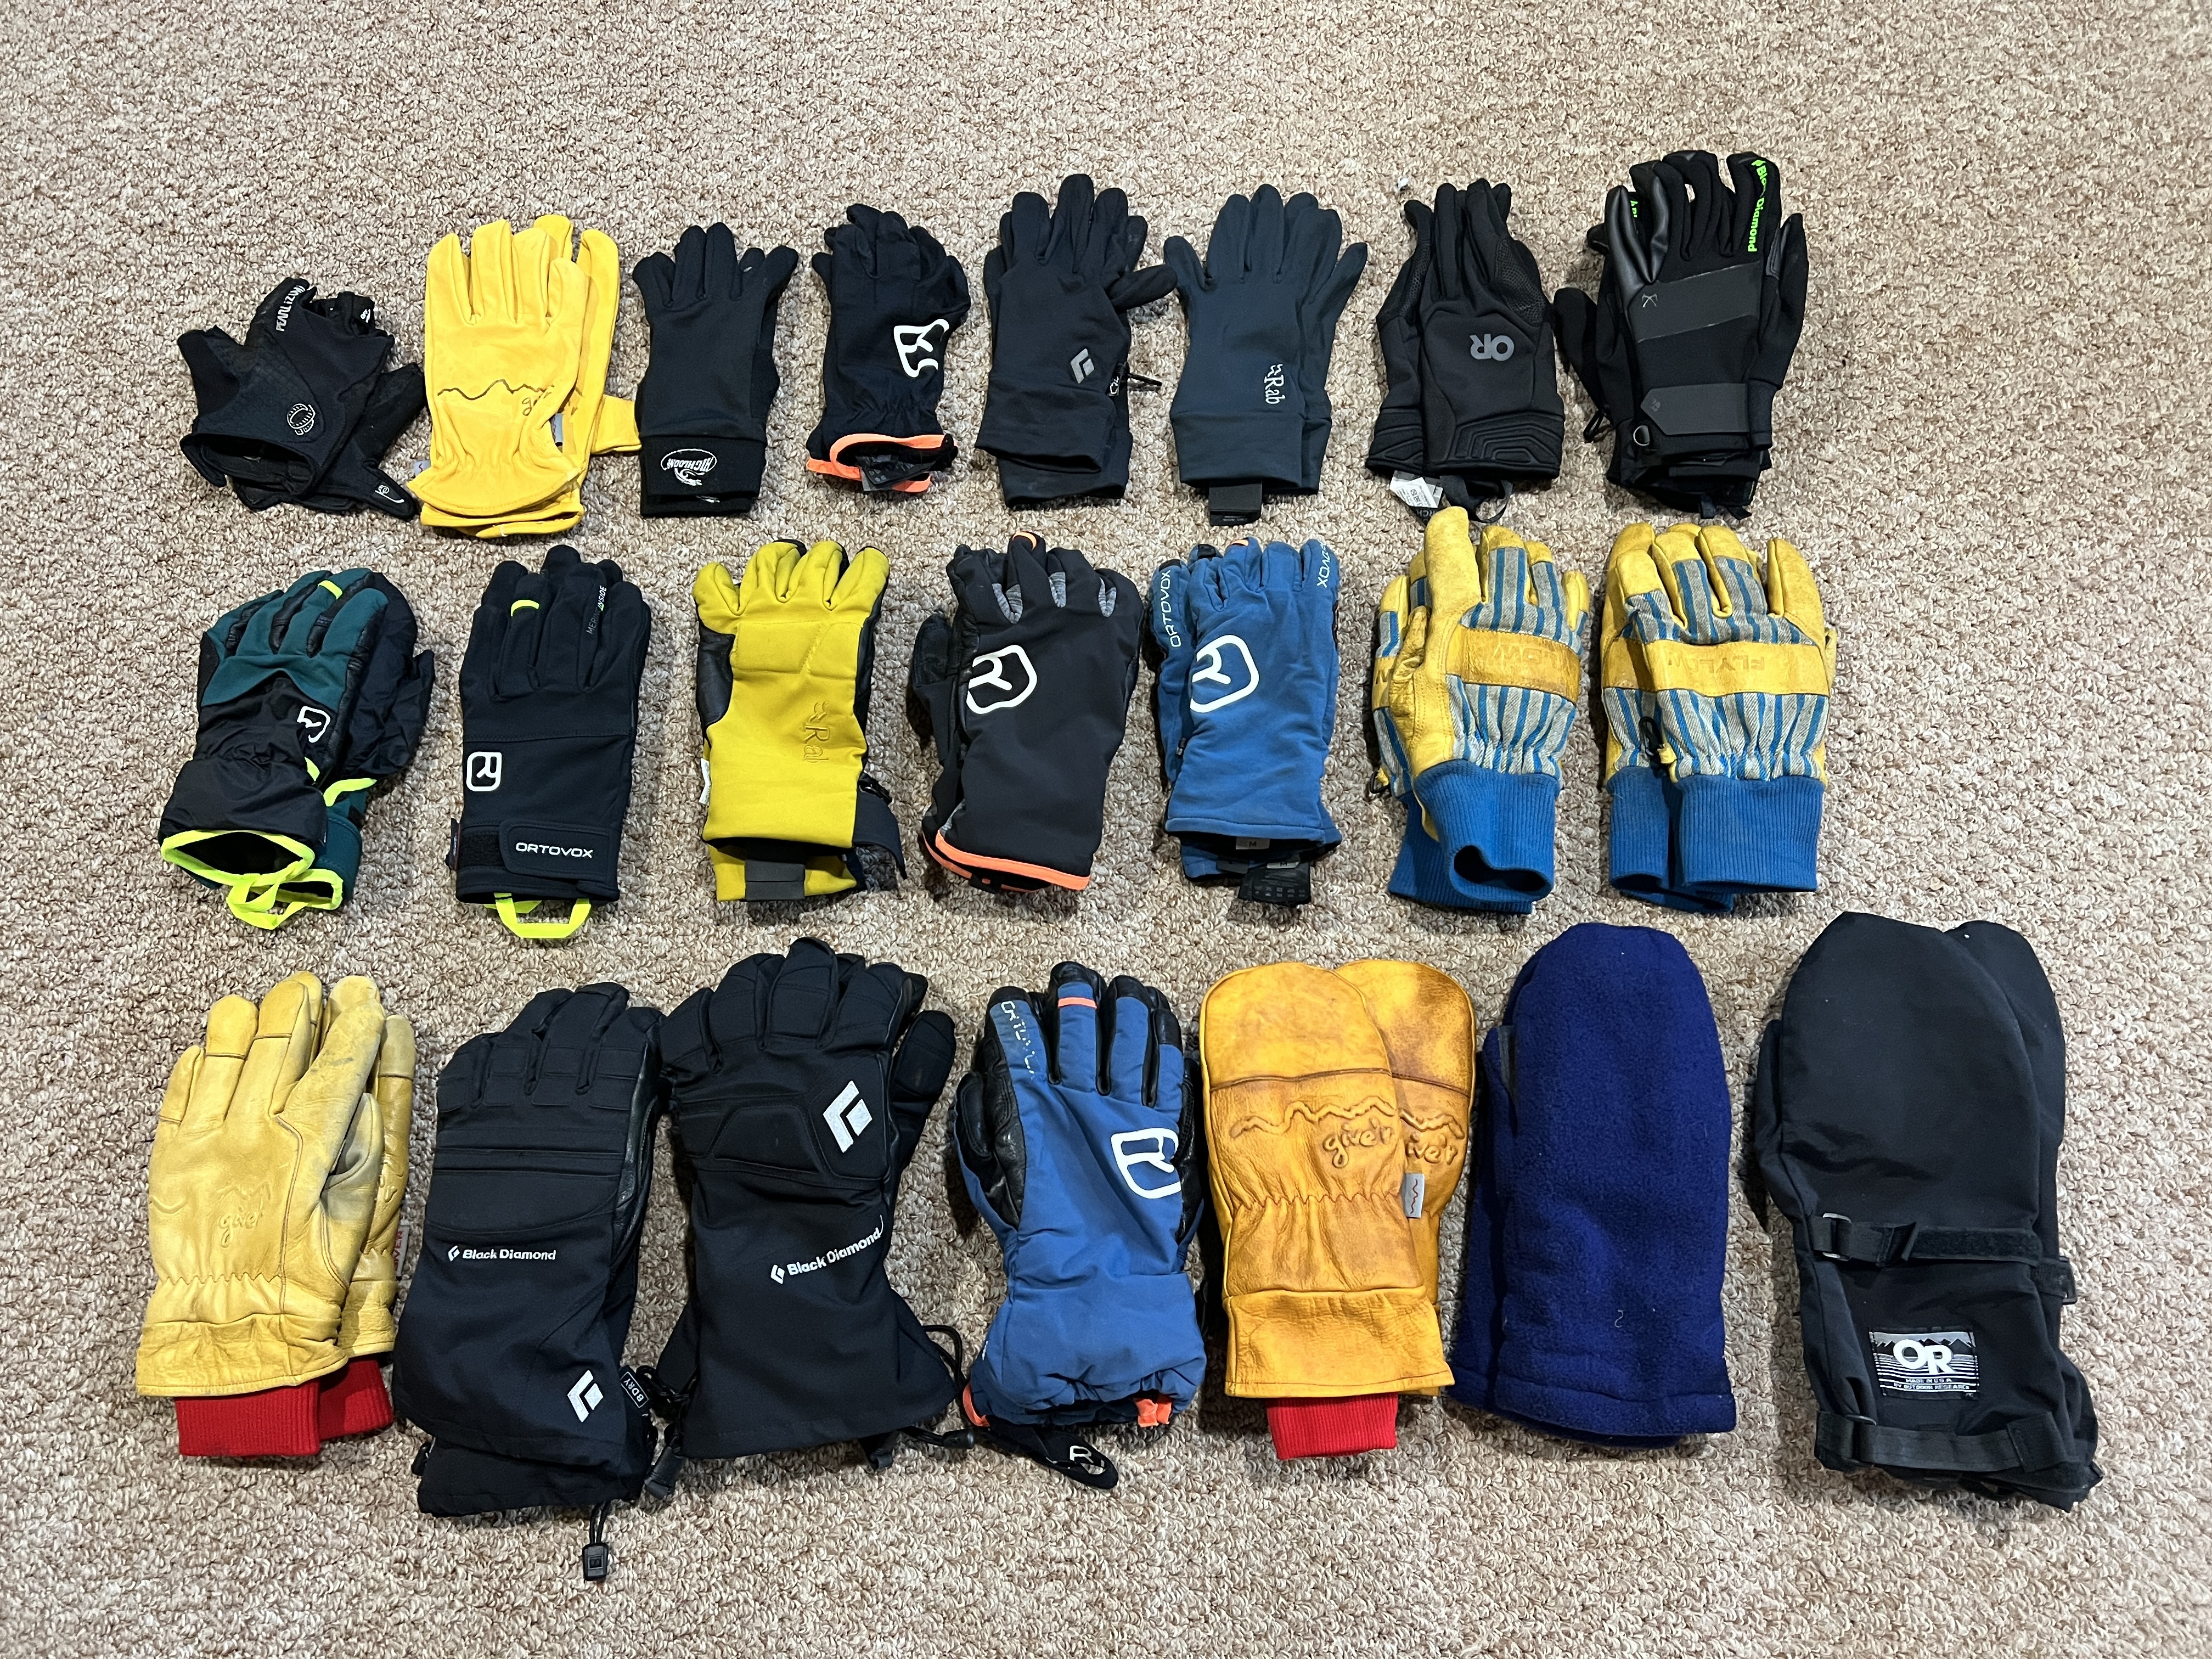
Every fall I do an inventory of my hand wear to be sure I’m ready for the upcoming backcountry touring, winter mountaineering, and waterfall ice climbing season. This year I figured I’d share my current collection and explain a bit about why I need 24 pairs of gloves/mittens. That’s right… 24 pairs!
Glove Liners– I wear glove liners on almost outdoor adventure. I make sure I have two pairs of serviceable glove liners year round. With all the sharp points related to ice climbing and mountaineering (and sharp ski edges) I expect to trash at least one pair of liners each year, so it’s good they are affordable! I was in need of a replacement pair this season so last week I picked up a pair of the Rab Merino 160 Glove Liners. This pair joins my Black Diamond Lightweight GridTech Liner Gloves and a pair of Ortovox 185 Rock’N’Wool Glove Liners to complete my glove liner inventory.
Technical Waterfall Ice Climbing Gloves– I prefer very dextrous perfectly fitting grippy gloves when leading waterfall ice. Handling ropes, placing ice screws, adjusting crampons… these tasks are more easily accomplished in specialized thin gloves. Currently I am rotating between the Outdoor Research Alibi 2 Gloves, the Black Diamond Torque Gloves, the RAB Infinium Axis Gloves, and the Ortovox Tour Light Gloves. To the surprise of many of my clients I actually wear one of the liners listed above under these snug fitting gloves. It improves the comfort especially with models like the Black Diamond Torque Gloves which can feel a little clammy without a liner.
Uphill Touring Gloves– For high output cold weather uphill skinning or hiking I prefer super breathable soft shell type gloves. My current favorite pair are the Camp USA G Comp Warm Gloves. What makes these so great is they have a built in insulated overmitt that is stored in a small pocket above the wrist. So they are super breathable and comfy on the up track and if you transition a little faster then the rest of your group you can hang out with the overmitts on to keep the tips of your fingers from going numb. I’m excited Ortovox has followed this design and I picked up a pair of Ortovox Tour Pro Cover Gloves for this season which join the couple pairs of Ortovox Tour Gloves I already have.
Downhill Touring Gloves– When it’s really cold and snowy out and you’re done burning calories on the ascent it’s time for the warm gloves to come out of the pack. I switch into these gloves for most descents, teaching avalanche courses about snowpack observations, practicing avalanche rescue skills, and occasionally snow blowing the driveway. I have two pairs of the surprisingly affordable Flylow Tough Guy Gloves. My fanciest pair of gloves are my Ortovox Merino Freeride Gloves. I also love the style and quality of the Wyoming based 4-Season Give’R Gloves. New to my inventory for this season is also a pair of the Ortovox Full Leather Gloves which fit and feel amazing!
Real Cold Ice Climbing & Mountaineering Gloves– For technical ice climbing and mountaineering on the coldest days I have two pairs of the Black Diamond Guide Gloves. As an emergency item and something I pack in my Search & Rescue pack I have some old thick fleece mittens and and old Goretex over mitts. I will likely update these with something like the Black Diamond Mercury Mitts soon. A stylish pair of toasty Give’R Leather Mittens rounds out my hand wear assortment.
Well that’s it for my current glove assortment. Do you have any of these? Any favorites of yours I should check out? Let me know in the comments!
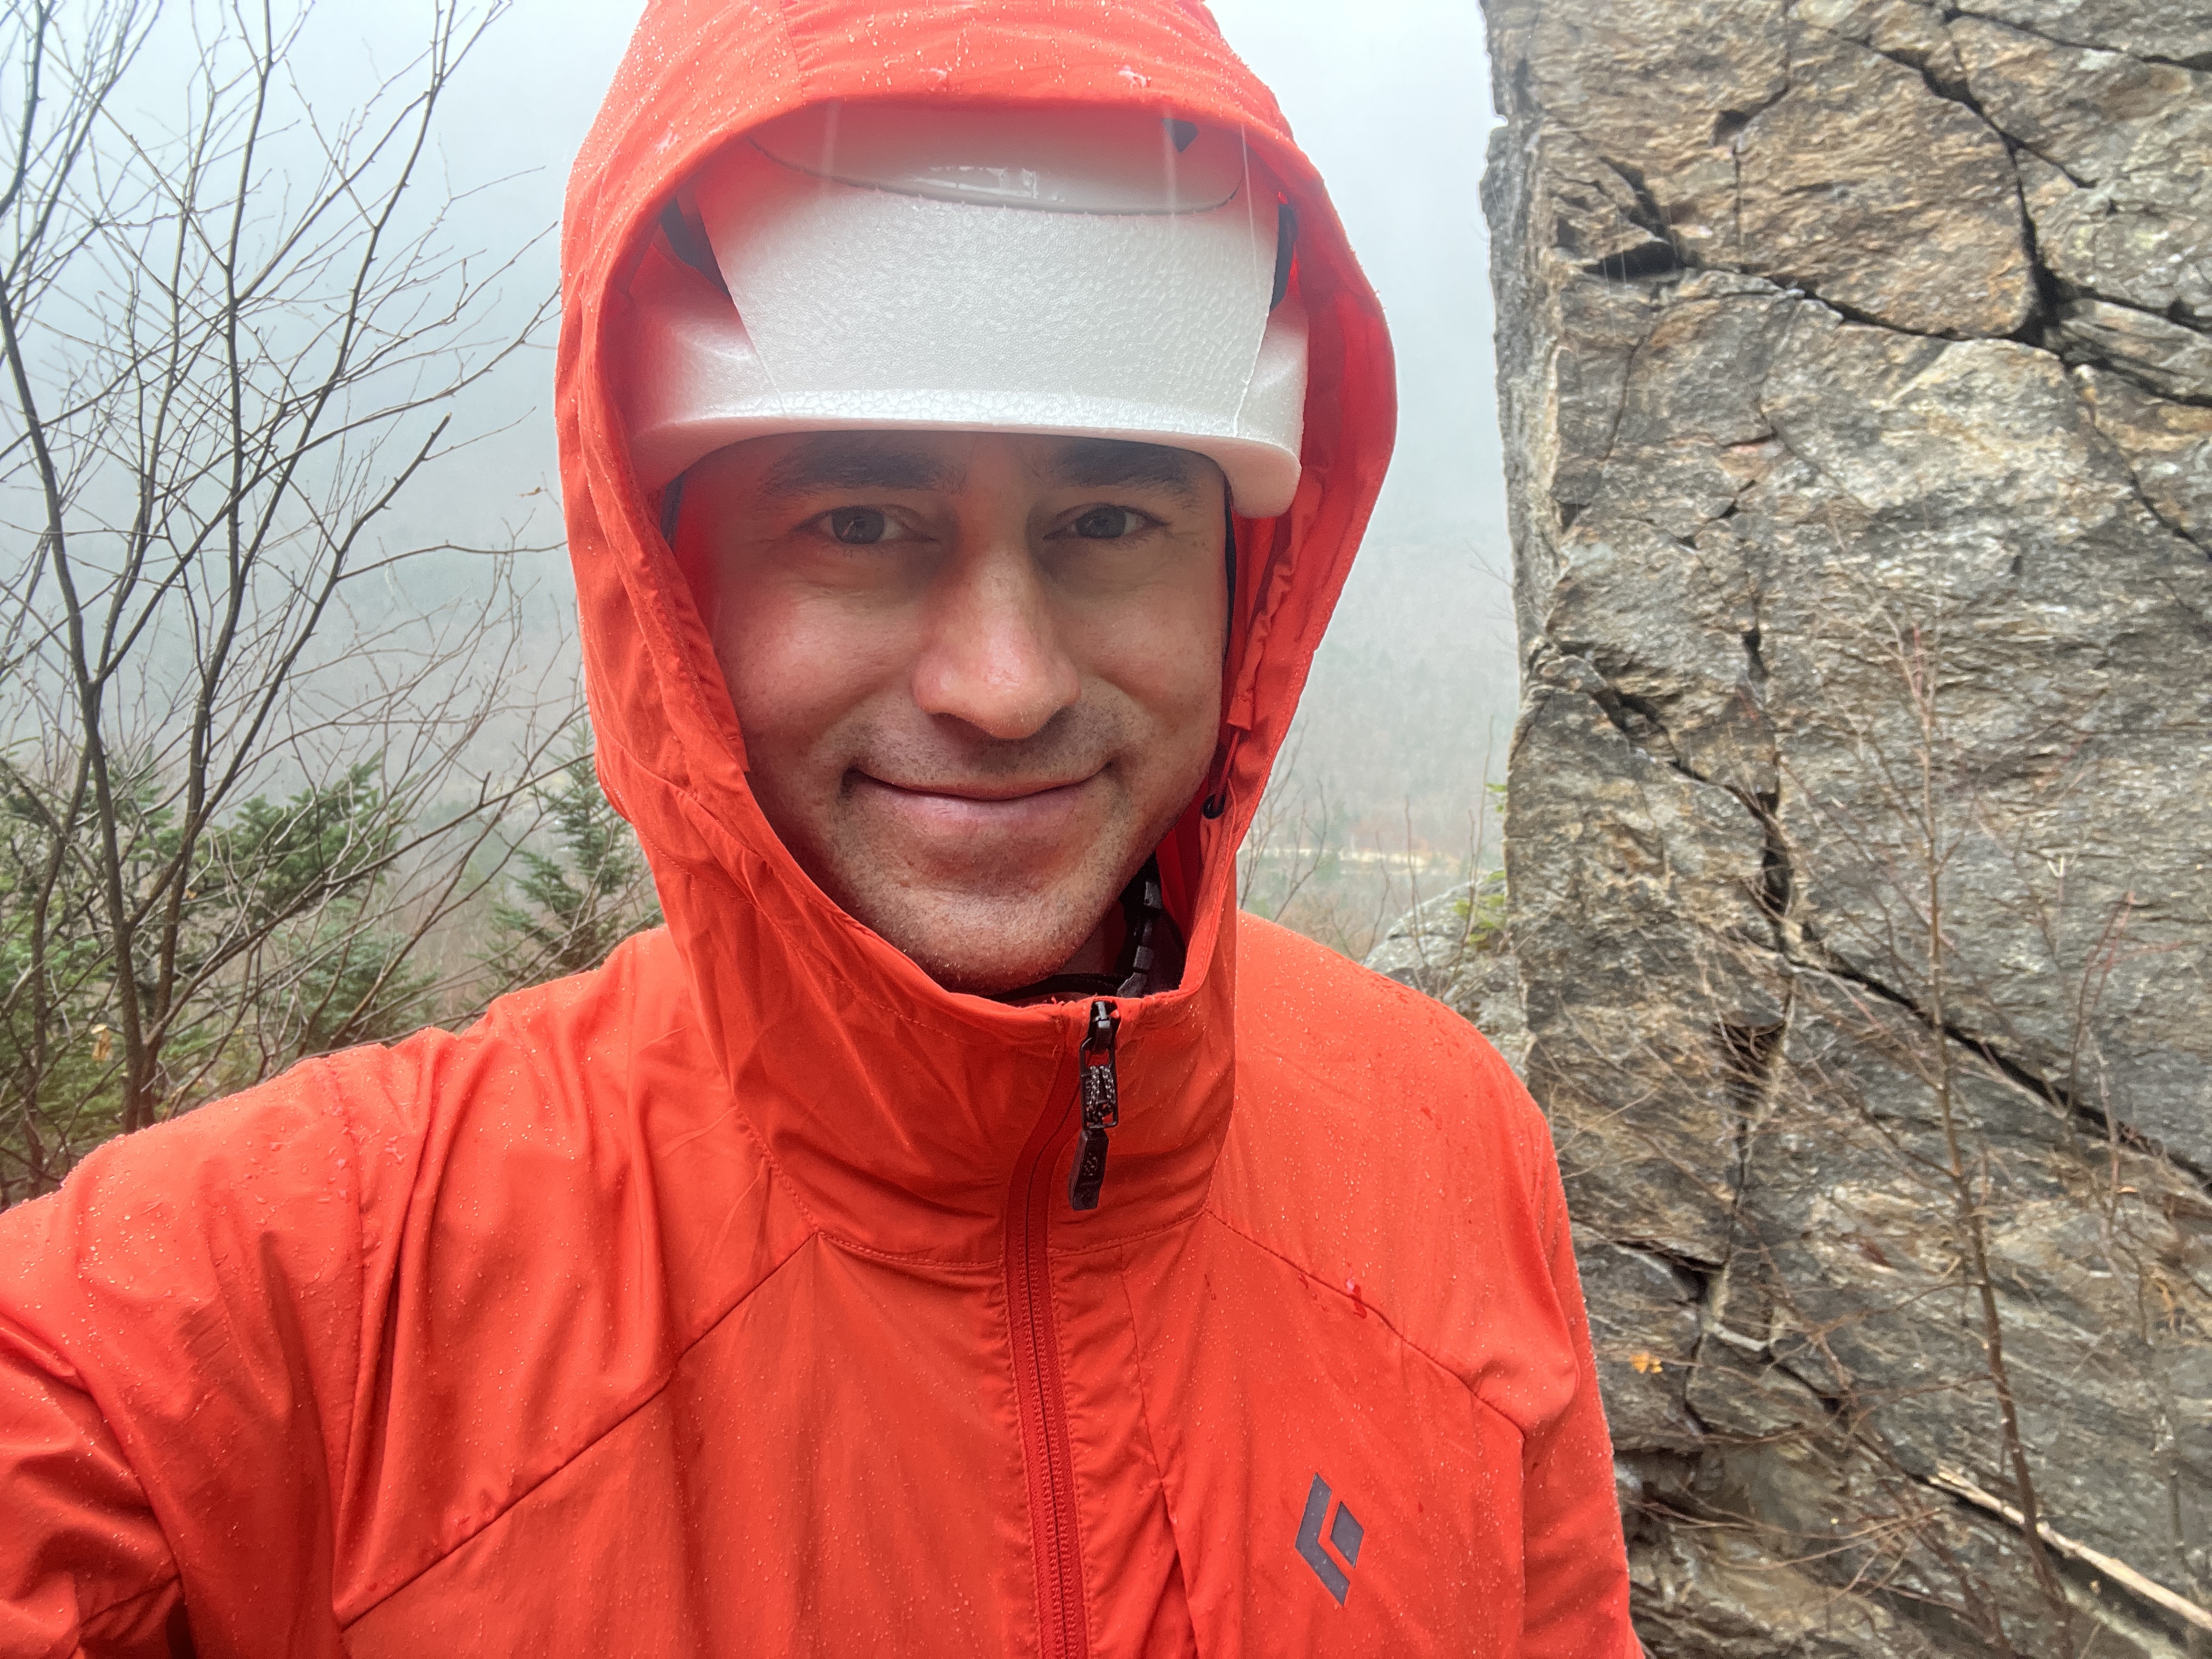
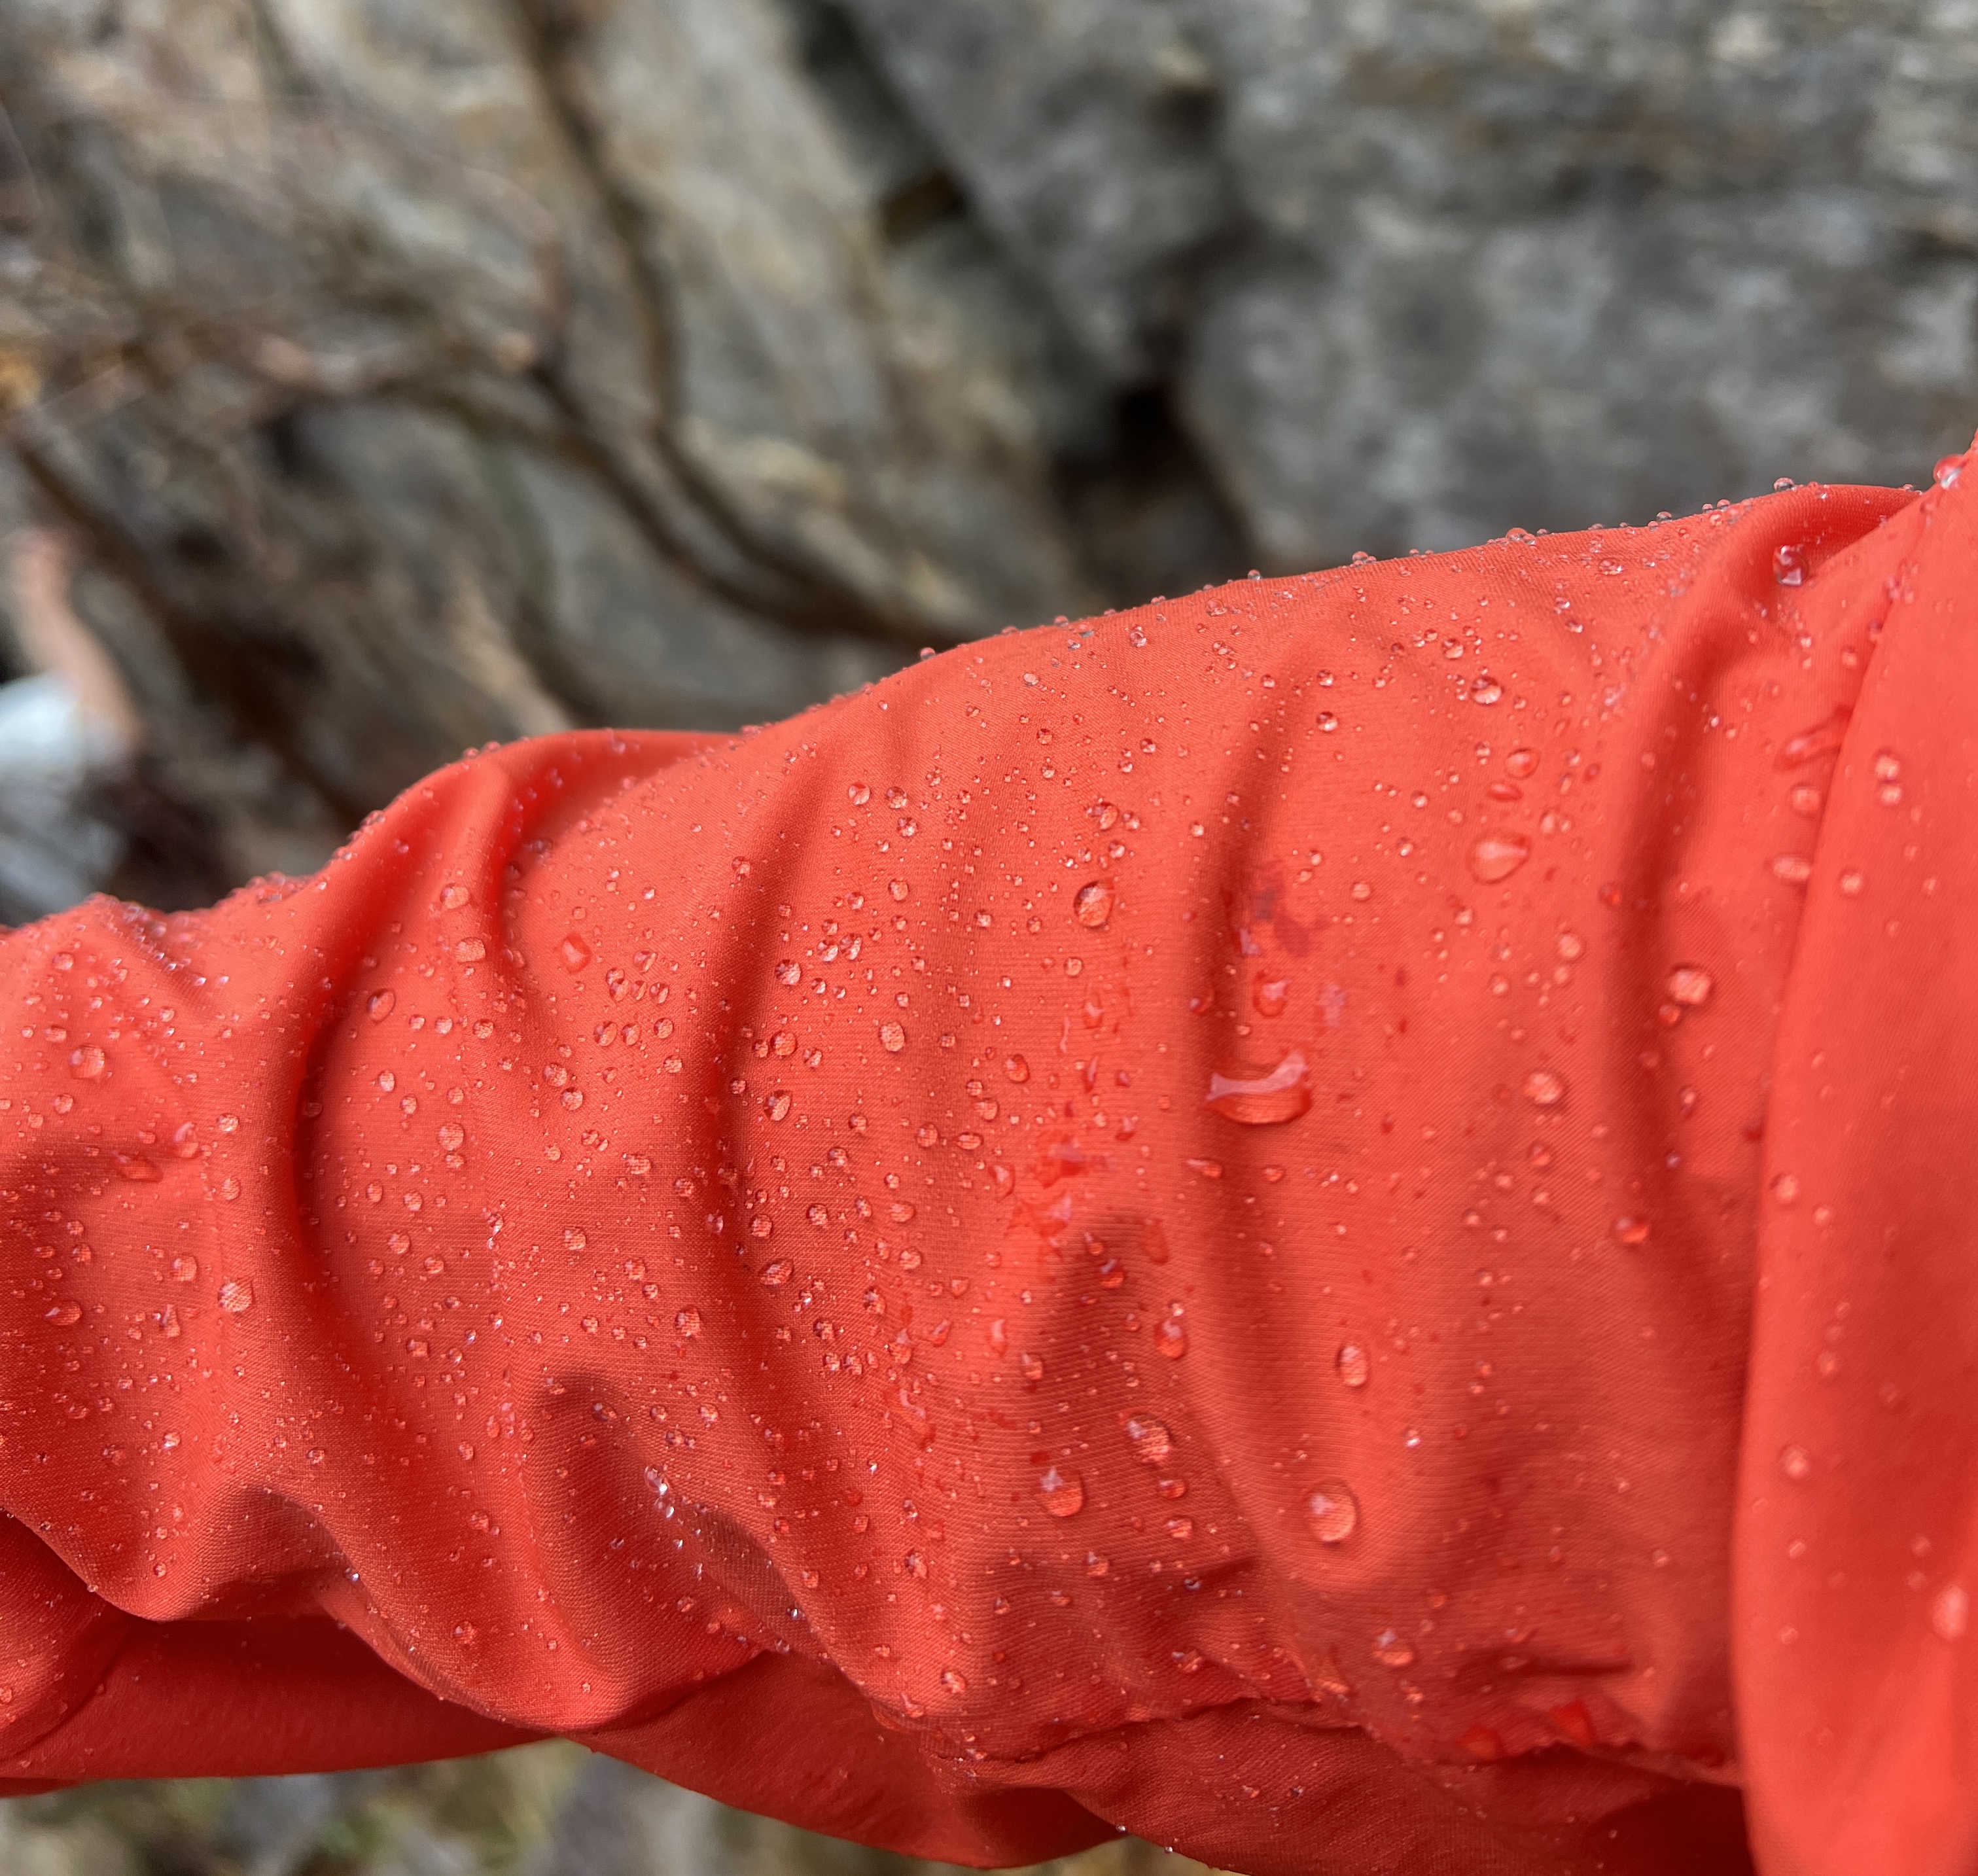
“Isolated showers are expected to spread in around midday while temperatures for most elevations will remain above freezing, breezy” – from yesterday’s Mount Washington Observatory Higher Summits. Perfect for a follow up look of the updated Black Diamond Alpine Start Hoody I recently received. I gave this piece a very detailed positive review back in 2016 and I’m happy to say that the original jacket is still in great condition despite 7 years of regular use!
Light rain and wind from neighboring Mount Washington arrives early afternoon and the Black Diamond Alpine Start Hoody comes out…
Black Diamond upgraded the original material to a newer Schoeller Eco-Repel Bio® PFC-free DWR Technology which seemed to shed light rain longer then my original hoody. There’s more stretch in this material which not only allows more freedom of movement but when combined with the new drop hem around the bottom the jacket stays tucked under my harness while making long reaches.
DWR doing what DWR does…
This is one of the best ultralight active shell jackets there is! Weighing around 7 ounces there’s rarely a mission I don’t find it wise to toss this in the pack. While it is a highly water resistent windbreaker I find it even more flexible with my layering system. For example, in summer this has doubled as a sun hoody on hot day as mentioned in my 2016 review. It’s more than enough breathable for higher output activities like mountain biking. For multi-pitch traditional rock climbing this clips to the back of my harness for those mid-climb unexpected changes in weather. As it gets colder it fits well over my Merino wool hoodies. In very cold weather while backcountry touring it is a perfect wind shell piece that fits well under any of my light puffy jackets. For such a quality versatile piece I can’t think of who wouldn’t find a spot for this in their active outdoor clothing system!